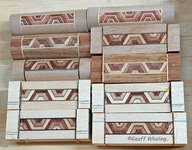
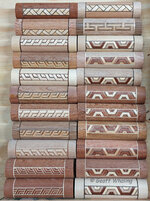
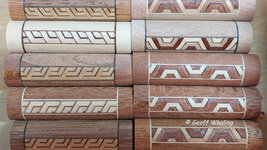
Geoff. next time that you are making the banding blocks, any chance you could photograph your process so I can compare notes?
Alan
Alan, there are no real secrets in the process,
only meticulous attention to all the 1%er's in stock prep, cutting, assembly / glue-up and in calculating sizes of each component. Unfortunately each individual setup (user, saw & sleds) has its own unique issues.
I'm generally following the process of the masters if you have watched the "real" Yosegi YouTube clips, but with modifications to accommodate my TS's design.
Perhaps the best advice and best investment time wise is to sort out all, or at least as many of, the idiosyncrasies of your particular table saw's design, manufacturing quality and your sled designs to remove as much play as is practically possible.
The fundamentals of TS alignment are critical for accuracy & precision. No arbor float is very critical. Fence & sliding table must be parallel to the saw blade etc. I spent almost 3 whole days sorting out my saw, much of it chasing my tail because initially I was following the recommended procedures in the manual. What a croc!
My saw is an early Woodfast TS250 (Record) psuedo sliding table panel saw. The design of the sliding table has since been changed. It does not have any miter slots in the table and fitting a zero clearance insert is not practical due to the sliding table design. So I have to use sleds for almost all final cuts which means sacrificing some depth of cut as well. I looked long and hard at all the table saws available when I purchased mine & not many even came close to what I desired.
The TS250 had the least "issues" imho and really is a budget saw plus I liked its simple design - easy to modify / adjust - best of all a great arbor. The blade tilt mechanism is functional and seems to maintain its stability. I
always use a digital "inclinometer" to set the blade angle relative to the table. I also use test boards for test cuts that are prepared to the same dimensions as the final stock, save wasting a lot of effort & material.
Then there is the saw blade -
purchase the best for quality of cut - which is not necessarily the most expensive or professional quality "name brand." I have had better results with DeWalt Xtreme blades than with some "ultra fine cut" CMT, Freud and other blades. No guarantees as I have had poor results with all, and cut quality for each individual blade can be a "crap shoot" as our US friends say. If a blade does not run true on the arbor then it gets relegated to the 2nd division and use for the hack stuff.


