uneven CA application

Signed-In Members Don't See This Ad

sorcerertd

Member
Joined
Sep 30, 2019
Messages
2,750
Location
North Carolina, USA
I don't always like to use CA as I really like the natural feel of the wood, but there are times when I find it better to use the CA. I can't seem to get it to apply smoothly and end up having to sand and re-apply quite a few times to get it right, ending up frustrated when I should be enjoying my hobby. I read somewhere that craft foam was good to use for application. It seems to work better than a paper towel for sure, as did closed cell foam. Still, I end up with a very uneven coat. I've used thin and medium and alternated between them, but end up with the same results. So...
  • What's the best way you have found to apply CA?
  • Is there a preferred brand that goes on smoother?
  • Is there a better bottle to apply CA with?
  • Is there a better container (or cap) to store CA in that doesn't get gummed up on the tip?
  • Do you have any tricks for sanding CA coatings that are uneven or do I just need to be more patient?
 
Signed-In Members Don't See This Ad

leehljp

Member Liaison
Joined
Feb 6, 2005
Messages
9,353
Location
Tunica, Mississippi,
I use what ever applicators I have on hand such as foam, or small parts bags and apply while the lathe is turning at about 600 rpm. I ditched the paper towel years ago because it absorbs more CA than gets on the blank. Also the applicators gives an overall smoother surface than does paper towel. That (PT or other applicators) itself doesn't matter that much if the build up (thickness) of the CA is sufficient.

But overall smoother applications will come with experience.

For me, I don't go for "how many layers", so I don't count them. I intentionally go for "build up" and then use the scraper (or some use the skew) and bring it down to size. Of course, sizing is determined by caliper measuring, not by bushings. The over all smoothness in application comes from my experience but that is not my goal because I will turn it down to size for perfect fitting.

One other item: Temperature & humidity - the curing characteristics of CA changes just enough to frustrate the inexperienced and experienced alike with temperature and humidity swings. When the temps drop to the lower 70's (F) and especially into the 60's or 50's, more curing time is needed. Humidity also affects it along with lower temps. Along with slower curing times, rougher surface finishes often appear.
 
  • Like
Reactions: DrD

jttheclockman

Member
Joined
Feb 22, 2005
Messages
19,190
Location
NJ, USA.
Lets start with brand. Is one better than another. Never been proven but there have been many threads on here that have talked about stick fast brand being troublesome. May want to avoid that one. I prefer to use Satellite Hot Stuff glues. Been using it for over 12 years and never a problem. As far as container, they are all the same and will clog. A trick is to tap the bottle on the edge of of something after using to break the air pocket at the tip and have it drain back into bottle. Works well. They do sell extra caps and bottles if need be.

As far as technique to applying, this come with practice but it is definetly not rocket science. The key here is to start with thin. I use 3 coats of thin to seal the blank and there is no way in this world you should ever get thin CA to clump or have ridges. Just not possible unless you use way too much and then it will fling off the pen as you turn on the lathe. It is too thin to build like that. You lower the speed down to as low as you can on your lathe. After the thin then I prefer 4 to 5 coats of med CA. I use blue shop towels from Walmart. Have for as long as I have been doing this. You are going to get 10000000000 ways to apply CA here and all are correct for that person but no way can they say they are the absolute perfect way or right way or only way so lets get that out of the way. My way is perfect for me. Because I have worked at it to make it so. I place 3 or 4 drops on a folded piece of blue strip towel. I have lathe running at slow speed. I wipe the CA on the blank once one way and return the same way the other way and that is it. Do not go back and forth trying to smooth things out. With that amount of CA and the speed of the lathe and the motion of wiping on should give you a very even coat. I never use accelerator. Hate the stuff. Only make CA brittle. Again my method. Others will swear by it .
As to sanding. When all coats are applied. I take some 600 grit sandpaper and wrap around a small strip of wood and use this to sand the blank. When I see all shiny spots gone I know the CA is flat and even all around the blank. I use the strip of wood because if you use your fingers you have a tendency to apply pressure unevenly as you sand and can sand off too much in one area. This trick is used in woodworking all the time. when hand sanding. Now one thing to remember if your lathe is running true and you do not have the dreaded Out of Round syndrom with your blank you will get an even turned and sanded blank. After the 600 grit I step up using MM to polish to a high shine. Final step add some plastic polish.

Not much more I can tell you but it will take practice. Good luck.
 
  • Like
Reactions: DrD

1080Wayne

Member
Joined
Feb 5, 2006
Messages
3,346
Location
Brownfield, Alberta, Canada.
Loads of variables , and everyone has to practice to find what works best for them . For me , it`s craft foam . I start with a piece approx 1 "x2" , run a small thin CA bead across the width at one end , apply it to the underside of the blank at one end with lathe at about 500 rpm , move it across to the other end . May not get there if barrel is long , or the wood very absorbent . If you do get there , go back and forth until you feel a bit of sticking or slight hesitation in the movement .

Turn foam over , repeat process , starting at other barrel end . More back and forth will be needed than was the first time before sticking starts . Note , the more sticking you allow , the rougher the finish you put on will be . Try to move the foam with minimal force , and stop when you feel the slightest hesitation . Cut of the end of the foam with dried CA on it (should be about 1/4" ) . Repeat . Each successive application will require more back and forth than the previous one .

After 4 applications ( 6 absolute max) I suggest you stop and let the CA cure for a full day before sanding . If you feel the odd high spot , take it off with a small fine flat file . If it is really rough you might have to start sanding at 220 , but if good 4 or 600 should do . I prefer to sand wet .

Can`t comment on CA brands . Age can be a factor , affected by storage method . I store in freezer . All tips are prone to plugging as far as I know . The smaller the hole , the thinner the bead , and the faster it will plug . I use 2 oz bottles for which I can get multiple tips .

Hope this helps a bit . I recommend practicing on a turned rod of about the diameter of your pen barrel .
 

WriteON

Member
Joined
Aug 21, 2013
Messages
3,331
Location
Florida & Pa
[*]What's the best way you have found to apply CA?
[*]Is there a preferred brand that goes on smoother?
[*]Is there a better bottle to apply CA with?
[*]Is there a better container (or cap) to store CA in that doesn't get gummed up on the tip?
[*]Do you have any tricks for sanding CA coatings that are uneven or do I just need to be more patient?
[/LIST]
I use Star Bond thin. Apply quick even coat...do not keep applying. Let it dry thoroughly. Apply another coat...and repeat. 5-8 coats should give nice results. No sanding if applied properly. I use blue shop towels to apply. Be patient. You are in the learning process. Nobody gets great results at first. You'll get the touch. You'll be ok. Cover the lathe bed so it's protected from the CA if it drips.
 
Last edited:

robutacion

Member
Joined
Aug 6, 2009
Messages
6,514
Location
Australia - SA Adelaide Hills
The old CA application issues, there is no doubt that more people than not have struggle with the CA application and I often wonder why there is...?

OK so, I believe that are better CA products than others, I like to use the EZ bond glues and accelerator, the super thin (5cps) and the medium (300cps). Craft foam does work for me well but what I'm trying to get at is in my view, one of the main reasons some people find it frustrating to apply a CA coating on a pen, the main culprit is the belief that each application should turn out super smooth and that is not the case so, what is in my view the main secret of a successful CA application/finish..? you have to build up layer after layer of CA and leave the sanding for last, sometimes I prefer to use the super thin CA and apply 6 to 10 coat instead of 1 or 2 super thin and 2 to 4 to 5 medium coats, either way, you will build sufficient CA thickness to smooth it out when you finished with the coats.

Don't panic about the CA layers being rough, you will remove about 40 to 50% of the CA you applied with the sanding, I suggest start with wet and dry paper starting with 600 grit, this is you main "cleaning" grit but you will get better results if you have the lathe 0ff and sand the barrel(s) lengthwise/with the grain, remove the higher ridges first and use dry a paper towel to keep cleaning the water from the barrels so that you can see how those high spots are coming down, don't over sand as as wet/dry paper cuts more than one may think, remember you still have a few grits of sandpaper to go so, try to remove the high spots and remove the shiny spots, then, you can turn the lathe on and continue with the other finer grits, I use 600-800-1000-1200-1500 and 2000 by then the surface should look very smooth, after then you only need to use some polishing compound and give it a good buff, it should look like glass.

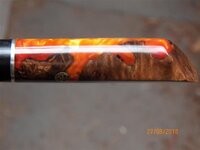
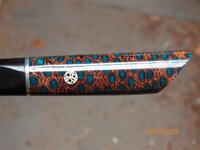
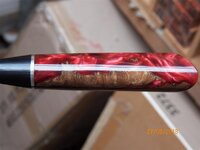
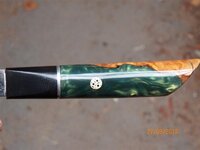
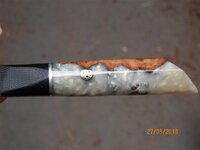
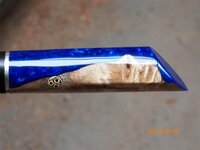
Applying CA on a round piece of wood on a lathe and a lot easier than applying a CA finish on other items such as bowls, platters, boxes and knife handles but it can be done, I do it all the time such as right now on some knife handles that I made, they were sent away to be machined and have the blade inserted and then back to me for CA finishing, all done manually, one hand turns the knife blade and the other I use one finger to spread the CA of the handle after I poured it a bit all around, nothing gives me the control of spreading the CA than a naked finger normally index finger but I can use them all when one gets too rough with dry CA, plastic bags over the fingers, gloves, tapes and so on doesn't suit me and cleaning the CA from the fingers with acetone in between handles is not much of a deal for the results I get.

037.JPG041.JPG045.JPG054.JPG059.JPG055.JPG

Best of luck,

Cheers
George
 

MRDucks2

Member
Joined
Jul 17, 2017
Messages
3,241
Location
Bristow, IN
I have used Titebond, Stick Fast, the cheap stuff you n the bubble pack from Harbor Freight, Locktite and BSI all successfully. I have also had problems with all of them.

The problems I have been able to identify were:
- Titebond I was trying to apply too much too fast.
- Stick Fast did have cracking/crazing under finish either during summer application (humidity related) or old glue.
- HF blister pack is water thin so takes lots of coats and I tend to sling it everywhere.
- Locktite seems to get stale quicker than some, for finishing purposes. Still worked fine for other stuff.
- Titebond tends to do pretty good for me, though I struggle more with not applying too much accelerator or it is sensitive to Stick Fast accelerator.
- BSI does ok, but not any better/worse than others but has lower/no odor. Good shelf life.
- I have P2-10 and Glu-Boost on hand but haven't yet tried them.

They have all worked and I have come up with ways to make them all not work. Best advice from experience: practice. I tale a piece of pine 2x2 about 8" or so, turn it round and practice 2-3 inches at a time. When done, I turn it off and do it again until I can get consistent results. This usually takes no more than an hour and I probably wouldn't need to do this from time to time if I spent more time actually making pens instead of spending time figuring out how to do things differently.
 

magpens

Member
Joined
Feb 2, 2011
Messages
15,911
Location
Canada
@sorcerertd

Todd, I believe that CA is frustrating for EVERYBODY when they start.
You just have to practice, AND think about what you are doing, and think about what is happening as a result of what you are doing.
Eventually you will work out a technique.

Someone above said that they only do sanding at the "end" after applying many coats of CA.

For me, it is much better to apply a couple of coats and then sand to remove the high spots. . Then more CA. . Then sand again. . Repeat.

After several cycles like this, the CA seems to go on more smoothly. . At the "end", you have to do the sanding to completion (smooth surface)

When sanding, I always have the lathe off and turn the headstock by hand.

Also, my sanding strokes are always along the length of the blank.
 

DrD

Member
Joined
Jun 26, 2019
Messages
1,104
Location
Columbus, Mississippi
Just when I think I've got stuff "figgered out" I find out that I haven't. I have taken to inspecting my finished blanks with a 25 x loupe and bright light. Before I start getting a ton of hate mail, I'll simply say, yeah, yeah I know - BUT over the years I have come to appreciate that when I buy anything, I want it to be pristine. Quickly, I used to shoot clay sports with Kreighoff's - very high $$$ shotguns. By the time I had used them for a year in competition especially in rain, they weren't as pristine as when I purchased them; I would, however NEVER buy one that wasn't pristine. Same with pens. I really don't care how the purchaser chooses to treat them, but when I sell my pen, it will be pristine.

So, I noticed with several blanks, there were tiny, but perceptible radial rings like a screw, going around the axis. Aha - sanding marks. So I stopped all radial sanding and went to sanding lengthwise as magpens mentions above. The rings still appeared. The only thing done radially was the application of CA. I tried different CA's, different application methods - all resulted in rings/ridges.

The short term solution for me is to now go back to 220 grit and sand until there are no shiny spots seen under 25x magnification. This involves sanding the blank completely, wash with DNA, dry, view, and repeat as necessary. when no rings are visible, I repeat with 320, then 400, then 500 or 600, then with 800, followed by 1000, 1500, 2000. All this is done dry. After 2000, assuming no visible marks at all under 25x, I may go to 8000 and 1200 MM wet or just to some polish and buff out on the lathe with a clean cotton rag - read old tee shirt.

I may try Hank Lee's method of using a scraper or square carbide cutter with ever so light touches at ~1800 rpm and see where that takes me.

As always use calipers to make sure of having correct diamerter
 

FGarbrecht

Member
Joined
Aug 22, 2019
Messages
618
Location
NY
Less is better than more to avoid bumpy surface, although I don't mind that too much since it sands off in later steps. I usually use a plastic bag over my finger, apply one drop to the spinning (low speed) blank, swipe quickly down and back one time, let cure. Repeat a bunch of times. Sometimes I use paper shop towel from HF or Lowes to apply. Sometimes the little parts plastic bags have a tiny hole in them that you don't notice until you realize that your finger is glued to the blank or to the bag. I do all my finishing with micromesh unless I have a really bumpy surface, in which case I'll use some 400 or 600 grit abanet wrapped around a little piece of flat stock to take off the high points. Once I get up to 12000 micromesh I've got a really nice finish and that's where I usually stop.
 

sorcerertd

Member
Joined
Sep 30, 2019
Messages
2,750
Location
North Carolina, USA
Robutacion, wow, nice handles!

I see a few things here that I do as far as technique, a combination of your methods. The one thing I don't see is putting the CA directly on the barrel. Maybe that's my downfall here. I've been drizzling it on top of the spinning blank and smoothing it, from the bottom of course, with craft foam. Have also used a small plastic bag from the pen kit. I'll give the indirect application a try. I guess I just got lucky a few times with good finishes as I have definitely not perfected my technique to the point of consistency.

Is it worth the trouble to CA acrylic blanks? Does it make them less prone to scratching on the completed product? I've only used it on wood.
 

jttheclockman

Member
Joined
Feb 22, 2005
Messages
19,190
Location
NJ, USA.
Is it worth the trouble to CA acrylic blanks? Does it make them less prone to scratching on the completed product? I've only used it on wood.

No to protecting from scratches. Think about it. What is CA?? Basically an acrylic. I never top coat acrylic unless it is used in combination with wood in a segmented blank. Just an opinion.
 

leehljp

Member Liaison
Joined
Feb 6, 2005
Messages
9,353
Location
Tunica, Mississippi,
So, I noticed with several blanks, there were tiny, but perceptible radial rings like a screw, going around the axis. Aha - sanding marks.

I agree with your assessment on "pristine"!

As to the radial rings, - on my first pen with CA back in 2005, it was with paddauk. Paddauk has some of the largest "cells" and some can be seen with the naked eye (with good eye sight) only I did not know that at first. On closer examination I could see "rings" and they weren't from sanding on CA, so I pulled out my DSLR and took a real close-up / macro. Sure enough, I was seeing the cells on that wood and they went around the pen. I will admit I was trying to rub the rings off of it at first. :rolleyes:
 

robutacion

Member
Joined
Aug 6, 2009
Messages
6,514
Location
Australia - SA Adelaide Hills
@sorcerertd

Todd, I believe that CA is frustrating for EVERYBODY when they start.
You just have to practice, AND think about what you are doing, and think about what is happening as a result of what you are doing.
Eventually you will work out a technique.

Someone above said that they only do sanding at the "end" after applying many coats of CA.

For me, it is much better to apply a couple of coats and then sand to remove the high spots. . Then more CA. . Then sand again. . Repeat.

After several cycles like this, the CA seems to go on more smoothly. . At the "end", you have to do the sanding to completion (smooth surface)

When sanding, I always have the lathe off and turn the headstock by hand.

Also, my sanding strokes are always along the length of the blank.
Yes, I said that but I should also have said that if one of the applications turns out a lot rougher than it should for whatever the reason (yes, it happen) I stop the lathe and then sand those ridges longways down with 80 grit it removes them fast and continue on.

Sanding between layers to remove all ridges is in my view the main reason why people sand through and get frustrated, yes, sanding gently to remove the higher ridges after a couple of coats is OK and I've done it for years but I realised that I was getting the same final results leaving the sanding for last.

The one thing that some people forget is that sanding immediately after you apply a couple of coats or multiple coats, is a lot easier to sand through because the CA is not yet hardened/cured sufficiently, some folks apply the CA coats and sand the next day, that is ideal but, you can accelerate the drying process simply by using a little extra accelerator on the last coat and use a hairdryer/hot gun by keeping it at a distance that you can put your hand in front of it without burning you, swinging the gun left and right slowly for about 60 to 90 seconds, a little longer if you are in very cold environments/workshop, I find it to work extremely well for me as I don't like to wait till the next day waiting for glue to set.

Off-course, these are my thoughts I'm perfectly aware that are many ways to get good results using CA as a finish, from what I have seen, one type of application that reduces the amount of sanding considerably is using BLO and CA at the same time, however, you will never get the glass look that way.

Cheers
George
 

sorcerertd

Member
Joined
Sep 30, 2019
Messages
2,750
Location
North Carolina, USA
George, I usually don't go quite as aggressive as 80 grit. I can do a lot of damage with 150 as it is. I wonder, though, how do you use BLO and CA at the same time? I haven't used BLO yet, so am not familiar with how it behaves, but since it's an oil, how does it not cause problems with the CA sticking to the work?
 

magpens

Member
Joined
Feb 2, 2011
Messages
15,911
Location
Canada
George, I usually don't go quite as aggressive as 80 grit. I can do a lot of damage with 150 as it is. I wonder, though, how do you use BLO and CA at the same time? I haven't used BLO yet, so am not familiar with how it behaves, but since it's an oil, how does it not cause problems with the CA sticking to the work?
I am also quite gentle with the sanding between coats of CA. . I use 240 grit. . Just want to take off the highs.

I have long wondered about the compatibility of BLO with CA, but I noted that they do seem to tolerate each other when I did try the mix.
However, I don't use them together.
 

leehljp

Member Liaison
Joined
Feb 6, 2005
Messages
9,353
Location
Tunica, Mississippi,
In 14 years of pen making, I have wondered what BLO accomplishes? I used it a few times years ago, but it didn't change any outcome from when I didn't use it - except add an extra step. BLO didn't add a bit to the shine.
 

1080Wayne

Member
Joined
Feb 5, 2006
Messages
3,346
Location
Brownfield, Alberta, Canada.
Somewhere deep within the bowels of this site if it hasn`t been excreted is a post by a chemist describing the cross-linking reaction which takes place between CA and BLO , in effect making a copolymer of the two . No adhesion problem is caused by using BLO , either by first applying it to the blank to accentuate the grain and following with CA a day later , or by mixing a small amount of BLO with the CA during application , in my experience .

As Hank says , it won`t add to the shine . I don`t know whether it detracts from it much , as I seldom take a wood blank to high gloss . I wouldn`t use it on holly , bog oak or oily woods .
 

robutacion

Member
Joined
Aug 6, 2009
Messages
6,514
Location
Australia - SA Adelaide Hills
George, I usually don't go quite as aggressive as 80 grit. I can do a lot of damage with 150 as it is. I wonder, though, how do you use BLO and CA at the same time? I haven't used BLO yet, so am not familiar with how it behaves, but since it's an oil, how does it not cause problems with the CA sticking to the work?
Yes, the 80 grit can be quite aggressive but I was referring to situations where something really wrong went on such as the blue paper towel, the craft foam gets stuck to the blank, a high ridge wasn't smoothed down, these are more prone using the medium CA so the 80 grit makes a quick job at removing the mess and if didn't use it crossways but longways the scratches are minimal and easily removed with some 240 grit before you continue on but in many situations/applications the 240 is not necessary after the 80 grit. (exceptions do apply...!)

Now, I never used the BLO and CA either together or one after the other but I have seen many folks using it to enhance the grain and then put a drop or two in a towel applicator with also a few drops of CA, mainly medium and rub it on the blank/barrel repeating it multiple times as we do with the CA only. Those using this method swear by it, they are not looking for the glass finish or the dip gloss but what they achieve by using BLO and CA together is a much easier application, the BLO controls the fast drying of the CA, therefore, giving you more time to rub the blanks a few extra times without the risk of getting stuck.

As someone mentioned, over the years there have been many discussions about this same issue but I'm sceptical about putting CA over wood that has been coated with BLO particularly if done pretty much immediately after, BLO is a slow drying product but after dry is very strong and stable.

Cheers
George
 

Stephen

Member
Joined
Oct 20, 2007
Messages
398
Location
Singapore, 568198.
Is it worth the trouble to CA acrylic blanks? Does it make them less prone to scratching on the completed product? I've only used it on wood.

No to protecting from scratches. Think about it. What is CA?? Basically an acrylic. I never top coat acrylic unless it is used in combination with wood in a segmented blank. Just an opinion.
I only apply CA on acrylics with decals on them.
 
Top Bottom