The best blank squaring jig yet

Signed-In Members Don't See This Ad

airborne_r6

Member
Joined
Oct 28, 2008
Messages
279
I wanted to make a blank squaring jig to use on my 12" disc sander but was not happy with any of the existing jigs out there. The main reasons included:
-only one size of rod holding the blank
-not adjustable for square, necessitating a high degree of accuracy in manufacture

With those problems in mind I set out to design a jig that would hold the transfer rods we all use to knock apart pens in such a way that they could be easily swapped out so that the blank is always on the best size of rod without needing to use any sleeves. I always wanted a way to be able to adjust the jig to square with the disc so that it is always accurate. I also wanted it to be easy to use.

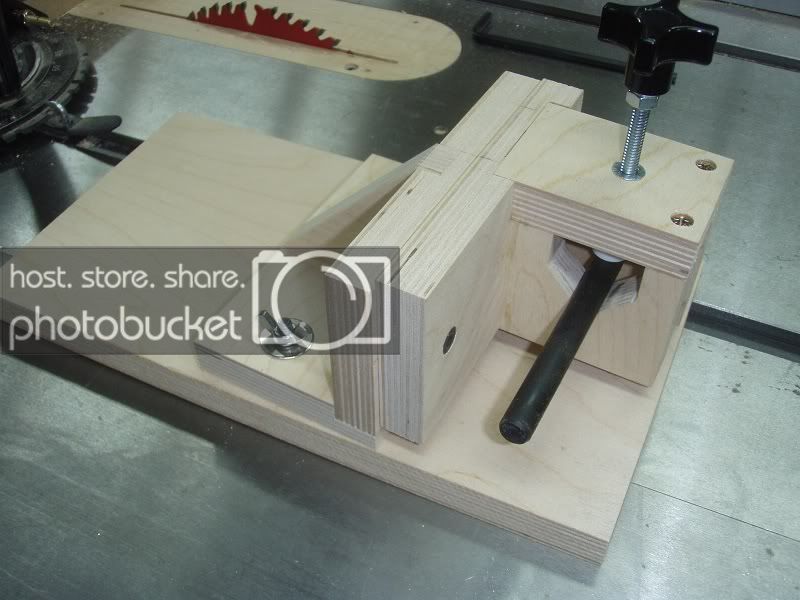
This is what I came with. I first built a prototype a couple years ago out of MDF. When that worked exactly as I had planned I rebuilt it out of 3/4 Baltic Birch plywood and took pictures of the process. That was longer ago than I am going to admit, but cut me some slack, I am in medical school.

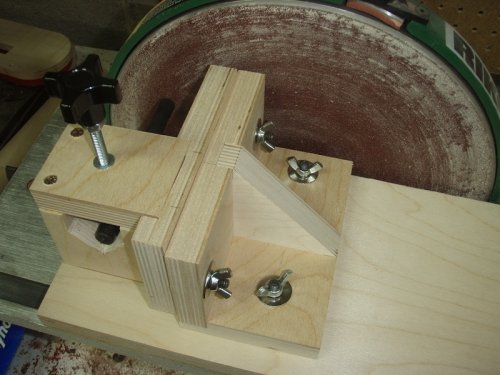
So without further ado, I give you the best blank squaring jig ever. At least in my not so humble opinion.

22Finalassembly.jpg

21Finalassembly.jpg

19Finalassembly.jpg

23Onthesander.jpg


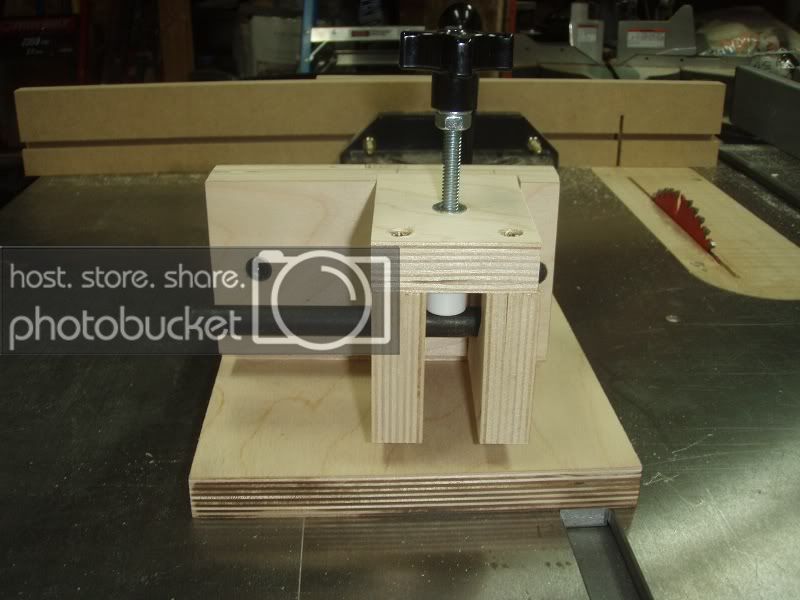
The transfer punch is held securely by the captured bolt and punches a swapped out easily by simply loosening the bolt. No adjustment is necessary for different size punches.

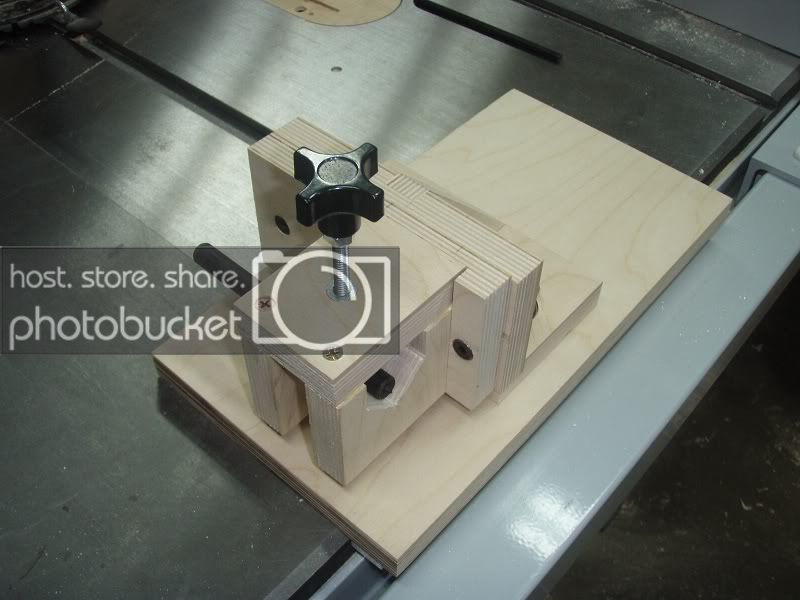
The punch carriage adjusts easily side to side and up and down. One of the two bolts securing the carriage in each direction is slightly enlarged. Simply place a small square between the punch and the disc, loosen the appropriate nut, adjust as necessary and tighten the nut. It holds very securely.

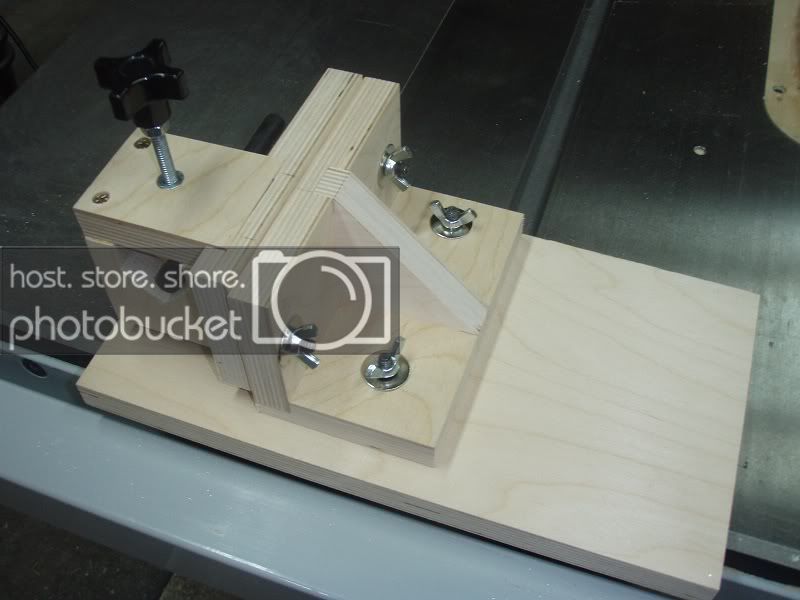
To use the jig just slide the whole jig to the left, it's mounted to a miter bar. Once the punch is clear of the disc, place a blank on the disc and slide the jig back to the right. Then push the blank into the disc. Because the blank is held securely on the proper size of punch it takes almost no effort and can easily be done from the end of the blank away from the disc without worrying about slipping off and sticking your fingers into the sander. Multiple blanks can be sanded quickly and safely without needing to stop the sander.

Super simple, super fast and super accurate.

I am working on making a tutorial that will hopefully go in the library with a materials list, directions and a complete plan.
 
Signed-In Members Don't See This Ad

warthog

Member
Joined
Aug 1, 2011
Messages
219
Location
Blue Springs, Ms.
That would be great. I can't wait until you put out the tutorial along with the plans. Man...I am ready to build it now. How long do you think it would take you to do this?
 

airborne_r6

Member
Joined
Oct 28, 2008
Messages
279
Time to build it depends on your woodworking skills and tools available. I used a table saw to cut the pieces to size and to make the dados/rabbet, a drill press for the holes, and chisel to clean out a rabbet between two parallel dados. If you have all those tools its pretty quick. If you don't have those its going to take a little longer, but can still be done as long as you have a way to make the dados such as by using a router.

Just realized that your time question is probably referring to when will I get the tutorial done. Probably not until sometime next week. I posted this up now you so guys had one more thing to drool over :biggrin:
 
Last edited:

Gilrock

Member
Joined
Oct 18, 2011
Messages
560
Location
Tucson, AZ
Looks like a nice jig. One question...it seems like you could eliminate one of the two vertical pieces of wood held together by the wingnuts and just hard mount the assembly as one piece. Why does it need to come apart at the center unless you plan to mount different jigs to the other part.
 

rherrell

Member
Joined
Aug 22, 2006
Messages
6,333
Location
Pilot Mountain, NC
The problem I have with using transfer punches is they're never the right size, you always have to use one that's too small for the tube.

A better choice is to use a letter "D" rod, .246", that's the same size as a standard "A" mandrel. It's the right size for slims and you make sleeves for all the bigger tubes, that way you have a perfect fit.

Other than that your design is outstanding!:biggrin:
 
Last edited:

Gilrock

Member
Joined
Oct 18, 2011
Messages
560
Location
Tucson, AZ
Weird....I could see the pictures last night and now they are gone.

Anyways I like the idea. I already have a jig that has the perpendicular upright board so I would just need to make the other part of the jig. And since Rick says the transfer punches aren't exactly the right size I guess I'll have to make some aluminum shafts... I swear I have more fun making the parts that help me make pens than making the pens themselves. :)
 

airborne_r6

Member
Joined
Oct 28, 2008
Messages
279
Looks like a nice jig. One question...it seems like you could eliminate one of the two vertical pieces of wood held together by the wingnuts and just hard mount the assembly as one piece. Why does it need to come apart at the center unless you plan to mount different jigs to the other part.

One vertical piece, the one held to the horizontal piece by the angled support block, only moves in the horizontal plane pivoting on the wingnuts holding it to the base. The second vertical piece, pivots in only the vertical plane on the bolts holding it to the first vertical piece. Combined the punch moves in both planes. Having the horizontal and vertical plane adjustments independent makes it really easy to adjust to square.
 

Gilrock

Member
Joined
Oct 18, 2011
Messages
560
Location
Tucson, AZ
Looks like a nice jig. One question...it seems like you could eliminate one of the two vertical pieces of wood held together by the wingnuts and just hard mount the assembly as one piece. Why does it need to come apart at the center unless you plan to mount different jigs to the other part.

One vertical piece, the one held to the horizontal piece by the angled support block, only moves in the horizontal plane pivoting on the wingnuts holding it to the base. The second vertical piece, pivots in only the vertical plane on the bolts holding it to the first vertical piece. Combined the punch moves in both planes. Having the horizontal and vertical plane adjustments independent makes it really easy to adjust to square.

Ah that makes sense...I didn't think about having to adjust it vertically.
 

dexter0606

Member
Joined
Jun 11, 2009
Messages
525
Location
Cambridge, ON
The problem I have with using transfer punches is they're never the right size, you always have to use one that's too small for the tube.

A better choice is to use a letter "D" rod, .246", that's the same size as a standard "A" mandrel. It's the right size for slims and you make sleeves for all the bigger tubes, that way you have a perfect fit.

Other than that your design is outstanding!:biggrin:

Never had that problem. Do you have a full set of punches? The punches vary in size by .015" so you should be able to get one that works. Haven't had an issue with this method and I've made a bunch of different sized kits
 

Gilrock

Member
Joined
Oct 18, 2011
Messages
560
Location
Tucson, AZ
Have you seen the tools Rick makes... 15 thousandths is like missing the strike zone. ;)

Don't disagree but you would have to intentionally twist the blank on the punch to get the misalignment. We're talking less than 1/2 a degree max

So you haven't fallen prey to the metal lathe addiction I take it....otherwise you would jump at the chance to machine something to the nearest thousandth. :)
 

dexter0606

Member
Joined
Jun 11, 2009
Messages
525
Location
Cambridge, ON
:)
Have you seen the tools Rick makes... 15 thousandths is like missing the strike zone. ;)

Don't disagree but you would have to intentionally twist the blank on the punch to get the misalignment. We're talking less than 1/2 a degree max

So you haven't fallen prey to the metal lathe addiction I take it....otherwise you would jump at the chance to machine something to the nearest thousandth. :)

Don't really need a sanding jig with a metal lathe.

It is a really nice looking jig. Kinda puts mine to shame. But it works :)
 
Last edited:

Lenny

Member
Joined
Jan 6, 2009
Messages
3,475
Location
Searsport, Maine
The problem I have with using transfer punches is they're never the right size, you always have to use one that's too small for the tube.

A better choice is to use a letter "D" rod, .246", that's the same size as a standard "A" mandrel. It's the right size for slims and you make sleeves for all the bigger tubes, that way you have a perfect fit.

Other than that your design is outstanding!:biggrin:

Never had that problem. Do you have a full set of punches? The punches vary in size by .015" so you should be able to get one that works. Haven't had an issue with this method and I've made a bunch of different sized kits

I sometimes will wrap the punch with a layer of tape to make the fit a little better. I don't use this method often but when I need to it works well enough. Someday I will get a dedicated sander and make something along this line.
 
Joined
Oct 11, 2011
Messages
534
Location
Monterrey Mexico
I sent this message as a PM to the originator of this post but since it may be of general interest, I will post the question here.
I am looking for a large disc sander (10-12") I saw the Rikon machine you show in your photo in Amazon.com for a very reasonable price, but it has received really poor reviews. How has this machine worked for you?

Thank you.
 

Carl Fisher

Member
Joined
Jun 7, 2011
Messages
2,761
Location
Cape Coral, FL
Regarding not having the exact correctly sized punch...

The goal of this method is simply to keep the tube square to the sander. If your punch is too small, no big deal. Just maintain a constant pressure in the same direction during the entire squaring process. i.e. push down slightly on the blank to keep the tube flat in contact with the punch. As long as you don't intentionally rack it then you'll be just fine.
 

rherrell

Member
Joined
Aug 22, 2006
Messages
6,333
Location
Pilot Mountain, NC
Regarding not having the exact correctly sized punch...

The goal of this method is simply to keep the tube square to the sander. If your punch is too small, no big deal. Just maintain a constant pressure in the same direction during the entire squaring process. i.e. push down slightly on the blank to keep the tube flat in contact with the punch. As long as you don't intentionally rack it then you'll be just fine.

That's exactly why I suggested the other method, it removes that "chance".

I guess I'm just obsessed with Murphys Law!:biggrin::wink:
 
Top Bottom