NGLJ
Member
This is the follow-up to this post https://www.penturners.org/threads/8-stave-spiral-experiment.172628/. At this point I am looking for feedback on the attached article before finalizing for the library.

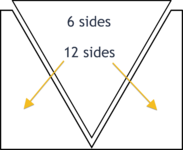
Mark, I cut the staves on the bandsaw with the table set at the desired angle (30 deg for 6 sides). I use a 3/4" carbide re-saw blade which gives a reasonably smooth cut. After a little sanding it usually goes together well. For a 6 sided blank I don't cut 6 staves. I cut 3 and glue them up carefully to get the inside surface as flat as possible (accurate cutting helps here). Then I sand that surface flat, without removing too much material, cut the piece in 2 and glue together to make a 6 sided blank. Even if you are off a little by the time it is turned you won't even notice. I also use the offcuts from the making the 3 pieces (2 from each piece) to make a 12 sided blank, which I turn round. That way I get good wood usage. See attached diagram.The article is very well done. Not a typical design/approach, so this will be a nice addition.
Just as a random comment, I found that turning these round, with very accurate dimensions along the blank and using a large collet chuck (1"-1 1/4") allowed for accurate drilling of the tube hole. The larger challenge for me was cutting the staves.
Thank you!Mark, I cut the staves on the bandsaw with the table set at the desired angle (30 deg for 6 sides). I use a 3/4" carbide re-saw blade which gives a reasonably smooth cut. After a little sanding it usually goes together well. For a 6 sided blank I don't cut 6 staves. I cut 3 and glue them up carefully to get the inside surface as flat as possible (accurate cutting helps here). Then I sand that surface flat, without removing too much material, cut the piece in 2 and glue together to make a 6 sided blank. Even if you are off a little by the time it is turned you won't even notice. I also use the offcuts from the making the 3 pieces (2 from each piece) to make a 12 sided blank, which I turn round. That way I get good wood usage. See attached diagram.

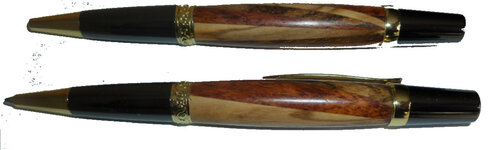
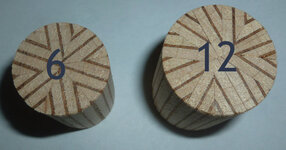
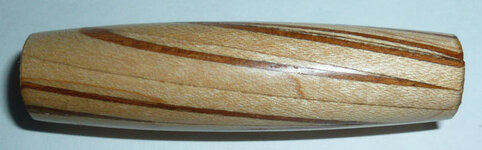
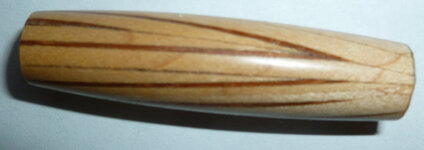
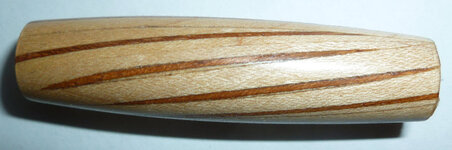
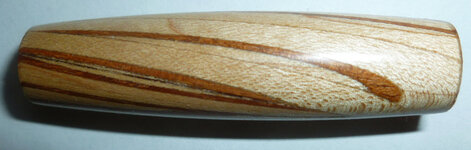
As a follow-up to this description here are two pens made from 3 blanks ¾" x ¾" x 6". One has 6 staves and the other has 12.Mark, I cut the staves on the bandsaw with the table set at the desired angle (30 deg for 6 sides). I use a 3/4" carbide re-saw blade which gives a reasonably smooth cut. After a little sanding it usually goes together well. For a 6 sided blank I don't cut 6 staves. I cut 3 and glue them up carefully to get the inside surface as flat as possible (accurate cutting helps here). Then I sand that surface flat, without removing too much material, cut the piece in 2 and glue together to make a 6 sided blank. Even if you are off a little by the time it is turned you won't even notice. I also use the offcuts from the making the 3 pieces (2 from each piece) to make a 12 sided blank, which I turn round. That way I get good wood usage. See attached diagram.