
Hello, question for the kitless makers here:
I have the Proxxon radius cutting attachment for their PD400 lathe.
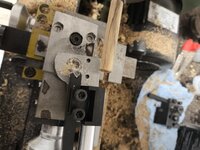
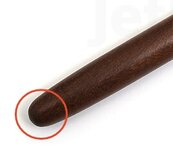
I want to cut a radius at the end of the pens I turn, to give them less of a "square" and more professional look. However, I don't seem to get the positioning of the tool right.
Is there some sort of formula or method to find out where should I position the tool to get the closest to perfect of half a sphere around the axis of rotation while moving the tool?
Pictued are my setup and the kind of end I want.
Thanks,
Amihai Fishman.
I have the Proxxon radius cutting attachment for their PD400 lathe.
I want to cut a radius at the end of the pens I turn, to give them less of a "square" and more professional look. However, I don't seem to get the positioning of the tool right.
Is there some sort of formula or method to find out where should I position the tool to get the closest to perfect of half a sphere around the axis of rotation while moving the tool?
Pictued are my setup and the kind of end I want.
Thanks,
Amihai Fishman.
") )
)