Finally made my first section for a kitless pen

Signed-In Members Don't See This Ad

RobS

Member
Joined
Jun 20, 2016
Messages
1,037
Location
Carlsbad, CA
I just want to thank everyone who I've pestered and who have posted how to make a kitless pen.

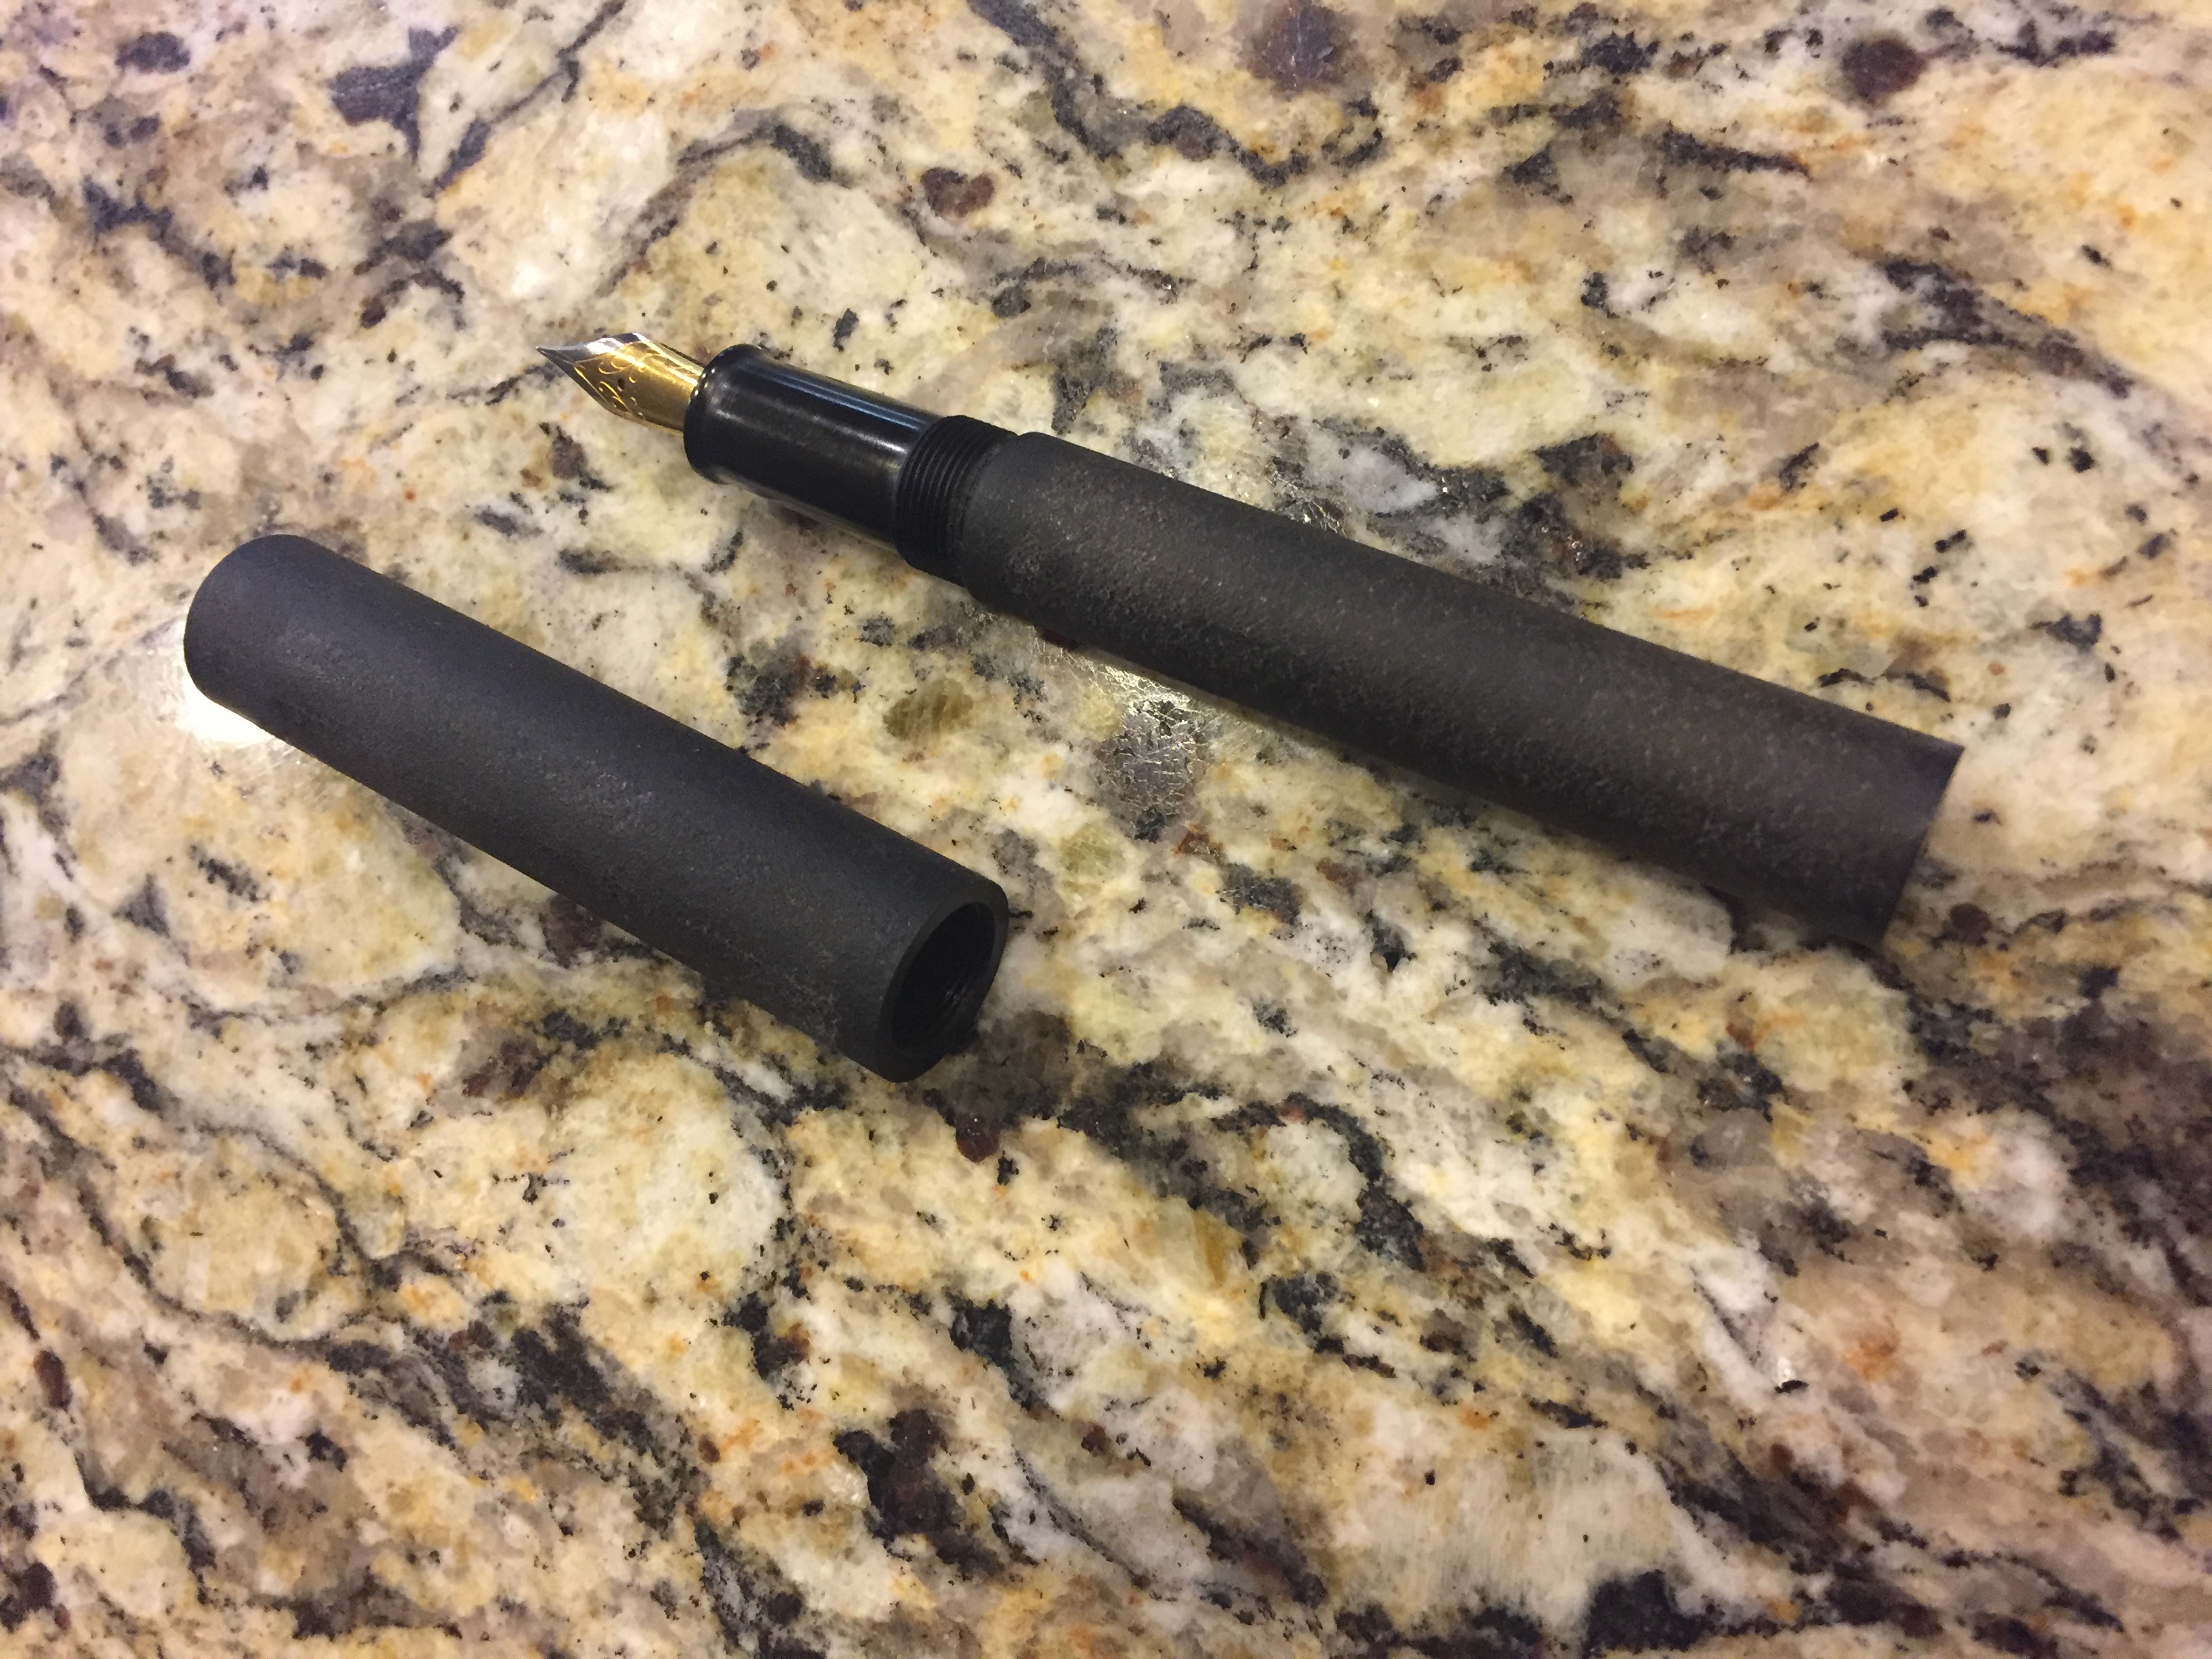
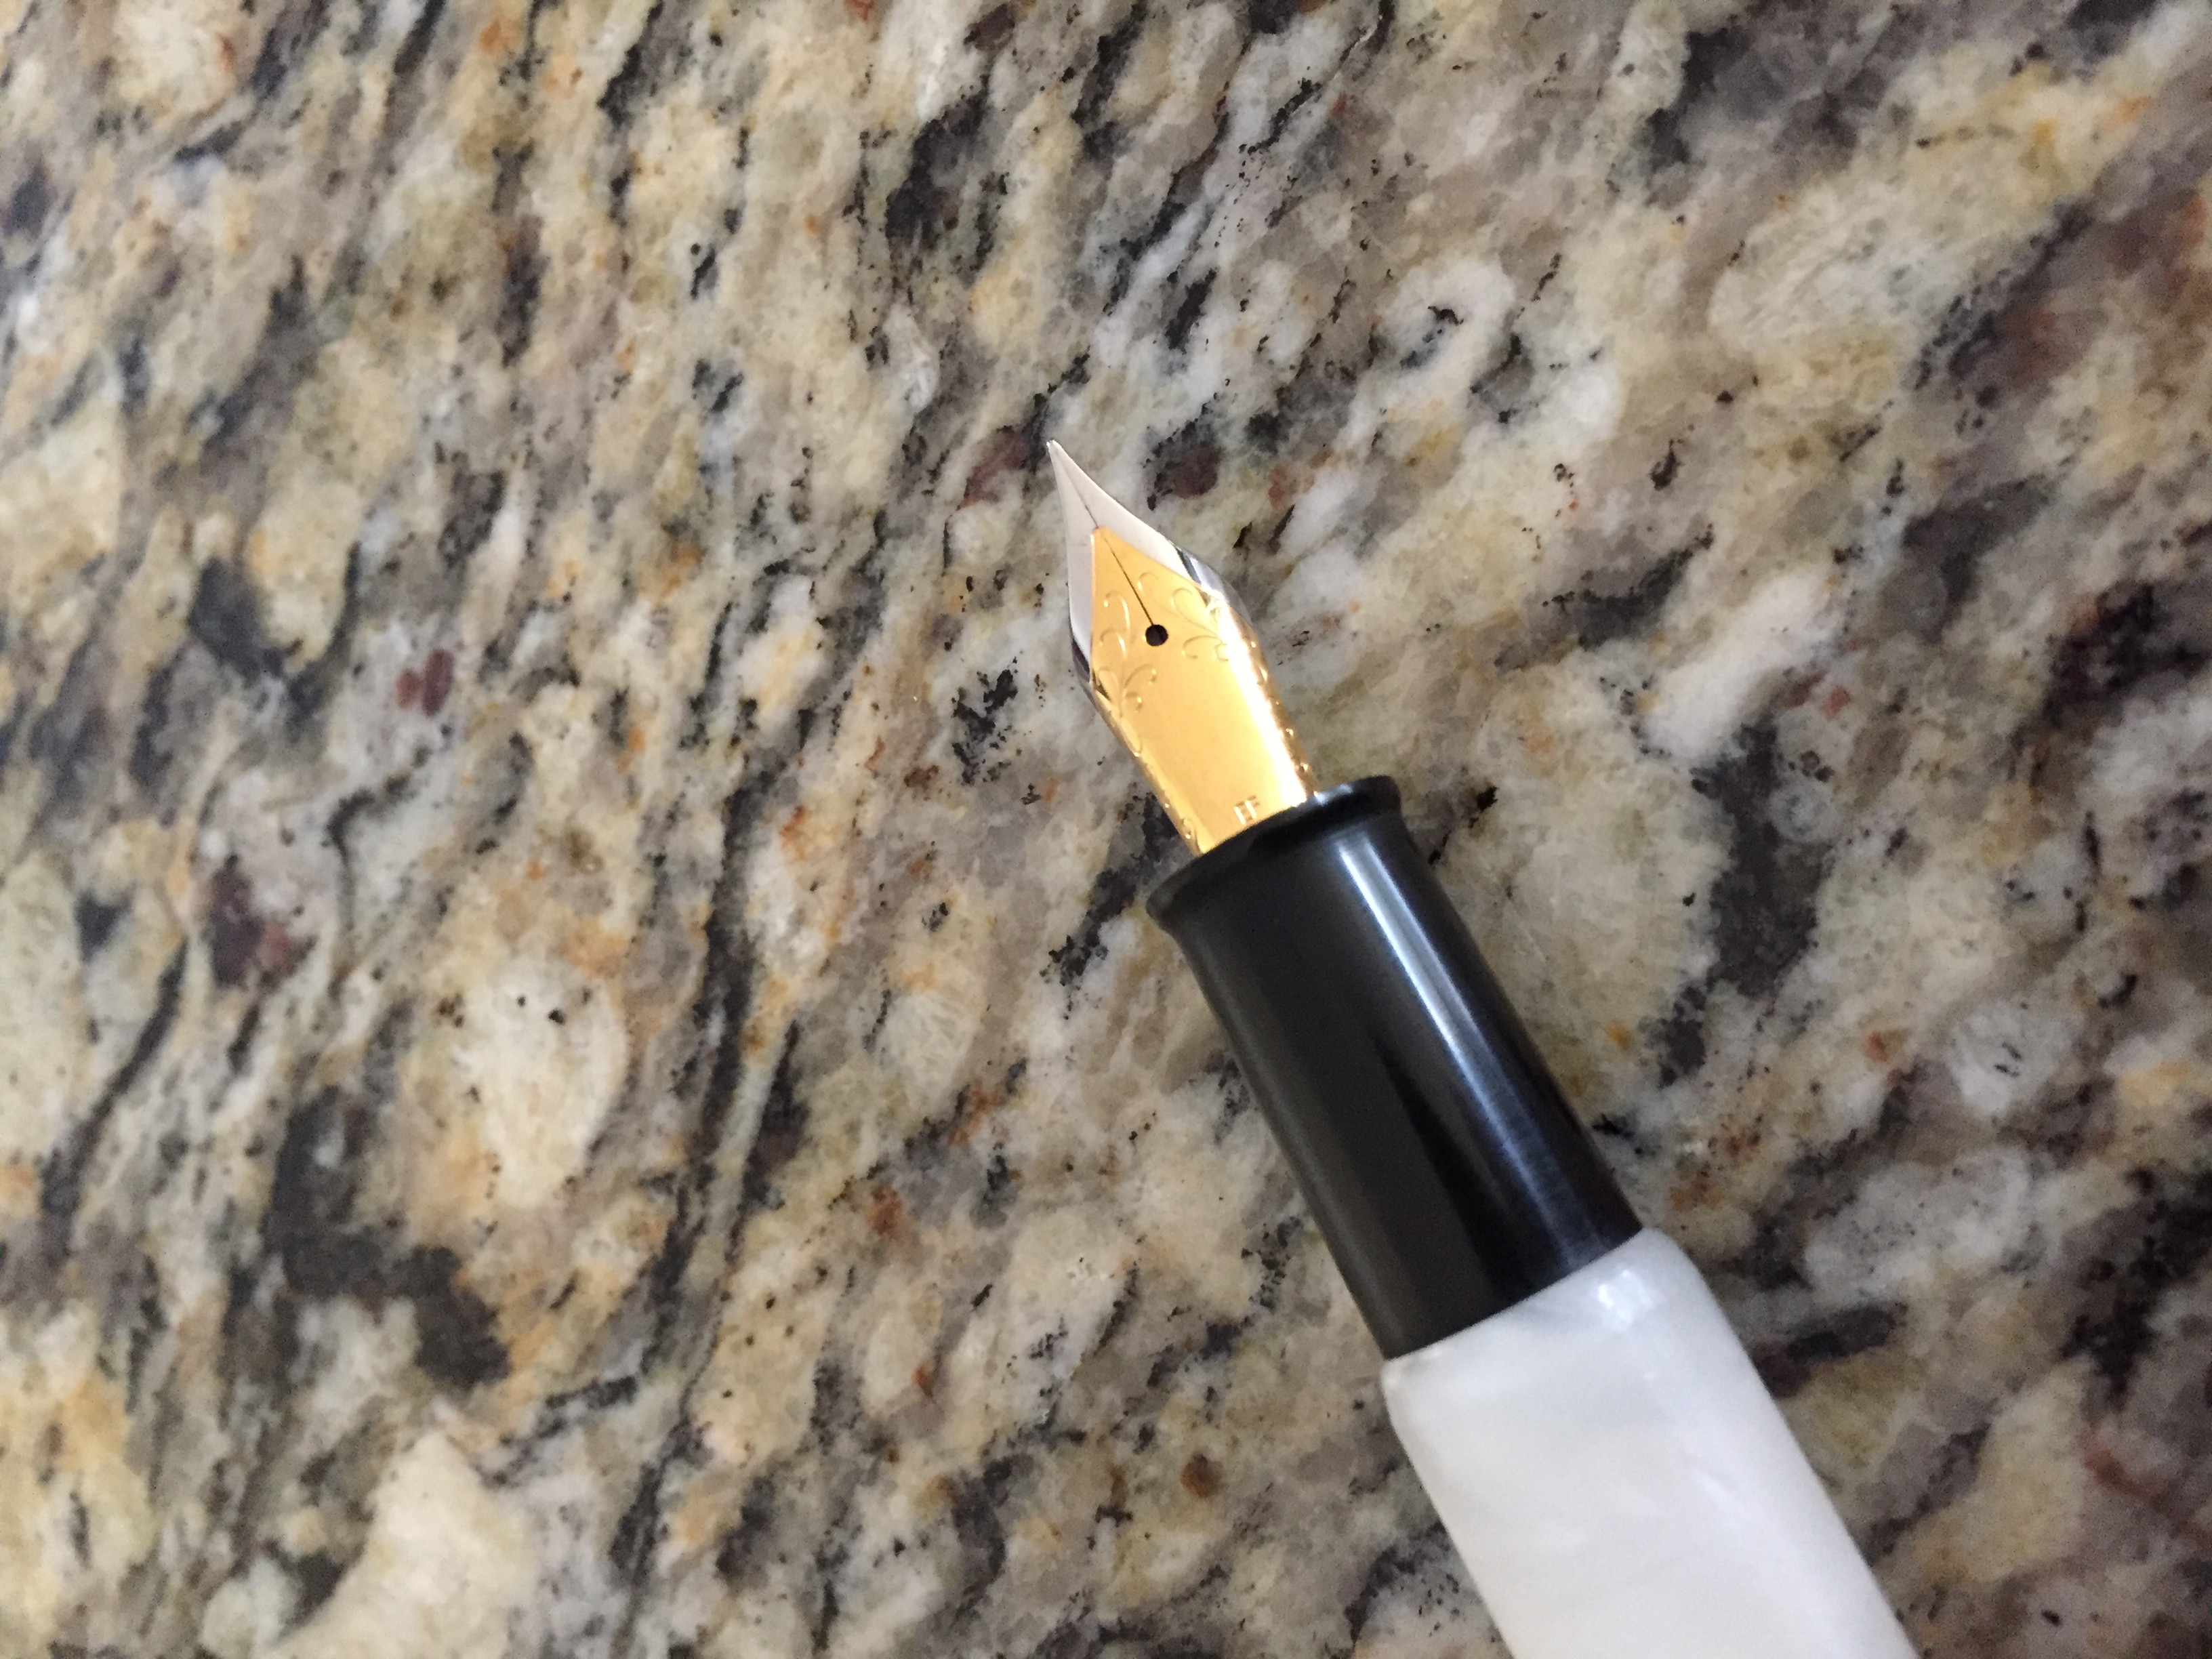
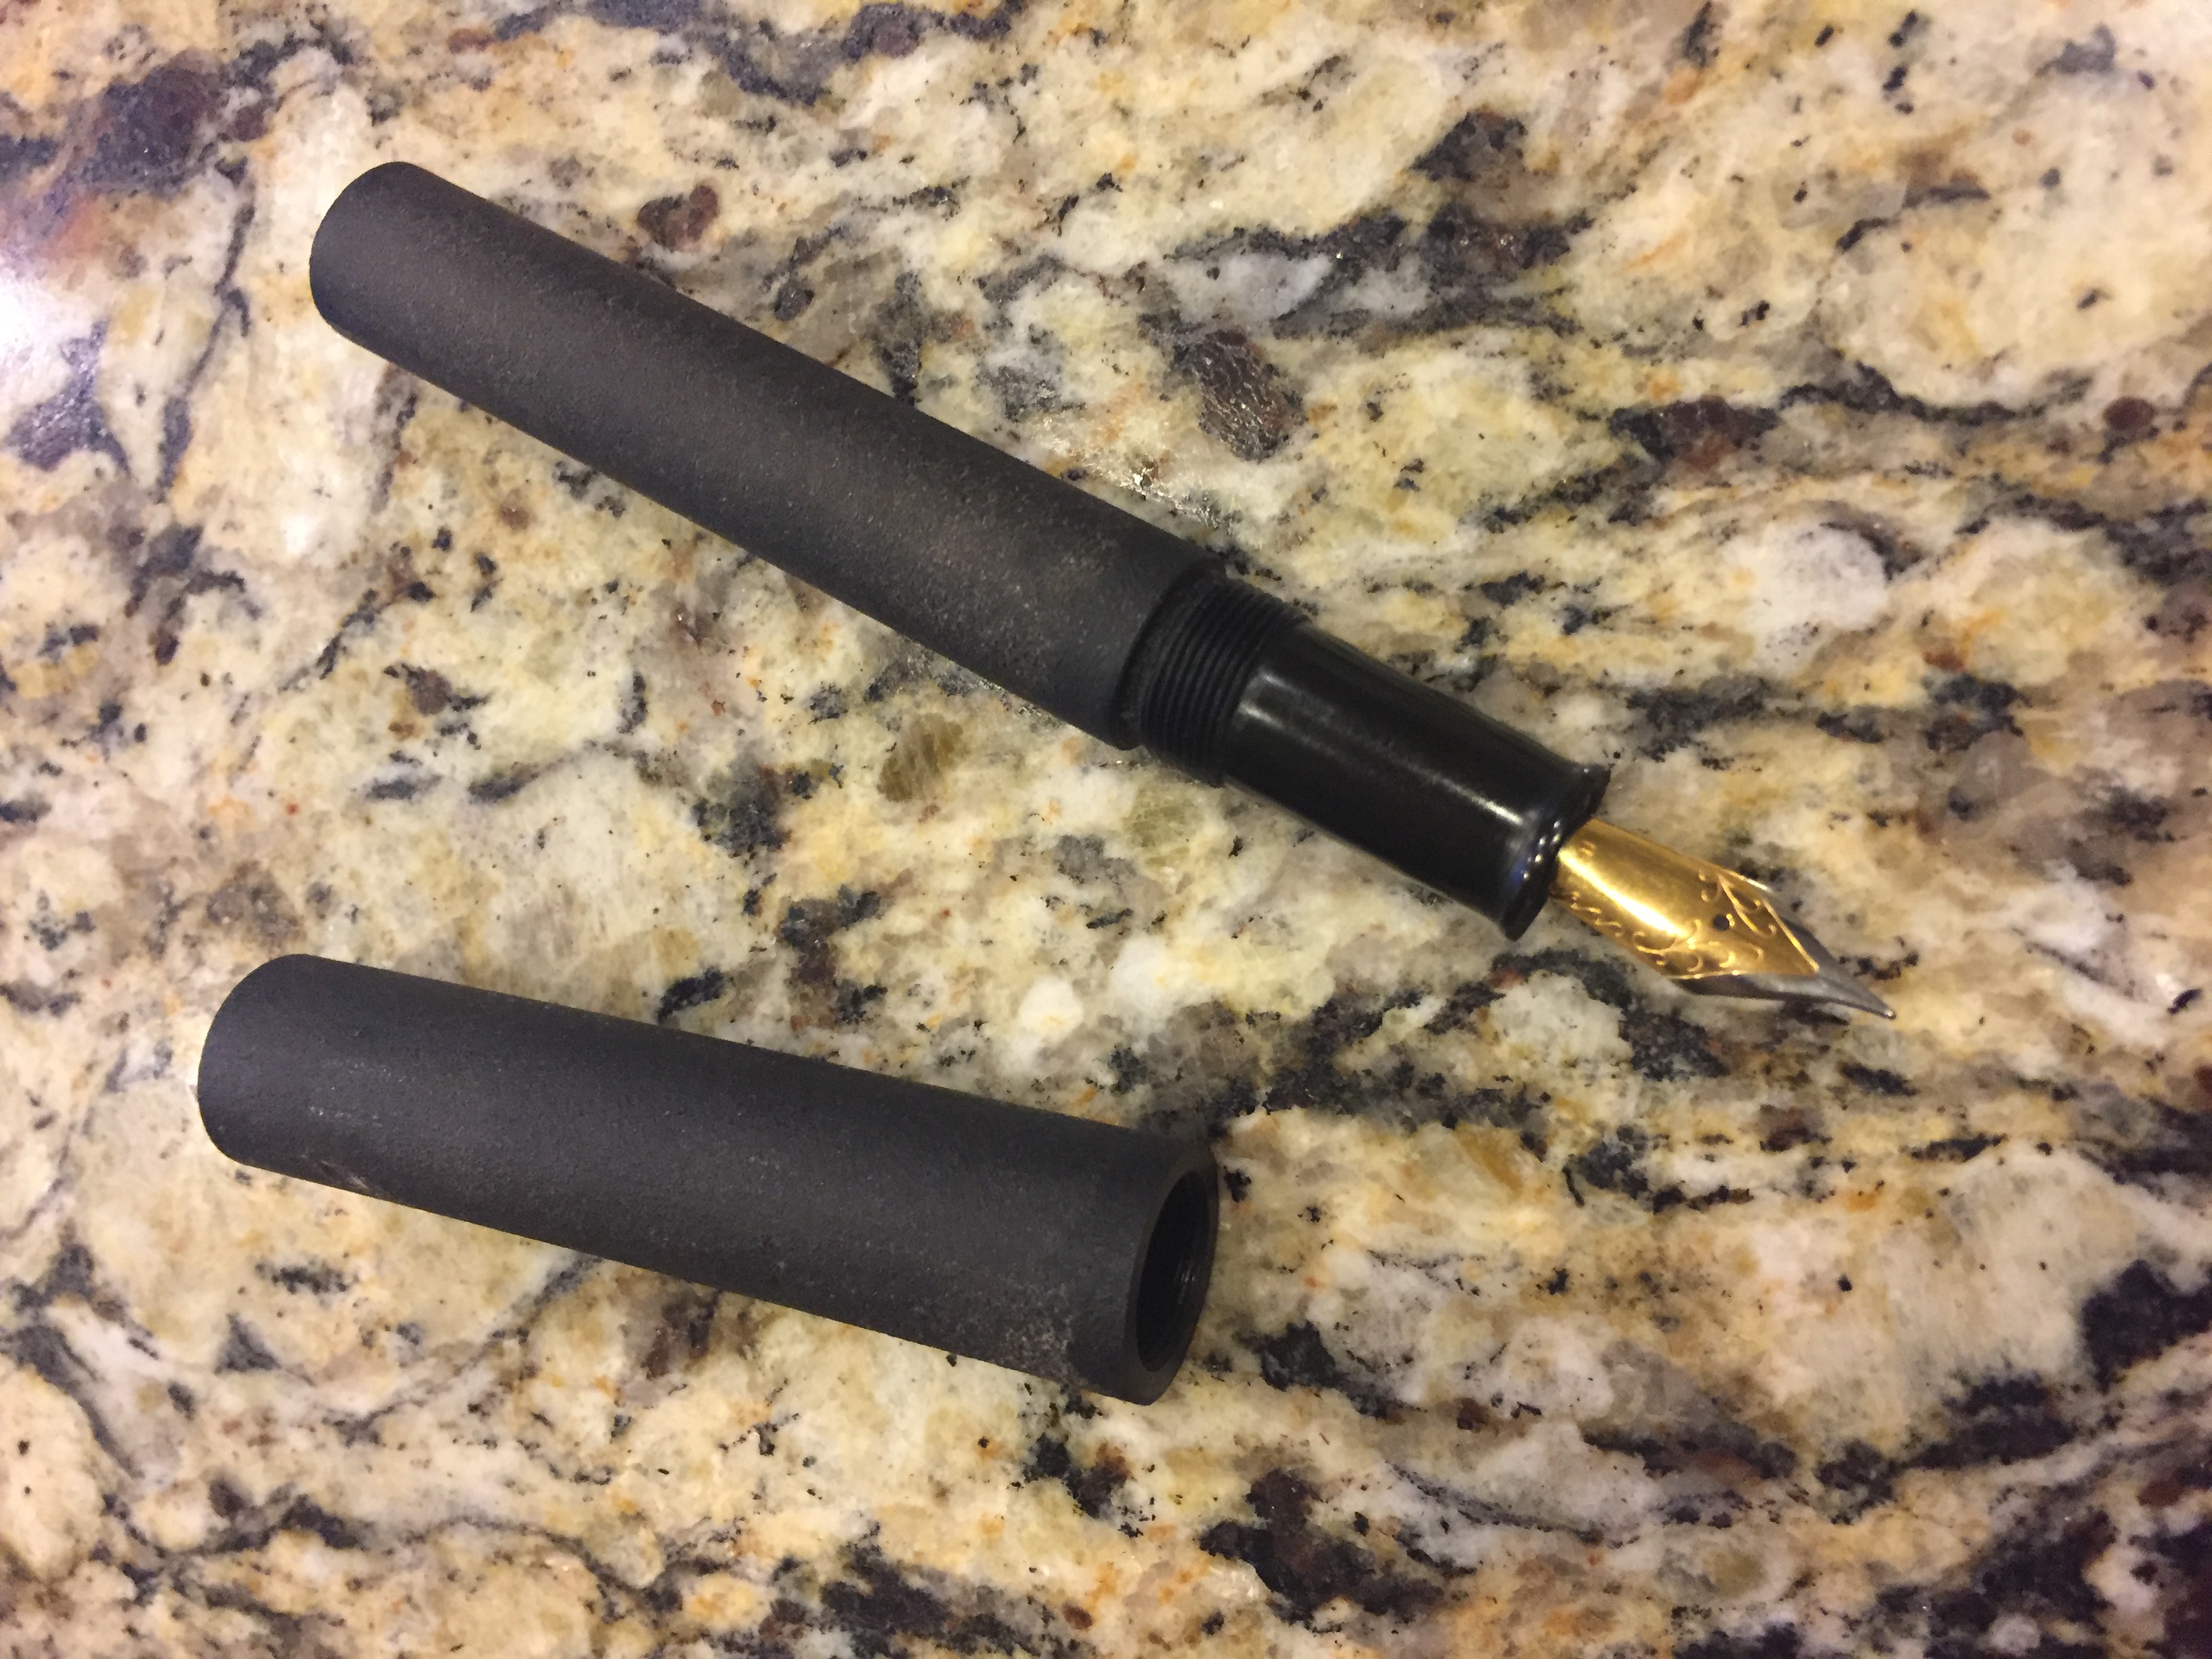
After releveling my jet 1221vs lathe, I made the jump and made my first section. This is of course after spending weeks designing one in Solidworks then reading as many posts as I could find to help flush out the design.
#6 Jowo, made from 14mm Japanese ebonite from Vermont Freehand
10x.75 section threads.
.252 reamer used for the converter fit
9mm and 8.5mm endmills used for the counterbores to fit the flanges on the Jowo.

View in Gallery


View in Gallery
 
Last edited:
Signed-In Members Don't See This Ad

RobS

Member
Joined
Jun 20, 2016
Messages
1,037
Location
Carlsbad, CA
Thanks guys.

dozuki, it was your thread that you started that motivated me to stop putting it off.

Cheers
RobS
 

RobS

Member
Joined
Jun 20, 2016
Messages
1,037
Location
Carlsbad, CA
progress, roughed out cap and body

Still need to shape, sand and polish. This is a clipless pen, as requested from a coworker.

Thanks again to those who I have driven nuts with all my questions.


View in Gallery


View in Gallery

10x.75 section (tap and die from victor machinery)
Jowo #6 (7.4x .5mm, tap from Silver Pen Parts)
14x.8x3 body cap threads (tap and die from Beaufort Ink)
Converter (Beaufort Ink)
Ebonite (Vermont Freehand)
 

duncsuss

Member
Joined
Jun 29, 2012
Messages
2,160
Location
Wilmington, MA
Very nice -- congratulations on your first :biggrin:

IMO ... If you don't have them already, now is the perfect time to order a couple of "pin-chuck mandrels" from Rick Herrell (on account of he offers 20% off during the Bash month).

Get one to match each of the drill bit diameters you used to drill the longest part of your barrel and cap -- I'd guess 9.25mm for the barrel, 13.2mm for the cap but you may have used letter or imperial unit drill bits.

These can be held in a chuck in the headstock and will securely drive the components so you can shape & sand & polish them.
 

RobS

Member
Joined
Jun 20, 2016
Messages
1,037
Location
Carlsbad, CA
Hi Duncan

Funny you should mention Rick, He and I already had a great conversation yesterday and I have prints sent to him to make me some mandrels for the cap and body, that would be useable on the capped version and on the threaded postable version I have planned.

Love Rick's work, I have 3 more flat top tool rests on order too. I used his thread adapter to hold the 14mm tap.
 

duncsuss

Member
Joined
Jun 29, 2012
Messages
2,160
Location
Wilmington, MA
Hi Duncan

Funny you should mention Rick, He and I already had a great conversation yesterday and I have prints sent to him to make me some mandrels for the cap and body, that would be useable on the capped version and on the threaded postable version I have planned.

Love Rick's work, I have 3 more flat top tool rests on order too. I used his thread adapter to hold the 14mm tap.

Yup.

The most recent ones I bought from him, I asked for a thin groove the length of the mandrel. He makes them so exact, I have trouble getting the first one to push into the barrel (it's like a piston, compresses the air inside and forces the barrel back off the mandrel!) The groove lets the air escape without having to fight it.
 
Top Bottom