
You are using an out of date browser. It may not display this or other websites correctly.
You should upgrade or use an alternative browser.
You should upgrade or use an alternative browser.
CA finishing/sanding?
- Thread starter CMC75
- Start date
Signed-In Members Don't See This Ad
Signed-In Members Don't See This Ad

well, that's pretty open ended.... I think the answer for most people is "yes" but with a qualifier
Some people use a little steel wool and then move to micro mesh, some use straight micro mesh, others zona paper, others a buffing wheel....
For me personally, I sand the pen with regular sand paper up to 600 with transverse sanding between grits. From there I'll apply Gluboost CA (exact formulation of Gluboost depending on resin vs wood pen), then I use Dr Kirks scratch free, followed by the three Dr Kirks polishes. Craft Supplies sells the Dr Kirks under a different name now and I'm too lazy this morning to go look it up.
I would recommend you check out Mark Dreyer's 10 Minutes to Better Penmaking series on youtube and then go check out how John Underhill (Underhill creations) does his finishing on youtube. They both use a different approach to applying and polishing the CA although related.
I have used CA to seal a pen, sanded it back and then reapplied the CA once everything is level too
Some people use a little steel wool and then move to micro mesh, some use straight micro mesh, others zona paper, others a buffing wheel....
For me personally, I sand the pen with regular sand paper up to 600 with transverse sanding between grits. From there I'll apply Gluboost CA (exact formulation of Gluboost depending on resin vs wood pen), then I use Dr Kirks scratch free, followed by the three Dr Kirks polishes. Craft Supplies sells the Dr Kirks under a different name now and I'm too lazy this morning to go look it up.
I would recommend you check out Mark Dreyer's 10 Minutes to Better Penmaking series on youtube and then go check out how John Underhill (Underhill creations) does his finishing on youtube. They both use a different approach to applying and polishing the CA although related.
I have used CA to seal a pen, sanded it back and then reapplied the CA once everything is level too

Flintski22
Member
I sand up to 600 before applying CA, then I wet sand with 600 grit and then move into wet sanding with micro mesh ranging from 1500-12000. After that I dry the blank and then buff in a plastic polish at higher rpms.
I have Starbound(medium) and friction polish. I will look for some plastic polish. Can autozone plastic scratch polish be useful or is polish not all the same?. From there I'll apply Gluboost CA (exact formulation of Gluboost depending on resin vs wood pen), then I use Dr Kirks scratch free, followed by the three Dr Kirks polishes
We started out with our sanding station being stocked with 180,400,1500. All sand paper cut to strips. I would like to move to Micro Mesh soon. I appreciate your feedback!I sand up to 600 before applying CA, then I wet sand with 600 grit and then move into wet sanding with micro mesh ranging from 1500-12000. After that I dry the blank and then buff in a plastic polish at higher rpms.

We started out with our sanding station being stocked with 180,400,1500. All sand paper cut to strips. I would like to move to Micro Mesh soon. I appreciate your feedback!
Skipping grits, like going from 150 directly to 400 and then directly to 1500 will most likely not give you the results you want.
It will take several eons (if ever) for 400 grit to remove the scratches created by 150 grit. The same holds for jumping straight to 1500 grit from 400 grit.
FYI, I start with either 600 or 800.
This helps a lot! Thank you. My last 2 pens were a result of what you are talking about.Skipping grits, like going from 150 directly to 400 and then directly to 1500 will most likely not give you the results you want.
It will take several eons (if ever) for 400 grit to remove the scratches created by 150 grit. The same holds for jumping straight to 1500 grit from 400 grit.
FYI, I start with either 600 or 800.
I think the folks that I talk with who turn a lot of pens start sanding at 150/180, 220, 320, 400, 600. Using that 150/180 grit may depend on the blank, sometimes it could be skipped. I know a few people who sand their turnings at the RPM they use for turning, I have gotten in the habit of sanding around 750 ish myself. I'm sure some will say that's too high or too low, it's really what works for you.
Perhaps the most important part is to make sure you sand along the axis of the pen before changing grits so you're not continuing to chase circular sanding marks. It's remarkable the difference that will make. Once it's smooth and perfect, then apply the CA. You probably don't need to sand at 600 again after applying the CA, just go to finishing grits.
I've not used Starbond for a finish, the guys who taught me to make pens all used Gluboost so I just started there and stayed with it because that's what they showed me. I think with any CA the devilish part is finding a way to apply it ripple free. There are probably as many ways there as there are turners on this site.
I have used Flitz polish on pens after micro mesh, I remember looking it up one time and found out it was literally the same polish as one of the big pen polishes just branded differently. I don't remember which one it was. I know automotive polishes can have different grit or "cuts" so you'll want to make sure you're using them in the correct order. The Dr Kirks polish I use is similar to that in the fact that has different grit levels.
I just remembered there are a whole bunch of folks who use the magic juice family of products too. You can check them out.
Post photos of your pens if you'd like also. Plenty of folks on here who will give out pointers, I've certainly learned a lot that way.
Perhaps the most important part is to make sure you sand along the axis of the pen before changing grits so you're not continuing to chase circular sanding marks. It's remarkable the difference that will make. Once it's smooth and perfect, then apply the CA. You probably don't need to sand at 600 again after applying the CA, just go to finishing grits.
I've not used Starbond for a finish, the guys who taught me to make pens all used Gluboost so I just started there and stayed with it because that's what they showed me. I think with any CA the devilish part is finding a way to apply it ripple free. There are probably as many ways there as there are turners on this site.
I have used Flitz polish on pens after micro mesh, I remember looking it up one time and found out it was literally the same polish as one of the big pen polishes just branded differently. I don't remember which one it was. I know automotive polishes can have different grit or "cuts" so you'll want to make sure you're using them in the correct order. The Dr Kirks polish I use is similar to that in the fact that has different grit levels.
I just remembered there are a whole bunch of folks who use the magic juice family of products too. You can check them out.
Post photos of your pens if you'd like also. Plenty of folks on here who will give out pointers, I've certainly learned a lot that way.

mg_dreyer
Member
My first YouTube video many a years ago … (and over 10,000 views).
View it here -
10 Minutes To Better Penmaking - GluBoost
View it here -
10 Minutes To Better Penmaking - GluBoost
Thanks for all of this.I think the folks that I talk with who turn a lot of pens start sanding at 150/180, 220, 320, 400, 600. Using that 150/180 grit may depend on the blank, sometimes it could be skipped. I know a few people who sand their turnings at the RPM they use for turning, I have gotten in the habit of sanding around 750 ish myself. I'm sure some will say that's too high or too low, it's really what works for you.
Perhaps the most important part is to make sure you sand along the axis of the pen before changing grits so you're not continuing to chase circular sanding marks. It's remarkable the difference that will make. Once it's smooth and perfect, then apply the CA. You probably don't need to sand at 600 again after applying the CA, just go to finishing grits.
I've not used Starbond for a finish, the guys who taught me to make pens all used Gluboost so I just started there and stayed with it because that's what they showed me. I think with any CA the devilish part is finding a way to apply it ripple free. There are probably as many ways there as there are turners on this site.
I have used Flitz polish on pens after micro mesh, I remember looking it up one time and found out it was literally the same polish as one of the big pen polishes just branded differently. I don't remember which one it was. I know automotive polishes can have different grit or "cuts" so you'll want to make sure you're using them in the correct order. The Dr Kirks polish I use is similar to that in the fact that has different grit levels.
I just remembered there are a whole bunch of folks who use the magic juice family of products too. You can check them out.
Post photos of your pens if you'd like also. Plenty of folks on here who will give out pointers, I've certainly learned a lot that way.
Like I said, we are just getting started. But here is our pens. I tried to take my time with the Hickory/click pen and CA. Everything you stated about grit sequences shows the scratches on my finish. The walnut and african blackwood are friction polish. This thread helps a ton.
Will be watching this in a few with my son. He is 9 and just as addicted to this as I am. Thank you.My first YouTube video many a years ago … (and over 10,000 views).
View it here -
10 Minutes To Better Penmaking - GluBoost
Mortalis
Member
First thing is to not apply CA too thickly. Light coats and let each coat dry completely. I apply at around 250 rpm (that is as slow as my lathe will go ) and I leave the lathe running while the CA is drying.
I tend to apply 6 to 7 coats of thin and then 3 to 4 coats of medium.
- On the Soapbox -
I do not like using accelerator as somewhere in the process it boils/bubbles or causes white spots. Others will say they never have a problem with it but I just eliminate the chance all together. I am not a production turner so time is not really a problem for me.
- Off the soapbox -
Once all the coats are complete and dry I then go directly to the micromesh. The coarsest one will definitely be coarse enough to smooth the blank (If your coating IS rough then go ahead and use some 400 or 600 lightly to remove the rough). I will sand with the lathe turning (somewhere between 250 - 400 rpm) and then I will stop the lather and "sand" along the length of the blank once or twice around the entire circumference. I remove all the dust from sanding before moving onto the next grit (I worked in an inspection department and acquired a microscope that I use to see if each mesh has remove all the scratches left by the previous. Not necessary but nice to have). By the time you get to the third or fourth grit you should start to see some matted sheen. Just keep going and by the time you get to the 3rd or 2nd grit from the end you will see a glassy finish appear.
I dont generally wet sand a wood blank but will occasionally wet sand a plastic blank.
I use these micro mesh pads.
One other thing. If you sand the corners of the blank so they have a very slight radius/break to the edge it will improve the look of the finished pen and when someone picks the pen up and holds it they will not be able to easily discern the difference between the where the blank ends and hardware begins
One other thing, I have my micro mesh pads 'numbered' so I keep them in order. I have them in a smallish container and when I'm done each grit I return to the opposite side of the container and then I know which one is next and which one(s) I've used.
I tend to apply 6 to 7 coats of thin and then 3 to 4 coats of medium.
- On the Soapbox -
I do not like using accelerator as somewhere in the process it boils/bubbles or causes white spots. Others will say they never have a problem with it but I just eliminate the chance all together. I am not a production turner so time is not really a problem for me.
- Off the soapbox -
Once all the coats are complete and dry I then go directly to the micromesh. The coarsest one will definitely be coarse enough to smooth the blank (If your coating IS rough then go ahead and use some 400 or 600 lightly to remove the rough). I will sand with the lathe turning (somewhere between 250 - 400 rpm) and then I will stop the lather and "sand" along the length of the blank once or twice around the entire circumference. I remove all the dust from sanding before moving onto the next grit (I worked in an inspection department and acquired a microscope that I use to see if each mesh has remove all the scratches left by the previous. Not necessary but nice to have). By the time you get to the third or fourth grit you should start to see some matted sheen. Just keep going and by the time you get to the 3rd or 2nd grit from the end you will see a glassy finish appear.
I dont generally wet sand a wood blank but will occasionally wet sand a plastic blank.
I use these micro mesh pads.
One other thing. If you sand the corners of the blank so they have a very slight radius/break to the edge it will improve the look of the finished pen and when someone picks the pen up and holds it they will not be able to easily discern the difference between the where the blank ends and hardware begins
One other thing, I have my micro mesh pads 'numbered' so I keep them in order. I have them in a smallish container and when I'm done each grit I return to the opposite side of the container and then I know which one is next and which one(s) I've used.
Attachments

Last edited:
mg_dreyer
Member
Looks like you are from the Midwest. In April you and your son should come out to The Midwest Penturners Gathering (midwestpenturnersgathering.com). We get about 300 penturners of all ages for two full days of classes and demos. It's always a blast. Feel free to PM me for any questions).Will be watching this in a few with my son. He is 9 and just as addicted to this as I am. Thank you.
Bob Roehrig
Member
Just my take on the CA subject, but this is what works for me to obtain that Mirror finish polish. I sand my blank to 600 grit. Apply a minimum of 8 coates of CA with occasional fine sanding along the way. Once my 8 coats are applied I give a final sanding with 600 and then jump right to my Beall Buffing system using Tripoli and White Diamond only. I do not use the Carnuba wax since to me it leaves a "gummy" feeling and find it's not needed. Some Renaissance wax YES. I use to go through the laborous process of wet sanding through the grits but after using the buffing wheel process I find (and see) the wet sanding to me is a waste of time. I'm getting the finiest perfect mirror finishes that I've ever had and saving a lot of time and MESS in the process. This is my way.....continue to work for what works for you............
Bob Roehrig
Member
I'm orginally from Michigan and have since moved to Florida in 2010. Miss the Chicago and midwest shows, but not into long travels any longer. Anyone know of any pen symposiums or meets that are closer to my home base now in the south?? Would love to attend these since I certainly miss the fine demonstrations and seeing all the new techniques.........thanksLooks like you are from the Midwest. In April you and your son should come out to The Midwest Penturners Gathering (midwestpenturnersgathering.com). We get about 300 penturners of all ages for two full days of classes and demos. It's always a blast. Feel free to PM me for any questions).
This would be great to attend. Is the show at the hotel? I didn't see anything different about venue location?Looks like you are from the Midwest. In April you and your son should come out to The Midwest Penturners Gathering (midwestpenturnersgathering.com). We get about 300 penturners of all ages for two full days of classes and demos. It's always a blast. Feel free to PM me for any questions).
NJturner
Member
Not sure if I am reading all the comments correctly, but I might suggest looking at your tool handling if you need to start sanding at anything courser than 320, especially with resin blanks. A good sharp tool, with a good hand can deliver a smooth finish that will allow you to start at a higher grit, helping to keep your shaping and detailing intact without the risk of sanding it away.
Second all comments of not skipping grits and insuring you stop the lathe with each grit change and do horizontal sanding as a final sanding step at each grit - then clean the blank of all dust and remnants of that grit to insure nothing is left on the blank to scratch it in preparation for the next grit.
Kevin
Second all comments of not skipping grits and insuring you stop the lathe with each grit change and do horizontal sanding as a final sanding step at each grit - then clean the blank of all dust and remnants of that grit to insure nothing is left on the blank to scratch it in preparation for the next grit.
Kevin
The MPG is really an amazing experience, I'd really recommend it if you are free that weekend. The various ballrooms at the hotel are used for the demonstrations and vendor sales floor. Many people stay at the hotel too, it's nice to have a chance to visit with everyone in the evening.
There are always kids there each year. My daughter has attended with me and enjoys it. Just make sure you set aside a little budget for your son to shop for blanks and other project ideas.
Everyone is very welcoming.
There are always kids there each year. My daughter has attended with me and enjoys it. Just make sure you set aside a little budget for your son to shop for blanks and other project ideas.
Everyone is very welcoming.
Thanks for all of this.
Like I said, we are just getting started. But here is our pens. I tried to take my time with the Hickory/click pen and CA. Everything you stated about grit sequences shows the scratches on my finish. The walnut and african blackwood are friction polish. This thread helps a ton.
I think I've learned something from every turning I've done. It all takes a little time to figure out exactly how you like things and what you want done. The nice thing with a CA finish is that it's super easy to redo it. If you don't like it, sand it back down and apply again.
One other thing just occurred to me that I haven't seen anyone mention. Do you have any finishing bushings? The will help prevent your CA from sticking to the steel pen bushings. (ask me how I know) You'll want to lightly sand the end of the blank to make sure the CA doesn't affect your final fit but they really help.

Finishing Bushings - Set of 4
Achieve cleaner and easier CA glue wood finishing for your pens with this set of 4 Non-Stick Bushings. Say goodbye to metal bonding issues during sanding - these bushings are designed to resist CA glue, making your finishing process a breeze!
 exoticblanks.com
Yeah I don't have those type of bushings yet.I think I've learned something from every turning I've done. It all takes a little time to figure out exactly how you like things and what you want done. The nice thing with a CA finish is that it's super easy to redo it. If you don't like it, sand it back down and apply again.
One other thing just occurred to me that I haven't seen anyone mention. Do you have any finishing bushings? The will help prevent your CA from sticking to the steel pen bushings. (ask me how I know) You'll want to lightly sand the end of the blank to make sure the CA doesn't affect your final fit but they really help.
Finishing Bushings - Set of 4
Achieve cleaner and easier CA glue wood finishing for your pens with this set of 4 Non-Stick Bushings. Say goodbye to metal bonding issues during sanding - these bushings are designed to resist CA glue, making your finishing process a breeze!
I am getting good turnings before sanding but my son needs time and experience to figure it out. I just didn't set us up with the proper grits for our building.Not sure if I am reading all the comments correctly, but I might suggest looking at your tool handling if you need to start sanding at anything courser than 320, especially with resin blanks.
They are worth every penny, truly. They can be used with other projects too.Yeah I don't have those type of bushings yet.
Another youtube that I enjoy watching is the monthly youtube live session that Exotic Blanks puts on.

Todd in PA
Member
A good CA finish is going to be about a hundredth inch thick. If you're touching that with anything under 600 grit, you're going to over-thin it, or even sand through it, regularly. Besides you'll never get those scratches out.
My regimen is to turn a hundredth past the finish diameter, measured by caliper. Then apply .012-.015 of CA. I lightly cut off the high spots with square carbide rather than sand. Then apply thin Gluboost, 3 or 4 topcoats, to fill in the low spots. Then wet-sand with 1200 until round, and go straight to buffing.

My regimen is to turn a hundredth past the finish diameter, measured by caliper. Then apply .012-.015 of CA. I lightly cut off the high spots with square carbide rather than sand. Then apply thin Gluboost, 3 or 4 topcoats, to fill in the low spots. Then wet-sand with 1200 until round, and go straight to buffing.
Those are sharp pens. Work of art really.A good CA finish is going to be about a hundredth inch thick. If you're touching that with anything under 600 grit, you're going to over-thin it, or even sand through it, regularly. Besides you'll never get those scratches out.
My regimen is to turn a hundredth past the finish diameter, measured by caliper. Then apply .012-.015 of CA. I lightly cut off the high spots with square carbide rather than sand. Then apply thin Gluboost, 3 or 4 topcoats, to fill in the low spots. Then wet-sand with 1200 until round, and go straight to buffing.
View attachment 394855
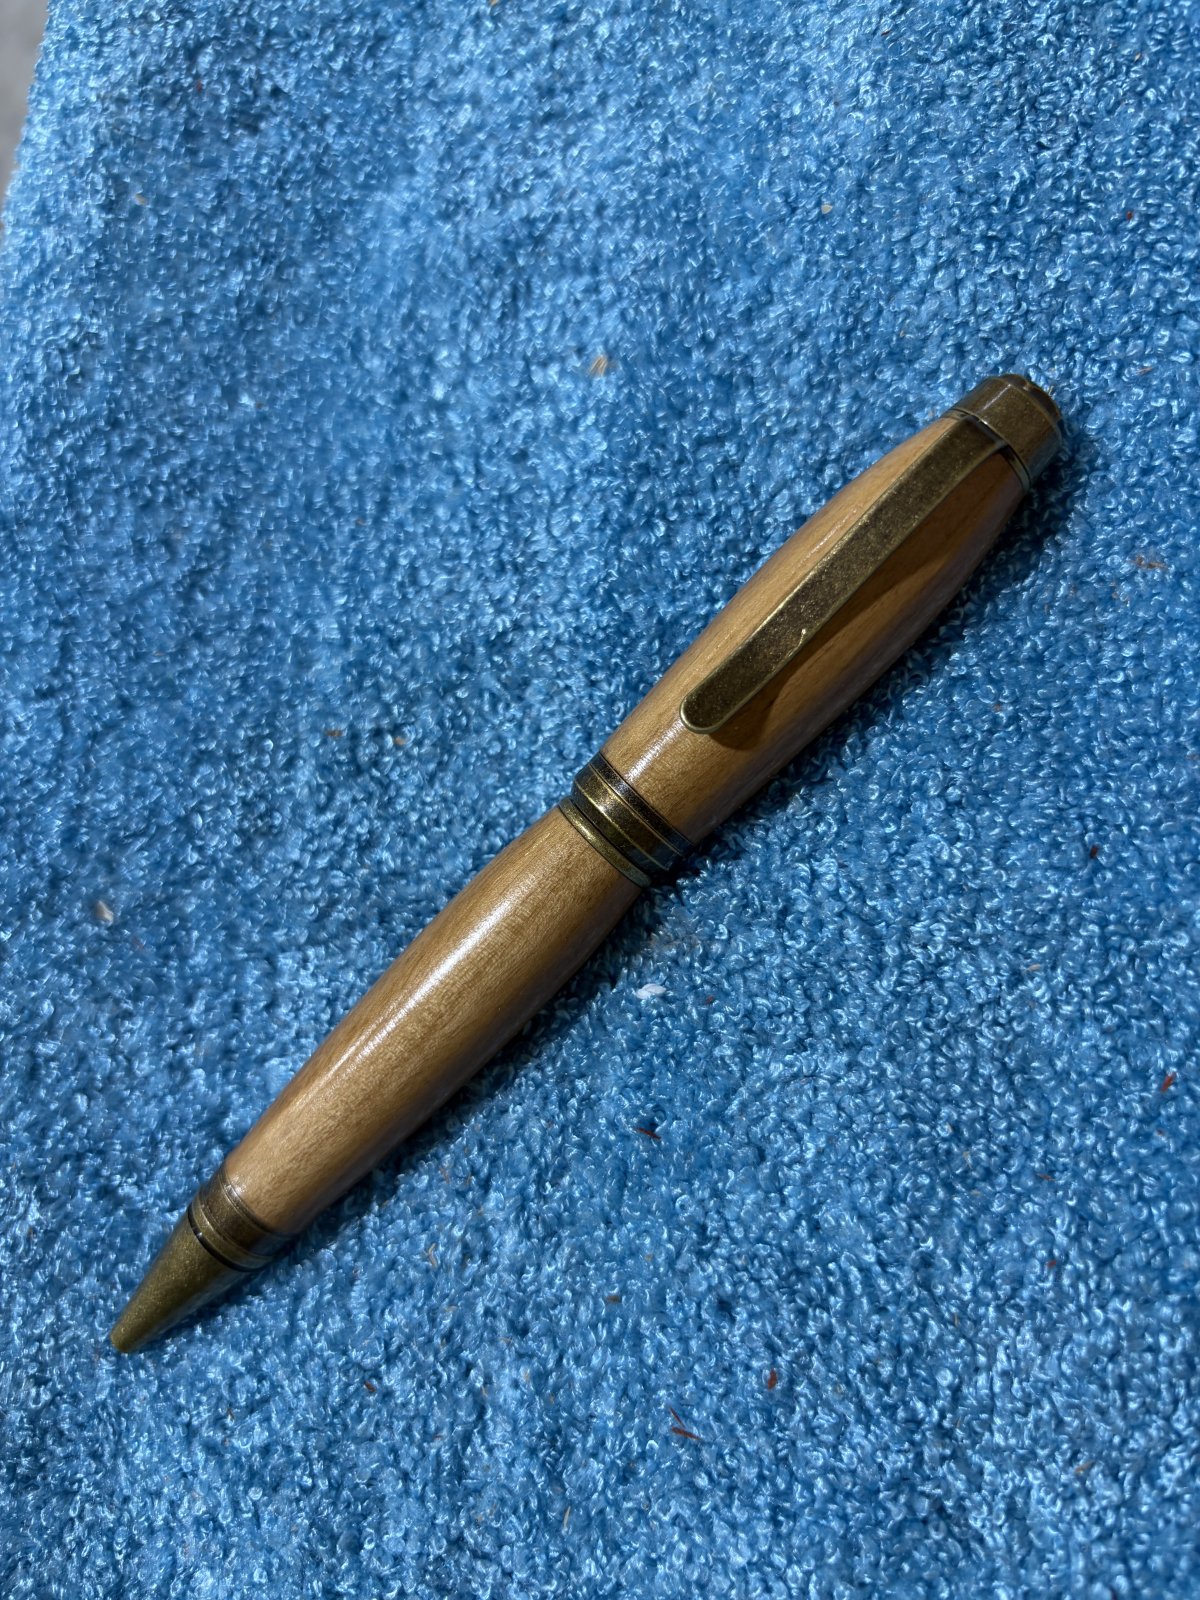
Tried my first cigar pen and also got some micro-mesh pads. Did 3 coats of thin and 2 medium. Before applying CA, I sanded with 600 then 800(also with the grain between). Do not have a polish yet but this is what came out. Work in progress.
drop dead gorgeousA good CA finish is going to be about a hundredth inch thick. If you're touching that with anything under 600 grit, you're going to over-thin it, or even sand through it, regularly. Besides you'll never get those scratches out.
My regimen is to turn a hundredth past the finish diameter, measured by caliper. Then apply .012-.015 of CA. I lightly cut off the high spots with square carbide rather than sand. Then apply thin Gluboost, 3 or 4 topcoats, to fill in the low spots. Then wet-sand with 1200 until round, and go straight to buffing.
View attachment 394855
looks great!Tried my first cigar pen and also got some micro-mesh pads. Did 3 coats of thin and 2 medium. Before applying CA, I sanded with 600 then 800(also with the grain between). Do not have a polish yet but this is what came out. Work in progress.View attachment 394887

Woodchipper
Member
1/100th but for how many coats? Combination of thick, medium or thin? The segmented pen on another topic had eight coats of thin followed by MM and Hutt polish.
Not sure I understand your question?1/100th but for how many coats? Combination of thick, medium or thin? The segmented pen on another topic had eight coats of thin followed by MM and Hutt polish.
Woodchipper
Member
Try again: How many coats of any of the three viscosities equal 1/100th of an inch? Never thought to measure before CA and after CA.
Thanks I appreciate your advice! Today I, using knowledge from several videos, went through all of the micro mesh pads(1500-12000) and came out with a personal favorite. Spalted maple gifted to me from here and an antique guntmetal kit.looks great!
That's a great pairing, nice job!Thanks I appreciate your advice! Today I, using knowledge from several videos, went through all of the micro mesh pads(1500-12000) and came out with a personal favorite. Spalted maple gifted to me from here and an antique guntmetal kit.
I think what Todd may be saying in his post is he turns a little small and then build back up to the needed diameter with CA. He's measuring with a caliper through the process.
Ok I haven't learned that high of detail yet. I have only measured barrel diameter to get my tooling uniform. I am trying to learn any finishing, CA or wood polish, techniques I can to get a good end to a build. I think you are light years ahead of me!Try again: How many coats of any of the three viscosities equal 1/100th of an inch? Never thought to measure before CA and after CA.
So are you saying that thin CA gives you a known thickness per coat?
Woodchipper
Member
Depends on how heavy the application. Not really concerned about the final OD after applying X coats of CA. More concerned how it looks to me and, more importantly, to the customer.