My experience with Solarez Resins
A little over a month ago I made contact with Tony to get some info on his experience. Since then, the best thing I can say is I have a new IAP friend. Over the last 5 or 6 weeks we have talked, had video conferences, and attempted to collaborate on the best methods to apply and cure Solarez resins. While I don't think we're 100% there, I do believe we have come up with several techniques to create a high gloss, durable finish that when complete is at least equal to or even better than CA. Here are some of my observations, many of which are duplicates of Tony's.
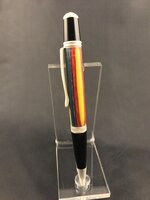
1) Solarez Ultra thin: In terms of ease of use and quality of finish this would be my favorite. I have applied this on a slow speed turner with the small application brush supplied, and used a UV flashlight to cure while spinning. For most of the experiments I used 2 coats. Following cure, the surface was hard, but required a little sanding to be smooth enough for a pen finish. I used 220, 320 and 400 grit to smooth which left a matte surface. I followed with a Beall buff using TripleE, white diamond, and carnuba wax. The resulting surface was very hard and very high gloss.
There are 2 things about this coating that I didn't like. One was that is it not self leveling. With epoxy coatings on a slow speed turner, the epoxy will self level to the point that it is perfectly round. Not this material. The other is the cost and at this point only available in very small quantities (0.5 oz) for about $15. If this was priced comparable to their other similar coatings, I would not go any further.
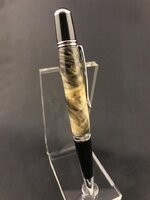
2) Solarez Thin Hard: This is the material Tony and I spent the most time talking about. It is available in larger quantities and less expensive and therefore worth the time to make it work. It's downside is that the presence of oxygen on the surface inhibits the curing reaction. We both proved this by taking a small coated section and covering it with plastic wrap prior to UV exposure. After exposure and removing the wrap the underlying coating was very hard. Without the plastic wrap the surface has a tacky or rubbery feel even though underneath where the coating is protected from oxygen it is hard.
Our focus went to providing an inert atmosphere at the surface, exploring gases such as nitrogen and CO2. Not having ready access to either, and not wanting to invest a fortune in large scale equipment, we tried to develop a proof of concept with commonly used, low cost 16-20 gram CO2 cartridges. These hold between 8 and 10 liters of gas which should be enough to encapsulate the blank for the minute (typically much less) of total UV exposure.
At first we tried just blowing some CO2 over the blank while exposing to UV and had limited success. At least one trial gave a very hard surface and many yielded a surface that was still a little rubbery but much less tacky than in open air. All of these when sanded and buffed as above still left a very hard high gloss surface.
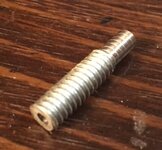
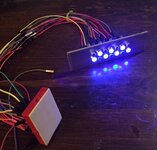
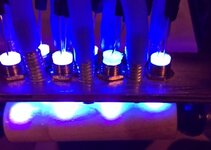
Being a gadget geek, I tried to see if I could make a system that would both provide UV light while providing a stream of inert gas. I made some nozzles from 1/4" threaded rod and mounted them along side some 395nm UV leds that i could mount over the blank. I've only made a few trials with this and wish I had a larger gas source, but It seems to work. The surface is not quite as hard as the plastic wrap experiment, but certainly harder and less tacky than when done without the CO2.
Bottom line: I'll probably be ordering more of both and can highly recommend if you want a high gloss surface.
Below are some picture of my experiments.
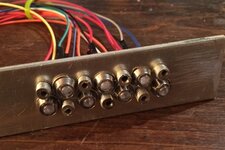
Nozzle machined from 1/4" threaded rod
LED bulbs hooked up and working; wired in parallel to 3.5V wall wart
Alternating LEDs and gas nozzles
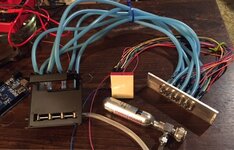
Gas manifold attached to fixture
Fixture over blank


") ) vertically in time for a cure.
) vertically in time for a cure.