WS3000 jigs

Signed-In Members Don't See This Ad
Joined
Aug 5, 2009
Messages
3,242
Location
Millersburg, OR
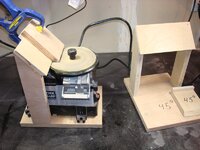
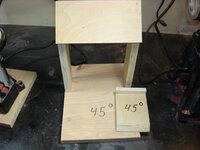
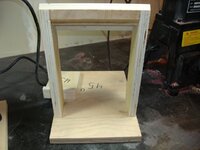
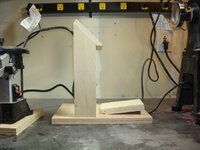
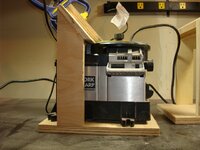
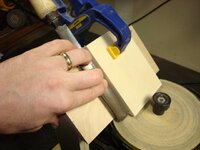
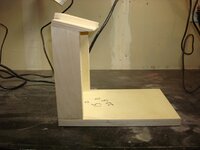
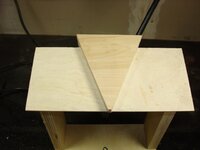
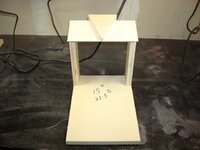
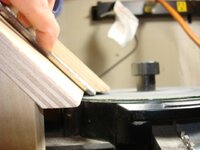
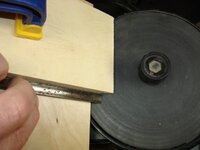
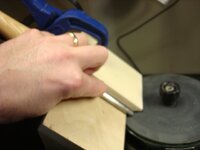
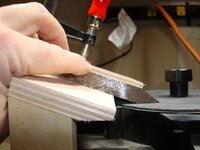
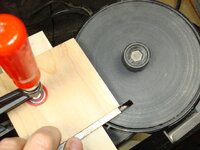
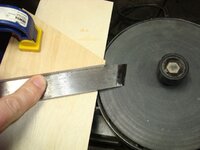
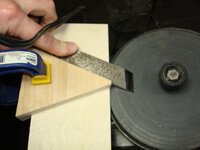
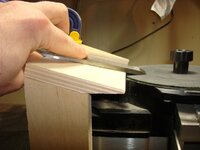
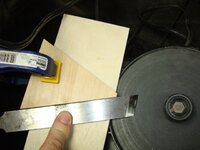
Here are some pictures of the jigs that I have made to sharpen turning chisels. The WS isn't fastened down so it can be moved around to use all the sandpaper. I use loctite spray adhesive #100 and buy my sandpaper at the local hardware store. The bases are just large enough for the sharpener. It is important to build in some kind of brace so the jig doesn't rock when sharpening. The gouge does catch a little when you start to turn into it, not sure what the best way to solve that is and I just live with it. If possible I would make the tops a little longer on the short ones so you have more space for the clamp to hold the guide down. I used 3/4" plywood because I had it on hand. I think thicker wood the better to help with stability. If you have any questions or ways to make these better please say so. Thank you.
 

Attachments

  • Gouges1.JPG
    Gouges1.JPG
    142.6 KB · Views: 314
  • Gouges2.JPG
    Gouges2.JPG
    80 KB · Views: 258
  • Gouges3.JPG
    Gouges3.JPG
    82.4 KB · Views: 234
  • Gouges4.JPG
    Gouges4.JPG
    87 KB · Views: 305
  • Gouges5.JPG
    Gouges5.JPG
    88.8 KB · Views: 300
  • Gouges6.JPG
    Gouges6.JPG
    76.4 KB · Views: 378
Signed-In Members Don't See This Ad
These are quite clever -- I have a stationary sander with 4 X 36" belt and 6" disk, and I can see making something like this for it. What kind of sandpaper do you use -- just ordinary garnet? And what grits?

Thanks,
Steve
 
These are just plum genius! I have a 2000 and a 3000. Copying these jigs (if you don't mind) will be a GREAT addition to the WS for me.

Thanks for posting the picts! I really appreciate this.
 
These are some pictures of the tools on the jigs. The height of the table above the wheel doesn't matter it just moves the tool further out on the wheel.
 

Attachments

  • G1.JPG
    G1.JPG
    63.4 KB · Views: 251
  • G2.JPG
    G2.JPG
    71.9 KB · Views: 267
  • G3.JPG
    G3.JPG
    47.5 KB · Views: 242
And the skew. You have to flip the skew over and use the other side of the guide to sharpen the other side.
 

Attachments

  • SK1.JPG
    SK1.JPG
    83.6 KB · Views: 246
  • SK2.JPG
    SK2.JPG
    60.3 KB · Views: 208
  • SK3.JPG
    SK3.JPG
    70.3 KB · Views: 266
  • SK4.JPG
    SK4.JPG
    74.3 KB · Views: 195
I use mostly 320 or 400 grit. The first time through you may need to use coarser paper. If you have a lot to grind the tip of the tool can get hot. For the most part I just use regular sand paper. And now I formally give all of you permission to copy and improve on these designs. :biggrin:
 
I use mostly 320 or 400 grit. The first time through you may need to use coarser paper. If you have a lot to grind the tip of the tool can get hot. For the most part I just use regular sand paper. And now I formally give all of you permission to copy and improve on these designs. :biggrin:

Thanks Christopher, I believe I will....! (Copy that is; don't know how much 'improvement' there will be...) :wink: Steve
 
Thats pretty cool... I may have to try that. I use the slotted wheel, but this would be perfect if I mess up the angles!

thanks for sharing!
 
Christopher - Thanks a million! I really like my WS but could never get consistency from one sharpening to the next time. This just about guarantees it. And the jigs don't require an advanced degree in joinery to make them or use them. Perfect! I'm with Steve - I'll definately copy but not sure how much improvement might be made!

One suggestion: Submit these to the woodworking and turning magazines. Bet they'd eat them up like Nachos at a Super Bowl party.

Thanks, again!
 
Outstanding!

I'll be in the shop tomorrow morning making these. Think I'll also add one for my scraper at 60 degrees. Now all we need to do is come up with a jig for my bowl gouges. I have a veri-grind jig for holding just need to figure a way to support it at the right angle and height over the ws3000
 
Back
Top Bottom