Ironwood
Member
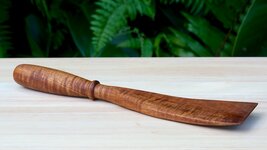
Due to a request on how I make my spatulas, I have taken some progress pics of the process.
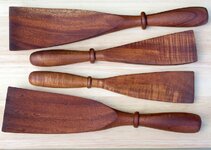
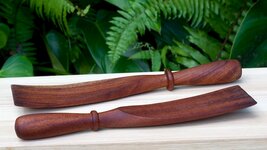
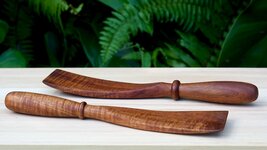
African Mahogany, AKA Khaya is my go to timber because I have found it lasts a long time and cops a lot of abuse, I have one spatula that has lasted nearly 20 years with trips through the dishwasher at least twice a week for that time. Other timbers are fine to use as well, some might not be as durable though.
It might be a good idea to research the timber you intend to use to make sure it is suitable for this use.
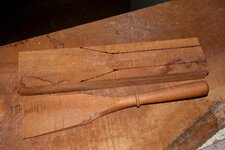
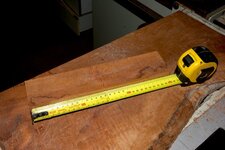
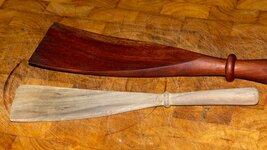
When I decided to make some more spatulas, I found a piece I had cut off the end of a slab, it is 28mm ( 1 1/8") thick, which is good for fairly straight spatulas, if you want to put more of a curve in the blade you will need thicker timber.
For this batch, I cut blanks to 300mm x 75mm x 28mm, (12" x 3" x 1 1/8")

I won't quote handle diameters or lengths, as its a personal thing, make them to the size that feels good to you.
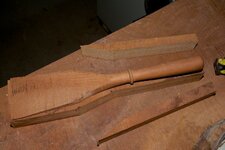
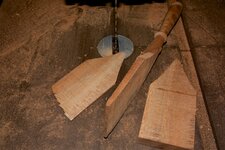
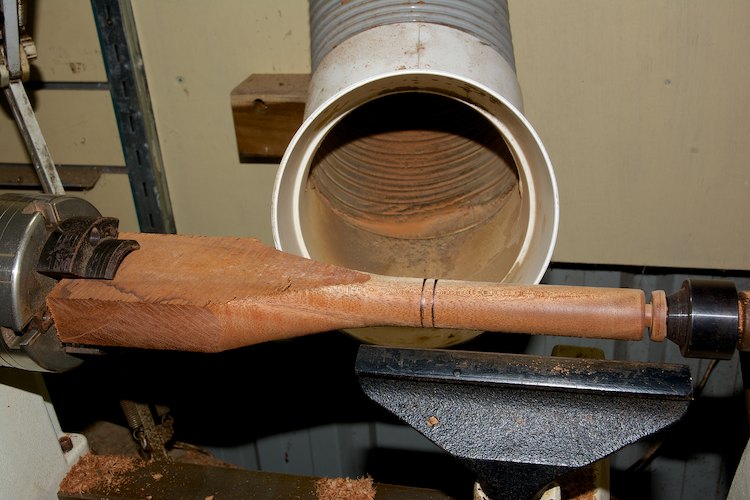
Mark out the handle and the start of the transition to the blade.

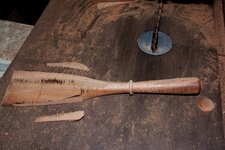
Now cut to your marks on the bandsaw.

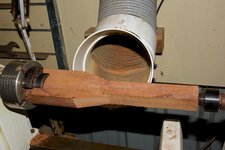
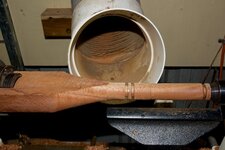
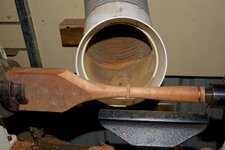
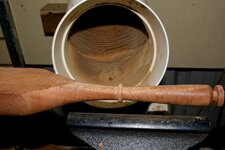
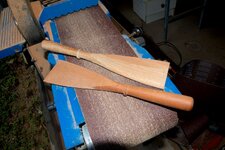
I use my Nova chuck with 2 spigot jaws fitted, clamp tightly once you have the centre of the handle lined up with your live centre. I put a centre punch mark on the end to help with alignment.

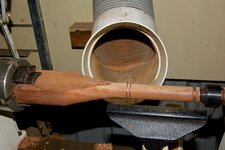
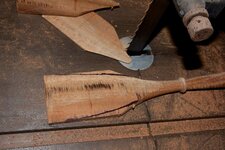
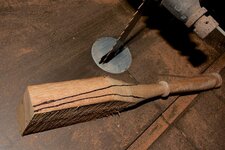
Turn the handle down to the greater diameter that you want, use a parting tool to define the end of the handle, if you want to put a bead on the handle like I do, mark where you want to put it.
African Mahogany, AKA Khaya is my go to timber because I have found it lasts a long time and cops a lot of abuse, I have one spatula that has lasted nearly 20 years with trips through the dishwasher at least twice a week for that time. Other timbers are fine to use as well, some might not be as durable though.
It might be a good idea to research the timber you intend to use to make sure it is suitable for this use.
When I decided to make some more spatulas, I found a piece I had cut off the end of a slab, it is 28mm ( 1 1/8") thick, which is good for fairly straight spatulas, if you want to put more of a curve in the blade you will need thicker timber.
For this batch, I cut blanks to 300mm x 75mm x 28mm, (12" x 3" x 1 1/8")
I won't quote handle diameters or lengths, as its a personal thing, make them to the size that feels good to you.
Mark out the handle and the start of the transition to the blade.
Now cut to your marks on the bandsaw.
I use my Nova chuck with 2 spigot jaws fitted, clamp tightly once you have the centre of the handle lined up with your live centre. I put a centre punch mark on the end to help with alignment.
Turn the handle down to the greater diameter that you want, use a parting tool to define the end of the handle, if you want to put a bead on the handle like I do, mark where you want to put it.