Fred Bruche
Member
Some have asked so here are some more detailed pictures of the clip. Just to mention, there are a handful of things I might consider doing differently next time, including some thin metal band (brass or aluminum, can't decide) at the wood/resin junctions. Threading flexigran works but the treads are not as crisp as I would like, so for the next one I will probably use some alumilite blank or ebonite for the body threads. But for once I stuck with the original plan design.
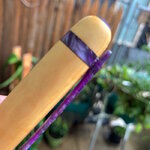
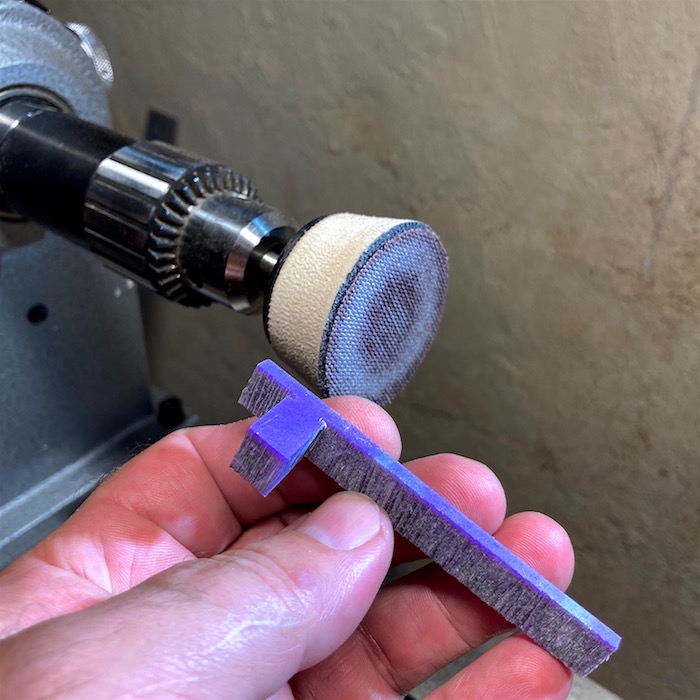
The clip started as a rough shape I cut from the flexigran blank, brought to final shape using handtools (rasp and carving knife) and power tools (on the lathe with sandpaper as shown in the first picture and Dremel), polished using the same tools, finished with Rennaissance wax. On the bottom face of the clip, I shaped a tenon (that was also used to hold the clip during shaping and finishing) to fit in a mortise in the cap flexigran band. I think it took an hour or so from start to finish. The clip was glued with epoxy as the final assembly stage.
I realized the clip was somewhat flexible as I was making it, wasn't too sure how it would hold. Started cautiously testing it, then realized it was holding just fine")

Cap threads were made from Delrin. The ink window is made from pinkish/purplish homemade Liquid Diamonds resin blank.
.jpeg")
I tried my best with pictures using my cellphone, I don't have my usual camera at hand.
C&C welcome.
Fred
The clip started as a rough shape I cut from the flexigran blank, brought to final shape using handtools (rasp and carving knife) and power tools (on the lathe with sandpaper as shown in the first picture and Dremel), polished using the same tools, finished with Rennaissance wax. On the bottom face of the clip, I shaped a tenon (that was also used to hold the clip during shaping and finishing) to fit in a mortise in the cap flexigran band. I think it took an hour or so from start to finish. The clip was glued with epoxy as the final assembly stage.
I realized the clip was somewhat flexible as I was making it, wasn't too sure how it would hold. Started cautiously testing it, then realized it was holding just fine
Cap threads were made from Delrin. The ink window is made from pinkish/purplish homemade Liquid Diamonds resin blank.
I tried my best with pictures using my cellphone, I don't have my usual camera at hand.
C&C welcome.
Fred