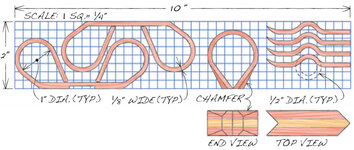
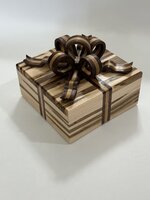
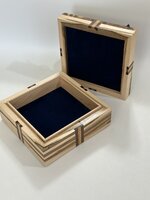
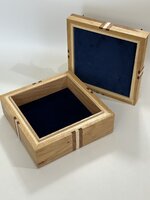
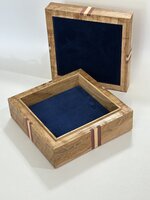
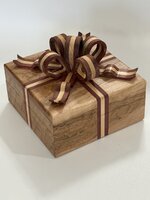
Finally have a method that is repeatable and accurate. To me, these boxes are not successful unless the ribbons line up no matter which way you put the top on. These do, I'm happy to report. The lids fit well with no slop, and the separation between the top and bottom is very tight. Miters came out very well after I ditched the electronic angle finder and went old school with a small tight angle triangle. I also bought a full kerf premium crosscut blade that will be dedicated for miter cuts. Thin kerf is fine most of the time, but I feel I was getting some deflection. I found if these boxes are out of square, even just a little, they just won't turn out to my satisfaction. All of these are lined top and bottom with blue velvet. Comments and critiques are welcomed.
Attachments

Last edited: