Drewby108
Member
So I am mostly clueless with casting. No pressure pot or anything. I made a pinecone egg a while ago, and that is the extent of my experience. I *should* have learned from that. Removing moisture, or at least sealing the wood before casting is vital.
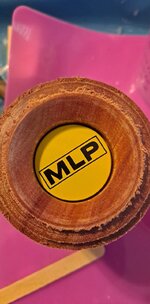
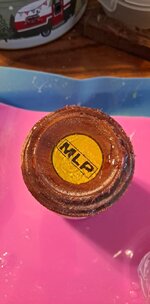
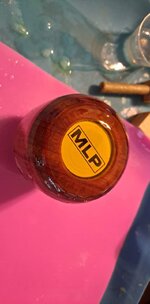
I am making a shift knob for my friend's birthday, and decided to cast his youtube channel's logo into it. I have been fighting almost every part of this project, so I'm not terribly surprised at this rookie mistake. I set the coin with CA glue to keep it still during the pour, had the heat gun ready to go, and got to mixing. The second I poured the alumilite, I realized I didn't treat the raw wood, and the bubbles forming confirmed it. Heat gun helped for 95% of them, but it got too hot and set the surface with a skin and started cooking the edges (I held the gun about 10" from it). I used the mixing stick to push on the skin to adjust the bubbles and get them to rise a bit, but there were still a couple coming out of the wood, even after a half hour.
Oh well. I have a week til his birthday, so I'm not going to remove all this and try again. I'll just hope that most of the problems get turned away when I go to finish it tomorrow night.
The swirly shadows are mostly just the deformations from pushing on the skin. The resin was pretty clear before that. The wood is katalox.