Problems with the Bio epoxy resin and other stuff...!

Signed-In Members Don't See This Ad

robutacion

Member
Joined
Aug 6, 2009
Messages
6,514
Location
Australia - SA Adelaide Hills
Hi great people.

This will be an unusual thread that was possible by the permission of our boss Jeff and the approval between the only 2 members that have been involved in this conversation, unfortunately, it all started by PM and I knew that the information shared would be of great interest to many of you folks, particularly those just starting casting.

According to Jeff, any conversation between members made through the private messaging system can not be copied into the normal thread/post that we see every day, however, and according to Jeff, if all parts involved are in accordance, the private conversation can be copied into a regular thread system so, I will try to copy the info in a way that will not be confusing and or make sense.

Wish me luck.
 
Signed-In Members Don't See This Ad

robutacion

Member
Joined
Aug 6, 2009
Messages
6,514
Location
Australia - SA Adelaide Hills
JustLookin'
Member[/B]
JoinedJun 3, 2019Messages17LocationAustralia
Jun 13, 2019
Hi George,
Thank you for your response to my questions on Bio Casting resin. I hope you don't mind me PMing you.
I was wondering if it would be possible to give you a call to discuss this resin in a bit more detail, as you seem to be the only person I have found that knows about this one, and hopefully you can give me the answers I am looking for.

Lynne[/USER]
 
Last edited:

robutacion

Member
Joined
Aug 6, 2009
Messages
6,514
Location
Australia - SA Adelaide Hills
robutacion
Member

Hi Lynne,

Sure I don't mind you PM (ing) me...!

I don't mind you giving me a call as discuss this resin, I have used about 90 litres of it since the beginning of the year, my only phone number is home on 08 8556 8225 any day after 2:00pm

On the other hand, I would prefer that we can also discuss the issues on the forum so that others can also learn about it, this is a new resin that is replacing many of the older Epoxies, the one I use is made now in Brisbane and I buy it from Adelaide Moulding Supplies.

I have asked a couple of questions on your thread and it would be good if you answer them, I have also expended some info on that same thread to assist John with his comments/concerns.

Cheers
George
 
Last edited:

robutacion

Member
Joined
Aug 6, 2009
Messages
6,514
Location
Australia - SA Adelaide Hills
JustLookin'
Member

JoinedJun 3, 2019Messages17LocationAustralia
Jun 13, 2019
fantastic, and I totally get wanting to have the Q & A on the site to help others, so what I might do is compile my list of questions and ask them on the thread.
I will get on to that in a minute, and if it's ok, I might call you tomorrow if I miss anything :)

Lynne
 
Last edited:

robutacion

Member
Joined
Aug 6, 2009
Messages
6,514
Location
Australia - SA Adelaide Hills
JustLookin'
Member

JoinedJun 3, 2019Messages17LocationAustralia
Feb 11, 2020
Hi George, it was so nice to talk to you today.
I went out and poured some blanks so I could get pics to show you my process. Here goes.
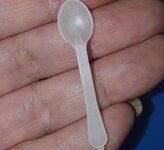
This is the little spoon I use Lynne1.jpg
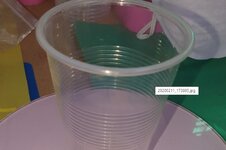
I mix up enough resin to put all 3 blanks, them divide it up into cups Lynne2.jpg
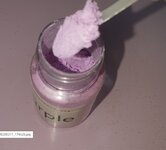
This is how much powder I usually put in Lynne3.jpgLynne4.jpg
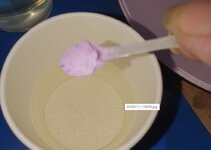
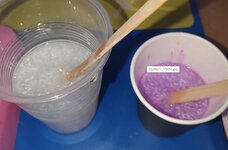
This is what I put in today in to grams of resin. I added slightly less micro pearl to the other cup. Lynne5.jpg
All mixed up, and to me, this color is not deep enough. It's to translucent, but we will see how they turn out tomorrow. Lynne6.jpg
 

robutacion

Member
Joined
Aug 6, 2009
Messages
6,514
Location
Australia - SA Adelaide Hills
JustLookin'
Member

JoinedJun 3, 2019Messages17LocationAustralia
Feb 11, 2020
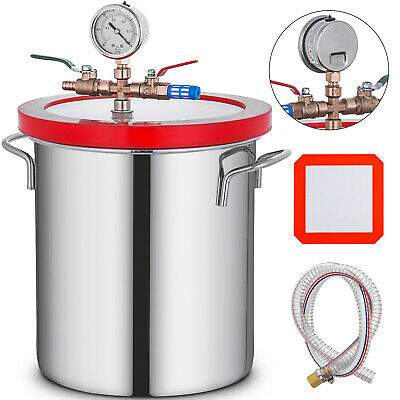
Is this a decent pressure pot?

www.ebay.com.au

5 Gallon Vacuum Chamber Stainless Steel with 220V Pump Degassing silicone gasket | eBay
This heavy-duty vacuum chamber is perfect for applications like degassing urethane, silicons, epoxies, stabilize wood,filling molds, extracting essential oils from organic materials, etc. 【 WIDE APPLICATION 】 - It is perfect for degassing urethane, silicons, epoxies, stabilize wood, filling...
www.ebay.com.au
 

robutacion

Member
Joined
Aug 6, 2009
Messages
6,514
Location
Australia - SA Adelaide Hills
robutacion
Member


Hi Lynne,

That is not a pressure pot but a stabilising chamber, I will have a look of eBay and give you the links of any decent I see...!

I also need to know the volume of resin (ml or gr) of part A and B before you add the powder.

That powder doesn't look like Pearlex but anyway, for a normal 3 blanks mold pour fill that small spoon with the powder as if you were adding it to resin, make sure you try to fill it up as you normally do and they weigh it (powder only) and let me know, none of this info was seen on your pics and I need that info, sorry.

Mistake #1 - with these sort of powders, adding more won't make it any darker, too little the mix gets semi-translucent with little/low pearl effect, too much, the pearl effect increases significantly but the colour stays the same only more opaque/solid. Darkening of certain colours can be achieved by adding small amounts of black, brown, depending on the shade of the original colour.

Cheers
George
 

robutacion

Member
Joined
Aug 6, 2009
Messages
6,514
Location
Australia - SA Adelaide Hills
JustLookin'
Member

JoinedJun 3, 2019Messages17LocationAustralia
Feb 11, 2020
For 3 blanks, I use 104 grams of resin with 51 grams of hardener. The purple was not pearlex brand, it is a natural mica powder I got from china . The micro pearl I used is pearlex.
I will measure the amount of powder tomorrow when I go out to demold the blanks and send that info through as soon as I can.

If I want a good saturated colour, what is the best colourant to use?
 

robutacion

Member
Joined
Aug 6, 2009
Messages
6,514
Location
Australia - SA Adelaide Hills
robutacion
Member

JoinedAug 6, 2009Messages6,278LocationAustralia - SA Adelaide Hills
Feb 12, 2020
Hi,

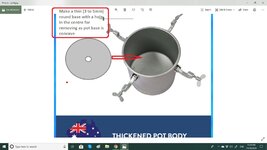
I have just found a great pressure pot for you, not only is rated at 98PSI max pressure but some of the new accessories type on the pot lid are ideal to convert into a casting pressure pot.

This is the eBay link https://www.ebay.com.au/itm/10-Lt-Pressure-Pot-98PSI-Spray-Gun-Tank-Hose-Gauge-DIY-House-Paint-Air-Tools-New/153603376070?_trkparms=aid=333200&algo=COMP.MBE&ao=1&asc=20171012094517&meid=328511fd5fbc4970bdf19f671a57357b&pid=100008&rk=2&rkt=8&sd=131243744457&itm=153603376070&pmt=1&noa=0&pg=2047675&_trksid=p2047675.c100008.m2219

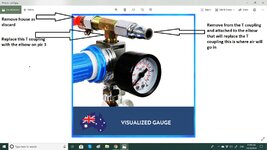
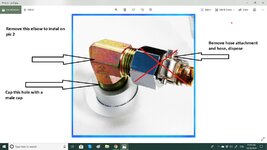
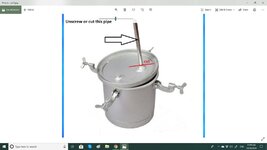
The alterations necessary to turn this paint pot into a casting pot are minimal and very simple, I have screen pasted and edited the images that will show/explain what to do, see attached pics...!

Leaks are what should be avoided to preserve the correct pressure inside the pot after disconnected from the air compressor, any accessories replaced or moved should have white thread tape on the threads of the part, sometimes original parts need to be heated with a hot flame to loosen the glue they use in the factory if reusing those parts use thread tape always when done pressurize the pot to 40 to 50 psi and look for leaks, soapy water helps to find any leaks but in instances where there is a leak but it can't be found by these methods, you may need to find a big enough container where you insert the pressurised pot to locate any leaks.

The lied rubber sometimes doesn't seal properly from factory, in that case, request the gasket replacement from the supplier. There are ways to preserve that rubber seal and at the same time help the rubber to seal better, products such as vaseline are great, remove the rubber seal from the lid rub a small portion of vaseline on the channel where the rubber goes then rub a little bit of vaseline also on both sides of the rubber. To prevent leaks is important that the lip of the pot is clean before putting the lid on for pressurization, a small amount of vaseline around that pot lip does wonders. After a few uses, clean old vaseline and replace with new in all places where vaseline was applied in the first place. I follow these procedures with great results.

If you have any further questions, please ask away...!

Cheers
George
 

Attachments

  • pot setup1.jpg
    pot setup1.jpg
    100.1 KB · Views: 161
  • pot setup2.jpg
    pot setup2.jpg
    136.4 KB · Views: 174
  • pot setup3.jpg
    pot setup3.jpg
    126.3 KB · Views: 149
  • pot setup4.jpg
    pot setup4.jpg
    66.5 KB · Views: 151

robutacion

Member
Joined
Aug 6, 2009
Messages
6,514
Location
Australia - SA Adelaide Hills
robutacion
Member

JoinedAug 6, 2009Messages6,278LocationAustralia - SA Adelaide Hills
Feb 12, 2020

There has always been difficult to find colours with a good saturation, bright/vivid colours tend to provide better saturation but companies such as Pearlex works more on the basis of "mild" colours with a good pearl effect, you can find an array of vivid powder colours in China, some may have been developed for other applications than casting but the majority of them work well with particularly Epoxy resins, unfortunately, you are required to buy large quantities of these powders otherwise they are not interested in small amounts so, colours with pearl effects we are limited here, however, if you are looking for solid colours you will find a number of possibilities at the Adelaide Moulding Supplies.

Hope this helps.

PS: Did you mixed the pink and white pearl to make those 3 blanks...?

Cheers
George
 

robutacion

Member
Joined
Aug 6, 2009
Messages
6,514
Location
Australia - SA Adelaide Hills
JustLookin'
Member

JoinedJun 3, 2019Messages17LocationAustralia
Feb 12, 2020
Hi George,
Unfortunately I can't tell you how much powder I'm using, as my scale does not register it. I tried oz, ml and gram, but it would not register at all. I guess all I can tell you is it must be under 0.1oz.

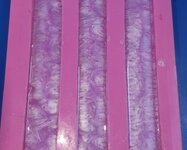
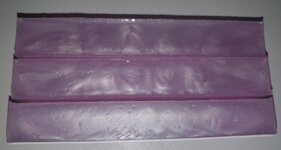
Demolded the blanks. Did not work as expected, but put that down to user error as I rushed to get the resin in the molds so I could cook dinner :)
They were supposed to be pearl white with a purple swirl through it, but I think it has all mixed together to become a very light lilac colour.
 

Attachments

  • Lynne7.jpg
    Lynne7.jpg
    114.4 KB · Views: 189

robutacion

Member
Joined
Aug 6, 2009
Messages
6,514
Location
Australia - SA Adelaide Hills
JustLookin'
Member

JoinedJun 3, 2019Messages17LocationAustralia
Feb 12, 2020
Hi again,
Just have a couple questions I'd like to clarify.
If we get a pressure pot, what psi do we use?
12 hours in the pressure pot, demold, then how long before those blanks can be turned? Is it still 7 days minimum?
 

robutacion

Member
Joined
Aug 6, 2009
Messages
6,514
Location
Australia - SA Adelaide Hills
robutacion
Member

JoinedAug 6, 2009Messages6,278LocationAustralia - SA Adelaide Hills
Feb 12, 2020
Hi,

For casting where only resin is used anything around 40 to 50psi is sufficient.

Yes, about 12 hours under pressure to demold, the amount of time you should wait before turning depends a bit of the ambient temps but 7 days would be ideal, the difference between waiting or not waiting for it to cure properly is the hardness, full hardness is achieved when fully cured.

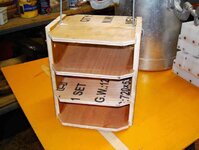
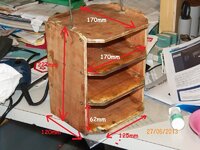
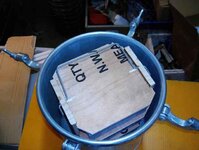
I noticed that you use Silicone molds, it would help considerably with handling the molds into the pot

(particularly while resin is still liquid) and out if you make one of these. timber preparation 005_(1).jpg 002.JPG timber preparation 007_(1).jpg

Using one of these, you don't need that plyboard at the bottom of the pot (inner).

Cheers
George
 

robutacion

Member
Joined
Aug 6, 2009
Messages
6,514
Location
Australia - SA Adelaide Hills
robutacion
Member

JoinedAug 6, 2009Messages6,278LocationAustralia - SA Adelaide Hills
Feb 12, 2020
Well, I understand that may be very difficult to weigh such small amounts of powder without the micro scales but I still believe that you are using too much powder, try to cut the amount in half, on that small spoon make it level with the spoon edges, even from the pics it looks too much for the small amount of resin you're using.

I use one of those 1 litre mixing cups and I have found out that a small teaspoon just full but not too much is the ideal amount of powder if I fill that same spoon right up until it can't hold any more, I pass the saturation point of the resin and the molds take days before I can demold. In general terms, your mix is about 150 mg (part A and B) while mine is about 1,000 mg now make this test, grad a teaspoon and fill it but not excessively, put that powder amount on top of a piece of paper/plastic (make sure is wind/fans blowing into it as you will lose some now grad your little spoon and fill it with the same amount you normally do and put it next to the other pile, the resin amount difference is about 6.5 times so you need to fill your little spoon 6.5 times now compare the 2 piles, you should see a fair difference, right...?

Let me know.
 

robutacion

Member
Joined
Aug 6, 2009
Messages
6,514
Location
Australia - SA Adelaide Hills
JustLookin'
Member

JoinedJun 3, 2019Messages17LocationAustralia
Feb 12, 2020
I will be going out to the shed soon to do another test pour and see what the results are from that one in a week. I will do the test with the powders then.

I was looking for colours that have more depth, or are more opaque, and I found these https://www.arttreecreations.com.au/art-supplies/epoxy-pigment-paste/
Not sure if they will work or not, but I really need to have actually colour, not tints. This is why I add so much powder. I need the colour to be solid. I just didn't know I was compromising the chemicals in doing so
 

robutacion

Member
Joined
Aug 6, 2009
Messages
6,514
Location
Australia - SA Adelaide Hills
robutacion
Member

JoinedAug 6, 2009Messages6,278LocationAustralia - SA Adelaide Hills
Feb 12, 2020
I'm not familiar with those pigments but it says they are paste not powder and that exactly what I said previously, any pearl colours are not completely solid, some colours do a better job at that but colours such as the one you used on the previous mix, they will never produce the solid colour you are after even if you dump a whole new powder container on the 150gm resin that would certainly destroy the resin and maybe would never set hard. The more we go the more I'm convinced excess powder is your main problem.

Now, as I said AMS has these solid colours on sale, I used them in the beginning before I use Pearlex powders, what you have to remember those solid colours are just that, you won't get any pearl effect, you may achieve some pearl effects if you add some white pearl, Mycropearl and any whiteish pearl powders, again don't use too much of the pearl, the other aspect is that whatever the colour you will use, the white pearl may change the depth colour to a slightly lighter shade.

These are the AMS products/pigments https://www.amcsupplies.com.au/product-category/moulding-and-casting-supplies/fillers-and-facecoats

Cheers
George
 

robutacion

Member
Joined
Aug 6, 2009
Messages
6,514
Location
Australia - SA Adelaide Hills
JustLookin'
Member

JoinedJun 3, 2019Messages17LocationAustralia
Feb 12, 2020
I was looking at those on AMS earlier, but the range of colours is very limited, so I went searching for an alternative.
I'm guessing the pastes are better and will give opaque colours as opposed to the translucent we get with the pearlex.

I really have to agree with you about using too much powder. The more I think about it and pour more blanks, the more conscience I am about how much I put in, and am limiting to about half a level spoon in my tiny spoon. Hopefully these will work out.

I did do a test today. One blank with no colour, 1 with a level spoon of colour, and a 3rd with a heaped spoon of colour. It will be interesting to see which ones bend and which don't when we turn them. I will keep you updated with that one.
 

robutacion

Member
Joined
Aug 6, 2009
Messages
6,514
Location
Australia - SA Adelaide Hills
Robutacion
Member

JoinedAug 6, 2009Messages6,278LocationAustralia - SA Adelaide Hills
Feb 12, 2020

As for the correct amounts of the opaque pastes I would be very careful, it doesn't take much to achieve the full colours so, I would start with a small portion and then add a little more if necessary, in fact, saturation is easier to achieve with the liquid colours, paste or no, some resins don't like liquid pigments so again try small batches until you are comfortable with the results.

I have to agree with you that AMS doesn't have a great colour selection of most pigments even the Pearlex ones, I have seen pigments for epoxy resins in China sites that I would love to try but as I said before they ask for large quantities of each colour (min 1kg) and that is just too much. I will look for the results of the new paste colours you sent me the link to, I haven't seen them before and that may explain why they say that this is a new product.

George
 
Last edited:

robutacion

Member
Joined
Aug 6, 2009
Messages
6,514
Location
Australia - SA Adelaide Hills
JustLookin'
Member

JoinedJun 3, 2019Messages17LocationAustralia
Feb 12, 2020
The problem with buying from China right now, apart from having to buy in bulk, is no mail is being sent right now with the cornavirus over there. All business have shut down.

There is another lady in Australia who makes her own blanks and turns these diamond painting pens. I was just looking at her page, and she shows what colours she is using in hers. I think she used to use Allumilite, but now I'm pretty sure she uses the JustResin brand resin,, which I also think is the same as the bio casting resin.

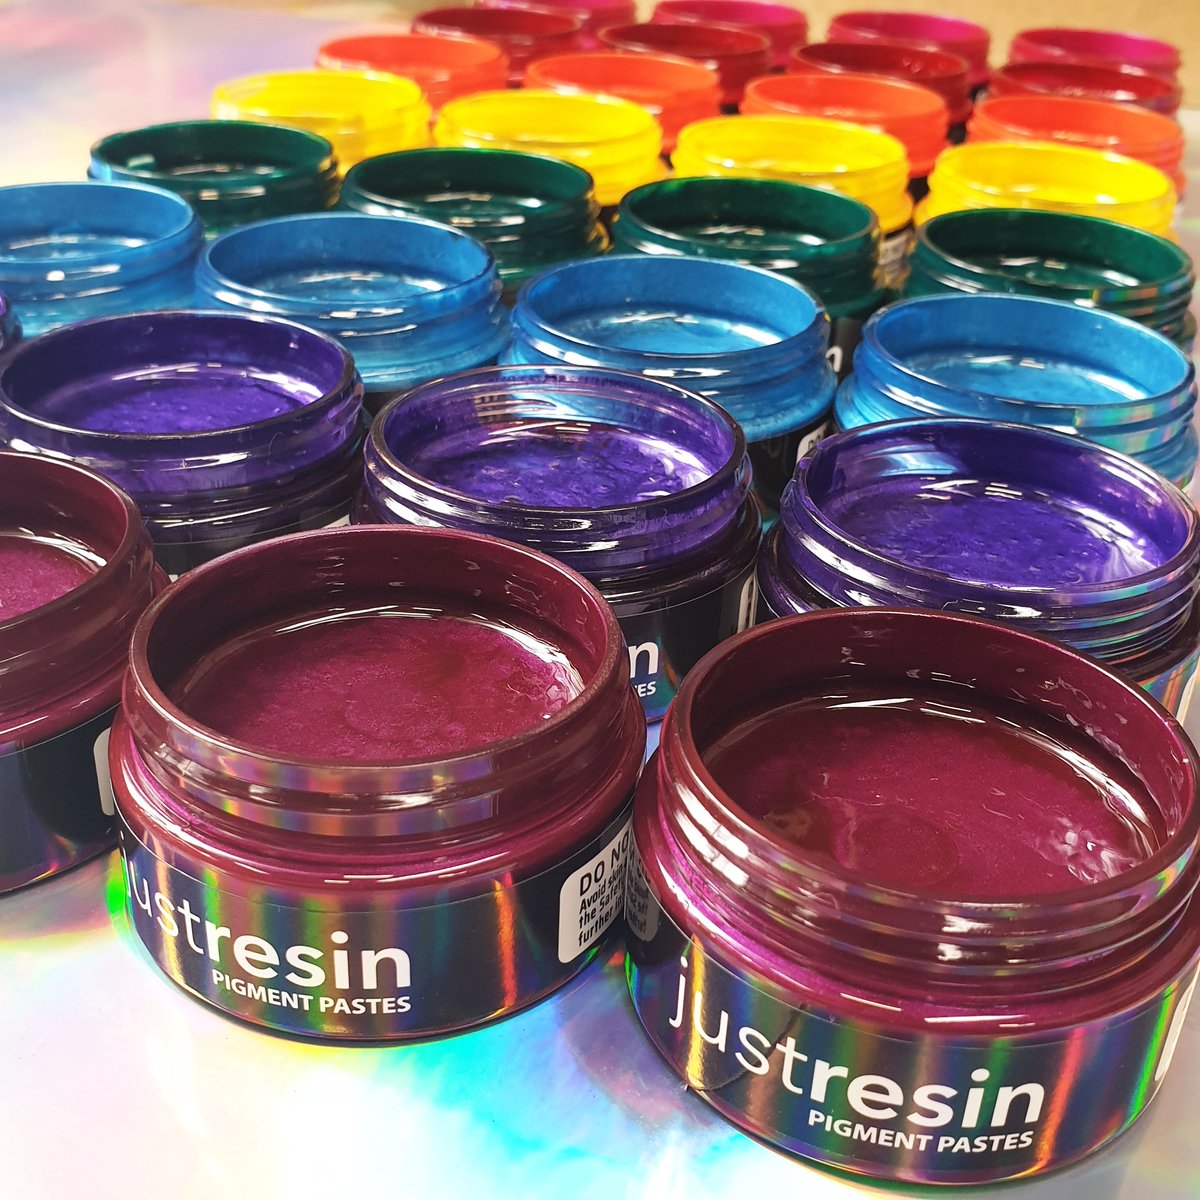
These are what she is using to colour hers, and I must say, her colours are fantastic!

www.justresin.store

All Pigment Pastes
For the inner Artist in YOU! Melbourne Based Online Store shipping Resin Art Products all across the Globe Browse our store where you will find the perfect products for your creative projects! Our range consists of epoxy resin, pigment pastes, mica, metal powders, inks, glitters, & much more
www.justresin.store
www.justresin.store
You searched for lumiere - Adelaide Moulding & Candle Supplies

www.amcsupplies.com.au
Looking at her colours, she uses mostly the Lumiere paints, but also has a great range of the JustResin pastes.

I think I might invest in one or the other and give it a go
 

robutacion

Member
Joined
Aug 6, 2009
Messages
6,514
Location
Australia - SA Adelaide Hills
robutacion
Member

JoinedAug 6, 2009Messages6,278LocationAustralia - SA Adelaide Hills
Thursday at 12:51 AM

Great colour shades on the link you sent me "Justresin" I like to see the various shades from the same base colour and theirs are quite god but again, I don't have much use for solid colours, most of my casts have either burl pieces, various types of Banksia pods and many other materials that require so transparency, the pearl/swirl effects are an add-on for sure.

It would be great it the information we have been sharing through private conversation/old PM system could be shared with everybody on IAP, there are many folks out there that could use the information shared particularly of the pot type and set-up procedures but any casting issues are of interest to most folks that may be having similar issues and not know why...!

PS: Are you buying a pressure pot..?
Cheers
George
 

robutacion

Member
Joined
Aug 6, 2009
Messages
6,514
Location
Australia - SA Adelaide Hills
JustLookin'
Member

JoinedJun 3, 2019Messages17LocationAustralia
Thursday at 3:06 PM
no nothing inside, just a half inch hole drilled at each end to insert the heads.

We were placing tubes in, but they were too small to fit the heads, so I would have to ream the inside with a dremel, which heated the resin so much they would bend, but have not done it that way for awhile.

We start with a short pilot hole, then it goes on the metal lathe to be ground down to about 13mm. After that it goes to the wood lathe where I taper the ends, then sand and polish. Last thing is to drill the holes in the ends deeper.
There is a method to doing it this way, and why we do not drill the holes deep to start with. We found we were getting a lot of breakages along the length of the hole (hubby does not have a soft hand when it comes to tightening things). With having a short pilot hole, we do not lose too much of the length if we need to cut and redrill
 

robutacion

Member
Joined
Aug 6, 2009
Messages
6,514
Location
Australia - SA Adelaide Hills
robutacion
Member

JoinedAug 6, 2009Messages6,278LocationAustralia - SA Adelaide Hills
Thursday at 4:09 PM
Yes, I understand all that but the current process is prone to giving you troubles with people complaining about their bending and become a banana in some cases, the thing is most epoxy resins are too sensitive to heat and even after a blank is fully cured its hardness/stiffness becomes compromised when exposed to heat, this heat can come in many forms but the first one is while working on the blank/piece after that, it all depends on what/how the customer handles the piece and where it puts it when not in use, what I mean is, leaving it in the sun, leaving it in the dash of a vehicle, putting it in a handbag and have that bag in the sun outside or inside of a vehicle, exposing the piece to a strong working light, etc.

You would have a lot less chance of problems if you used the Polyester resin, heat doesn't bother it however it can be brittle if too much catalyst/hardener % is used.

If you don't like the smell of the Polyester and prefer to use the much more expensive epoxy resin, you may need to consider drilling and inserting a brass tube/insert all the way through, there are places that sell brass tubes in every possible size you can think of, I get most of mine here.

There are other interesting products that may be applicable to jewellery making and many similar items, I'm talking about UV resin, have you ever worked with it..?

PS: I'm not trying to be "difficult" with all my observations for no reason, you have requested my assistance so is my obligation to share with you all I know about these issues.

Cheers
George
 

robutacion

Member
Joined
Aug 6, 2009
Messages
6,514
Location
Australia - SA Adelaide Hills
JustLookin'
Member

JoinedJun 3, 2019Messages17LocationAustralia
Thursday at 6:30 PM
You bring up some very good points, and I will address those momentarily, but first i need to share a funny with you. 😂
I just did another test. Bought some acrylic paint and decided to try that to colour the resin. I decided to try and recreate an Opal block i had made last year. Poured about 1/3 of 6 shot cups with resin for the colours, the rest was tinted with micropearl.
The colours mixed well and looked very nice (only a tiny drop of paint was used).
The micropearl resin got to temperature (about 15 minutes), so I poured it into my block mold, then started to drop the colours onto it, hoping it would sink somewhat to the bottom, then i would softly swirl it, as I had done previously.
Well, the pink was dropped on first, and it just sat there! I poked it with a paddle pop stick, and my micropearl resin had gone hard on the top!
I managed to poke a few holes in it, thinking the colour might seep through and maybe I would get something usable. Dumped the rest of the colours onto it and poked a few more holes......Suddenly I had this!
Lynne9.jpg

VOLCANIC reaction!! Not sure if was the paint, or if I had not cleaned the mold properly, but I have never had resin go hard on top as quick as this micropearl did, and never had this reaction before LOL It is crackling away in the shed and I will demold it later tonight or tomorrow.

Ok, yes I think I understand what you are meaning with the care of the pen after sale. Most keep their pens at home as that is where they work on their canvas. Most of these pictures can not be transported, so they are an at home craft.

I do not know how I will cope with the smell of polyester resin. I just today bought a pack of these to try while sanding, as the paper ones are not really that good. Not sure if they would keep the smell out though, plus we keep our workshop locked all the time, as it is quite a way from the house, and do not want anything to disappear.

I honestly am not a fan of the tubes in pens, especially when doing transparent ones. You really don't want to see a brass (or white painted) tube inside a beautiful clear cylinder. I did look for clear tubes, but was unable to find any.

Does the UV resin have a smell? I really do not know a great deal about resins, and was researching what would be the best to use when my (now ex) business partner called AMC to inquire about what they thought would be best. Obviously they said the bio casting resin, so she bought the largest kit she could and had it sent to me.

If you are thinking it is a combination of too much pigment and no tube for stability, then maybe I need to think about trying a different resin.
Do you have any you can suggest?
 

robutacion

Member
Joined
Aug 6, 2009
Messages
6,514
Location
Australia - SA Adelaide Hills
robutacion
Member

JoinedAug 6, 2009Messages6,278LocationAustralia - SA Adelaide Hills
Thursday at 7:04 PM

Oh yes, after a while is not too bad but at first, the smell is overpowering, one of the best things is to use a large fan blowing the fumes/smells out of the shed but not much more you can do about it, unfortunately for us the Polyester resin is about 1/4 of the price of the epoxy, even though I used Polyester for years a few years back I had to change to epoxy due to the CNC machining issues on polyester blocks when I was making e-Cig boxes however, I will still need to continue using epoxy for some blanks, ve got 40 litres of Polyester resin to use on pen blanks, I simply can't continue using such of an expensive resin for them as the cost is getting too high as competition is fierce.

As for your lave explosion, I believe it has to do with the paint you used if is an acrylic/water based paint water in resin don't mix...! Interesting to see what you endup with when you cut them...!

George
 

robutacion

Member
Joined
Aug 6, 2009
Messages
6,514
Location
Australia - SA Adelaide Hills
JustLookin'
Member

JoinedJun 3, 2019Messages17LocationAustralia
Thursday at 7:12 PM
LOL IF they are even usable. I don't think they will be. Live and learn. Never know if you don't try right?

I checked out a polyester resin at bunnings a few weeks ago, and it was really expensive. Clear casting resin about $24 for a small 500g tin. I didn't think it was worth it, so walked away.

Is there a polyester resin with low odour that doesn't cost an arm and a leg?

Did you get the blank yet?
 

robutacion

Member
Joined
Aug 6, 2009
Messages
6,514
Location
Australia - SA Adelaide Hills
robutacion
Member

JoinedAug 6, 2009Messages6,278LocationAustralia - SA Adelaide Hills
Thursday at 10:41 PM
You may maybe able to salvage them but you need a pressure pot, simply put them back in the mold and fill with clear or any other colour you wish, with luck the pressure will fill all those air pockets and turn them solid/usable

I also buy the Polyester resin on AMS 20 litre drum is now $220.00 here, they have other Polyester resin
here that is another $20 bucks over on the 20 lt drum, I don't really know if there is any low odour Polyester resin as I never searched it. You need to try it and see how you go with it, I trust it a lot more to stay firm for pieces as the one you are done and what is really the name of those things you make, I forgot if you have already told me, sorry.

I read what you said about seen a tube painted on not inside a blank that has beautiful swirls and colours moving, however, you are certainly not going to get that effect with solid colours, be prepared for that.

George
 

robutacion

Member
Joined
Aug 6, 2009
Messages
6,514
Location
Australia - SA Adelaide Hills
JustLookin'
Member

JoinedJun 3, 2019Messages17LocationAustralia
Friday at 2:02 AM
I'm still really on the fence about polyester resin. I think it's the smell that turns me off, and not knowing how I will handle that. I have chronic asthma, and the last thing I need is to have a reaction to something....I think this is what is playing on my mind with using poly resin.
What I like about the Bio Casting, is that there is no smell to it. We did have a few really good pens at one point, and any of the clear ones never bent that I've been told anyway.

I'm trying to take everything on board and make a decision about what to do.

So your thinking is that without a tube right through the middle, the pens will ultimately bend at some stage, just with people holding them and using them for long periods of time? Would this still be true if a pressure pot is used?

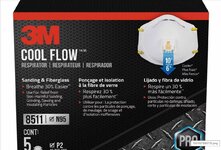
I'm going to have to really think about this one. Do I take a chance and get the colour ratio right, so the blanks are harder, and chance it that they won't bend at all, or do I switch to a resin that I am uncertain about. If I switch to poly resin, don't a need to then get a respirator? They are not cheap, as I was pricing them in bunnings today. I did pick up these, but not sure if they would be ok for use with stinky resin.
Lynne10.jpg
It seems this resin casting is going to end up costing me a lot more than I anticipated.
Alternatively, the last option is to just not make them at all, and continue buying the same old blanks and hope people keep buying them.

Let me know your thoughts on the blank I sent when you receive it and have done your tests :)
 

robutacion

Member
Joined
Aug 6, 2009
Messages
6,514
Location
Australia - SA Adelaide Hills
robutacion
Member

JoinedAug 6, 2009Messages6,278LocationAustralia - SA Adelaide Hills
Friday at 3:13 AM
First of all and before I forget, no, using the pressure pot won't change the fact that epoxy resin is particularly sensitive to heat on unsupported blanks/pens, etc. the next time you have a 40C day grab one of your pieces or blank and see how much it will move just by using the pressure in your hands.

Its a lot more to casting that some people may realise, allergies is a big one, polyester affects a lot of people and yes unless you are working in a well-ventilated space/area you need a respirator with single or double chemical filters, the ones you purchased today are merely dust masks.

You should be able to get a small polyester kit for you to try, and yes, you have to consider all these options and issues related to casting and decided if its worth it or not for you, more and more I see new resin pen blanks on sale made in China and other places that you and I/we will never be able to replicate as they are all done by machine using resins different than the ones we know and the prices are getting cheaper and cheaper reason why I'm not casting much particularly pen blanks, and the ones I do is only because the woods I use on them no ones has so that gives me some advantages, however, to stay competitive I'm forced to go back to the polyester resin that I hate the smell of it but for a 1/4 of the price of the epoxy is my only choice, never the less I have been promoting more the sales of all the bits of timbers I have prepared for casting to others, everybody wants to cast their blanks our days and while fun, interesting and creative I have done many thausands of blanks of all sorts and sizes, is not much fun for me anymore so, I may one day stop casting altogether, will see...!

Cheers
George
 

robutacion

Member
Joined
Aug 6, 2009
Messages
6,514
Location
Australia - SA Adelaide Hills
JustLookin'
Member

JoinedJun 3, 2019Messages17LocationAustralia
Friday at 12:35 PM
our workshop is quite large with a very high roof. It has a window, but that can not be opened, so there is only the door. The workshop is tucked away off the side of another large open shed. It's hard to explain, but I could always pour out of the workshop and still be under cover, but no enclosed if that makes sense.
Would I need a respirator if I poured in this scenario?

I looked at that website you sent with the tubes, and they did not have anything that would accommodate the ends I am placing in the pens. The 2 ends we use are very slightly different sizes, which makes it hard to put a single sized tube in, and easier to just drill a 5mm hole. Onced drilled, the hole is a little bigger than 5mm, and this hole fits the one tip perfectly, where as the other end is a tight fit as it is more like 5.3mm.

I will not be pouring any more blanks with this resin, and have no idea what to do with it now if I can't use it. I have almost a full 15 liter kit. I actually think the resin is a 20l drum and the hardener is a 8l jug.

It's funny, because right from the beginning, I had a feeling this was not the right resin to use. With all the problems we'e been having with it, bending, not polishing to a high shine, and everything else, I think I just knew it wasn't the right type.

I will have a talk to Steve when he gets home, and discus all the information you have given, and we will go from there. You have definitely given me a lot to think about, but I think I really want to make my own blanks. I want to be unique, and I want to be able to offer one off pens to my customers, something they could never buy from anywhere else.

Is there a particular poly resin you would recommend? Are there any that are less stinky than others?
Poly resin uses a catalyst right? It's not the type where you measure 1.1 or 1.2 ratios.
 

robutacion

Member
Joined
Aug 6, 2009
Messages
6,514
Location
Australia - SA Adelaide Hills
robutacion
Member

JoinedAug 6, 2009Messages6,278LocationAustralia - SA Adelaide Hills
Friday at 2:03 PM
The respirator issue is dependent on each individual some people are more sensitive to it than others you may or may not have a reaction with your situation but you will never know unless you try it.

I only used the Polyester resin sold by AMS so I can't answer your question but from what I read from other users overseas, they all confirm the smell issue that some guys say that don't bother them at all.

I believe the problems you have been having of not curing/hardening properly and not shinning enough those are all result of excess powder in the mix and that can happen with any other type of resin.

Polyester resin uses a liquid catalyst/hardener that is calculated by 1% or 2% too much as the resin will crack like glass, depending on the size of the pours, if you mix for example 1 litre and that goes all in a bucket even the 1% will make it shatter for your application 1% in summer and 2% in winter is acceptable. I use a plastic pipette from AMS to measure the drops which you calculate over a scales so, you pour the 3 blank mold resin amount in a cup and weight it then calculate 1 or 2 % of that weight, you then put and small cup on the scales and zero it (same with the resin) then pour drops of the catalyst until you reach the required weight, count those drops please, to complete the mix pour the catalyst into the resin add the colour and mix, your gelling time if you want double or triple colours is a lot shorter than the epoxy and it reacts depending on the quantity you have mixed so you have to experiment and learn the longest you can wait to add other colours.

One of the things I learnt when using polyester and measuring the catalyst is, I work out where in the pipette scale the correct % I want to use is I then mark that with a permanent marker so the next time I just suck the catalyst with the pipette until I reach that mark and voila I don't need to count the drops anymore, off-course this is a lot handier if you pour large amounts of resin as me very rarely I use anything less than 1 lt pours and 3 of them to fill all my molds to go on the 2 pressure pots, I would counting drops for an hour.

Every type of resin will have its goods and bads and all require some time to get it right/earn it.

As for the resin you've got left from what I believe was a 30 litre kit (20lt resin+10lt hardener) keep it for now until you work out what you want to do, this Bio resin is good and easy to work with and very safe, something I can't say about the polyester, the catalyst is a very dangerous chemical a small drop in your eye and is blindness for sure. If you start with any other resin and want to sell the Bio resin I can buy that from you.

George
 

robutacion

Member
Joined
Aug 6, 2009
Messages
6,514
Location
Australia - SA Adelaide Hills
JustLookin'
Member

JoinedJun 3, 2019Messages17LocationAustralia
Friday at 2:46 PM
I am thinking I might go and get the small tin of resin that Bunnings has and give that a go. Pretty sure it is a poly resin as uses a catalyst to harden. Not very cheap, but handy for me to get hold of for testing.
It is in a paint like tin though, so will need to figure out the best way to get it from there to my cups without pouring it all over the place LOL

I generally pour enough resin to make 3 single blanks at a time. Each blank holds roughly 54g of resin, so the most I would mix at once is 162g. I then divide this into smaller cups to add the colours I've chosen.
So for this it would be 1.62g of catalyst if my calculations are right.
Does this resin need to go in a pressure pot, or can I just let it set on it's own? If it works well, and I can handle the smell, I will be getting the pot, but I don't want to outlay money on a pot if I end up not being able to do the blanks.
How long does this resin take to cure usually, and how long does it need to set before being able to turn it?

As for the Bio resin, I could possibly make paper weights from it. People use these to hold down the paper they have folded back on their canvas, so if made in the same colours as pens, could be sold as a set. Something to think about, and if I do decide I won't use it, I will def let you know. I do like the resin, but if it won't work for what I need, then I need to get something that will.

Thinking about the amount of powder put in the mix, I did a lot of research, and from everything I read, it says that you can safely add 6% of your resin weight in colour. 6% of 50g is 3g, and I do not put anywhere near that quantity in my pours, so I am leaning toward the problem being that this resin needs stability. It needs to have the tube in for that, and we are not using tubes, so each pen fails. If I were turning traditional pens, 2 halves with a tube in each, then I would not have this issue, but mine are different, and the only way to put tubes through the middle, is to pour with the tube in the mold. This will then eliminate me being able to do swirls or multiple colours, and also gets me back to having to introduce heat to the ends with needing to ream out the holes to accommodate the tips.
 

robutacion

Member
Joined
Aug 6, 2009
Messages
6,514
Location
Australia - SA Adelaide Hills
robutacion
Member

JoinedAug 6, 2009Messages6,278LocationAustralia - SA Adelaide Hills
Friday at 3:41 PM
I don't know where you read about the 6% colour in a mix that that ain't right. not even close, I would be more inclined to 0.6%, imagine me adding into a 1 litre (1,000gr) resin 6% of powder that would be 60gr the average weight of a full Pearlex container is 21gr, do you thing that 3 full containers of powder in a single 1 litre resin sounds right...? not at all...!

What is the smallest amount of polyester resin you can buy from AMS, I tried to check but the site seems to be down at the moment.

Probably the easiest way to pour from a 1 litre can is to punch 2 holes one on each side of the lid close to the can's edge, the air hole can be small about 5 mm or so but the other end you make a bigger hole with something and then use a sharp stick to close that bigger end when not in use, the other end (air) a simple piece of tape will be enough, you just lift the tape when using it.

Again, I always cast with the pressure pot, bubbles can be your enemy with polyester but you need to try without the pot and see if you like the results. If I remember correctly, I was demolding after 12 hours/overnight and processing the blanks straight away, I recall to have turned round a few blanks after demolding without any issues so, you may want to wait for 1 more day. The thing with polyester resin is that the strong smell in the blanks will decrease as time goes by, the first 14 days are the worse.

Oh, and I have received your blanks this morning, it looked firm enough or normal for epoxy but I will do a few tests and let you know before I return it to you...!

Cheers
George
 

robutacion

Member
Joined
Aug 6, 2009
Messages
6,514
Location
Australia - SA Adelaide Hills
JustLookin'
Member

JoinedJun 3, 2019Messages17LocationAustralia
Friday at 4:05 PM
hmmm, I can't seem to get on to AMC either. Funny, I was on there just 30 minutes ago.
The 500g tin at Bunnings is like $24, plus the cost of the catalyst which is $6.80.

This is the resin. https://www.bunnings.com.au/protite-500g-clear-casting-embedding-fibreglass-resin_p1560654
This is the catalyst. https://www.bunnings.com.au/protite-fibreglass-15ml-resin-catalyst-hardener_p1560662

I know another girl that made some blanks from this stuff and they turned out really good. She didn't use a pot, but did them in the pvc molds, which I have, but I prefer the silicon, because I can see how the colours look.

So basically this resin is quicker for everything....faster to "gel", faster to turn, so could potentially speed up our whole process, apart from the smell LOL Does leaving them outside help eliminate that smell?

I don't suppose you know if this resin is thicker than the epoxy. When I've added stuff like glitter to the epoxy, if I pour into the mold too soon, the glitter always settles on the bottom. Would the poly resin suspend stuff like that better? I'm guessing if this works and we the pot, the pot will help to keep glitters suspended too? What about colour. Is it the same as the epoxy? Can only use a small amount of colour in it, or can I add the colour like I have been.

I have so many questions I know, but I am actually getting a bit excited to try this.
 

robutacion

Member
Joined
Aug 6, 2009
Messages
6,514
Location
Australia - SA Adelaide Hills
robutacion
Member

JoinedAug 6, 2009Messages6,278LocationAustralia - SA Adelaide Hills
Friday at 5:33 PM
Well, if I was to suggest Bunnings resin that wouldn't be my choice because is more for fibreglass than casting even though I read that can be used for casting, casting polyester and fibreglass polyester are 2 different products and it stinks more than the casting polyester. Many folks that I know that tried to use fibreglass resin for casting because it was cheaper or they knew someone in the boating industry that had leftovers, they all had issues with the pours mainly because of fibreglass polyester being normally thinner for easier application but not so good for thick pours. You have the proper casting polyester next to it on the online catalogue

You have an issue with this brand resin that you need to deal with and that is, you are paying $41 for 1 litre and if you want to continue using casting polyester resin you will be paying double that what you can get it at AMS, my last drum was $222 for 20 litres while yours endup costing $41x20=$820 that is the epoxy price or near enough.

The other issue with different brands that you don't know is the clarity, some polyesters dry yellowish while others are crystal clear, the polyester from AMS has been very clear.

You are using far too much powder and that has become clear over our conversations and as I said before, you have the exact same risk of reaching liquid saturation regardless of epoxy or polyester so and as I suggested before, start with half of the amount you have been using and go from there and remember if you are going to use solid colours pastes you won't get any pearl effects and even adding white pearl to the mix may not produce the results you want, again experimentation is necessary.

As for sinking/floatation, regardless of the resin thickness if you pour the glitter or anything else before it starts to gell, it will sink, period. You can pour the glitter early but you have to nurse the resin until it just starts to gell and then you stir it because in a few minutes the resin will be hard and as soon as jelling starts to occurs the resin thickness just enough to keep items such as glitter suspended in the resin.

I can tell you that is a lot easier to do 2 or more colours with polyester than epoxy, because of the amount of resin you use in your average pours of about 160gr, you need to find out how long it takes to start jelling from when you finish mixing it, one inexpensive gadget that you probably already have in your home is a cooking long probe thermometer, the probe is stainless so cleans easily with acetone so, if you put the thermometer is the mix as soon as you finish mixing and watch the change of temps as minutes go by, this changes depending if winter or summer (off-course), you will know when the temp all of a certain starts to rise, the gelling starts from there, you only have a couple of minutes before is too late but if you have everything ready, is still plenty of time, on mine I have another concern and that is that I have to get the molds in the pressure pot and pressurised before it sets otherwise any crevasses/voids won't be filled.

Your questions are normal from someone trying to learn the "ropes", I had dozens of guys and gals asking the same/similar questions, we all want to get good at things very quickly and avoid wasting time and materials but, I can give you all the information in the world but you still need to put it into practice and adjust things to suit you and get the results you want or expect, with casting you don't always get what you want or expect, even folks like me that have been casting all sorts for so many years, we still have stuff-ups and that is just part of the casting world.

I just wish that when I started casting I had someone like myself to show me the ropes and prevent me from making so many mistakes so consider yourself lucky...!;)

Cheers
George
 
Signed-In Members Don't See This Ad

robutacion

Member
Joined
Aug 6, 2009
Messages
6,514
Location
Australia - SA Adelaide Hills
JustLookin'
Member

JoinedJun 3, 2019Messages17LocationAustralia
Friday at 5:50 PM
I may have a solution to my problem, and not have to change the resin after all.

I was explaining to my son's girlfriend why I can't use the blanks I just made, and saying how I needed to have a tube through them to stabilize the pen, which then meant having to ream the ends again to make the hole large enough to fit the ends.
I said I couldn't do translucent colours, because you would see the rod, and my son asked why I couldn't use a piece of plastic tube. Then a lightbulb must of gone off, because he followed that with "or why not 3d print a rod to the size you need".
I have used 3d printed inserts in my blanks, and does work. By using translucent filament, you would barely be able to see the rod in the center. I could also make the rod to fit the pen ends perfectly, so no need to have to ream the ends.

I am going to give this a try. Will take a few days, as I have to draw up the design for the rod first, then print it, but I am hopeful I might be on a winner here.

Doing swirls around a tube will be a challenge, but I like a challenge, and if there is a way to make it work, I will find it LOL

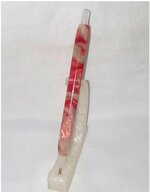
This was made with a diagonal insert I 3d printed in translucent. You can hardly make out the lines between the colours.

Lynne11.jpg

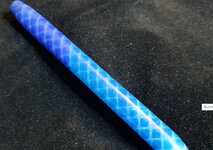
And this was made with a honeycomb insert
Lynne12.jpg

I just read your last reply to me, as I was excited and started writing to you before you had replied, and yes, i will cut back the amount of colour I add to my resin, and I am going to get some of the new pastes as soon as I can afford it. You can buy a luster paste which has the shimmer in it, so will be getting some of those also, but I need to make some $$ first, so am stuck with the pearlex for now.

Believe me, I am so very grateful for all of your help in answering my questions, and helping me find solutions to my problems. I will be forever in your debt.
As for the blank I sent you, please don't worry about sending it back. Just toss it in the bin, unless you wanted to turn it and see how much it bends hahaha
 
Top Bottom