Rob, I have been looking at the PM 2014 for my next lathe. Please let us know what you think about it. Could you please measure the footprint (just the base on your machinist surface) the description said 52" total, I assume that counts the motor. I may not need to make a new turning station. Thanks!
Sent from my iPhone using
Penturners.org mobile app
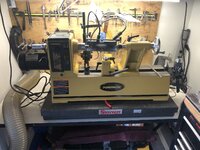
base depth ~11.5"
base width ~32.5" + motor overhang on left side 8.5" (you can slide it to the right, but that will decrease your center point distance)
height from base to center line is ~ 14.5"
Important Note:
You can not plug it into a gfci outlet, it will trip due to the phase inverter. I was successful in plugging it into an outlet that has a gfci/afci 20 amp breaker that I use for my metal lathe. I called Powermatic, and the recommended that I not use GFCI outlet plugs, or outlets that are daisy chained to a gfci outlet due to the inverter. The tech on the phone, was still a little leery about using the gfci/afci breaker. I will swap out to a standard plug, and I understand the ramifications of possible electrocution due to water. So I think I'll go with a single plug outlet option.
The cons:
I'm used to the Jet 1221vs pulley system which is crazy fast for swapping back and forth, this one is much tighter, we will see how it works out.
i'm also used to the large wheel on the jet on the motor side, for threading. I think I will have to get used to power threading on this baby
The pros
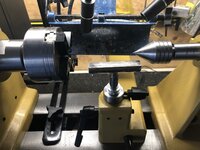
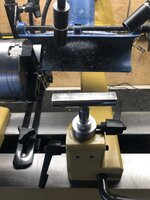
The tail stock is a proper heavy duty design, love it. The engagement in the bed gap from the tail stock is double that on my Jet. There is 0 play, which is a big win! The tail stock also lock up easily with the handle. Always felt like my Jet could have used a little more legnth.
It comes apart in 3 places, the heaviest is the motor. I was able to set it up, without problem. That is removing the tool rest, tailstock and motor. Placing the base, then adding everything on one at a time.
It just radiates this sense of mass and gravity.
The motor control is on a wired magnetic remote, so you can put it where you want it.
That is all I got for now. I powered it up to 900 rpm, sounded fantastic.
Hope to turn this weekend. However, I have to use adapters for my chucks, waiting on supernova chucks that are on back order.
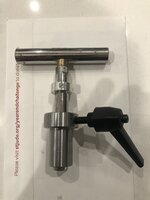
I also already bought a direct 1-1/4-8 Beall ER32 collet, I did this to reduce the tolerance stack up when using an adapter, which is critical when doing kitless or ring work.
Merry Christmas


")
")