ed4copies
Local Chapter Manager
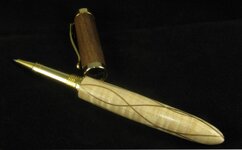
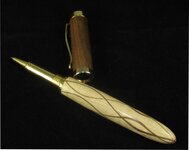
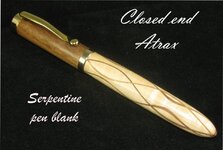
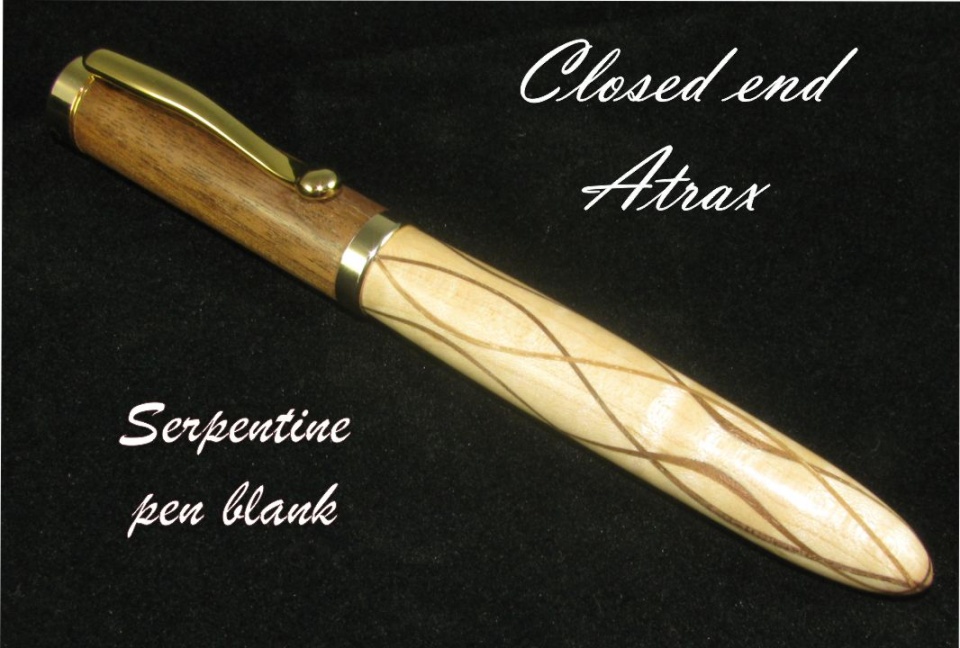
Haven't seen many closed end pens on the ol' IAP recently, so I thought I would make one from our new Serpentine blanks, made by TerryQ!!
The blank "does the talking", so a simple pen kit seems the right choice--I picked an Atrax Upgrade gold. Thought it would look nice with a simple cap.
Well, I made the video and in the process of the steps, everything went well.
The pen was complete and I felt it was successful.
So, why do I say I was out of practice??
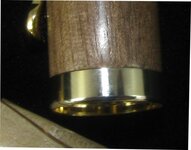
Because I needed a cap---seemed simple, cut a little piece of walnut, make a cap---done it hundreds of times. So, I did it again!
Assemble the pen and "oh, sh_____ucks!!" The centerband does not mate with the wood all the way around the pen--the wood was never faced!! So, DISASSEMBLE the cap.
I have had many people tell me you can't disassemble these caps without destroying the black plastic threaded piece. So, trying to view this as a "teaching opportunity" I set about trying to disassemble without breaking.
Knocking the clip and clip holder off was easy. Then, I inserted the largest punch that would fit into the tube (.452" diameter). Grabbed my trusty hammer and started hitting, while holding onto the cap. About 3 minutes passed before anything moved. Then, the centerband moved "an inkle". I felt the problem was solved, it had started and would now move more swiftly. WRONG!!!
I beat on that punch for a little less than 10 minutes and my hands were getting sore. The metal part of the centerband was out far enough that I could grasp it with my fingers and I was able to remove it. Now, I contemplated supporting the cap with a piece of wood, drilling a hole to accomodate the black plastic coming out. HOWEVER, if I did that, the cap would be resting on the Walnut and would be VERY LIKELY to crack. So, I abandoned that plan and continued hitting the punch for a few more minutes, then called it a night (tomorrow I will feel stronger).
I considered putting WD40 on the inside, but I was afraid it would seep out and penetrate the walnut--which would make it stained and crummy looking---I really wanted to succeed so I could tell everyone HOW to do it.
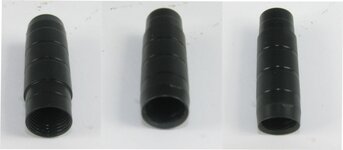
Tonight, I went back down and beat on it for several more minutes. The part came out. To my amazement, it looks like it is brand new. Pictures attached.
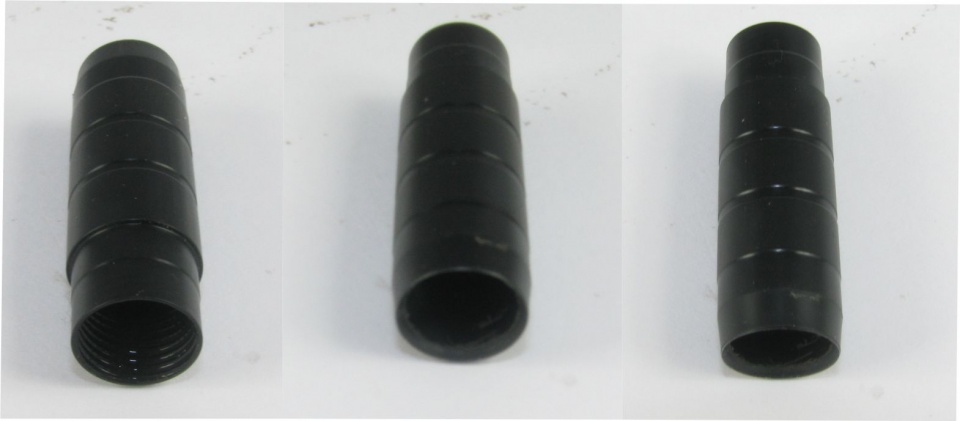
From both ends and close-up of plasic where it was hitting the punch.
Then, I took the cap to the lathe and faced both ends (the step I forgot yesterday). The repair and the parts are shown here.
My only comment is "It definitely AIN'T EASY!!!!" But I was the dumb spit that made the mistake, so it was my job to fix it---and I did---YOU can too, if you are an equally dumb spit to MAKE the mistake and determined enough to FIX it.
The diameter of the punch IS important. The pressure was on the outside of the plastic piece, so it survived nicely. I can't think of an easier way and this way was NOT easy. But, it CAN be done!
Proof below.
And I really value this pen a lot more than most---I WORKED for this one!!
Comments and "better ideas" encouraged!!!
Ed
The blank "does the talking", so a simple pen kit seems the right choice--I picked an Atrax Upgrade gold. Thought it would look nice with a simple cap.
Well, I made the video and in the process of the steps, everything went well.
The pen was complete and I felt it was successful.
So, why do I say I was out of practice??
Because I needed a cap---seemed simple, cut a little piece of walnut, make a cap---done it hundreds of times. So, I did it again!
Assemble the pen and "oh, sh_____ucks!!" The centerband does not mate with the wood all the way around the pen--the wood was never faced!! So, DISASSEMBLE the cap.
I have had many people tell me you can't disassemble these caps without destroying the black plastic threaded piece. So, trying to view this as a "teaching opportunity" I set about trying to disassemble without breaking.
Knocking the clip and clip holder off was easy. Then, I inserted the largest punch that would fit into the tube (.452" diameter). Grabbed my trusty hammer and started hitting, while holding onto the cap. About 3 minutes passed before anything moved. Then, the centerband moved "an inkle". I felt the problem was solved, it had started and would now move more swiftly. WRONG!!!
I beat on that punch for a little less than 10 minutes and my hands were getting sore. The metal part of the centerband was out far enough that I could grasp it with my fingers and I was able to remove it. Now, I contemplated supporting the cap with a piece of wood, drilling a hole to accomodate the black plastic coming out. HOWEVER, if I did that, the cap would be resting on the Walnut and would be VERY LIKELY to crack. So, I abandoned that plan and continued hitting the punch for a few more minutes, then called it a night (tomorrow I will feel stronger).
I considered putting WD40 on the inside, but I was afraid it would seep out and penetrate the walnut--which would make it stained and crummy looking---I really wanted to succeed so I could tell everyone HOW to do it.
Tonight, I went back down and beat on it for several more minutes. The part came out. To my amazement, it looks like it is brand new. Pictures attached.
From both ends and close-up of plasic where it was hitting the punch.
Then, I took the cap to the lathe and faced both ends (the step I forgot yesterday). The repair and the parts are shown here.
My only comment is "It definitely AIN'T EASY!!!!" But I was the dumb spit that made the mistake, so it was my job to fix it---and I did---YOU can too, if you are an equally dumb spit to MAKE the mistake and determined enough to FIX it.
The diameter of the punch IS important. The pressure was on the outside of the plastic piece, so it survived nicely. I can't think of an easier way and this way was NOT easy. But, it CAN be done!
Proof below.
And I really value this pen a lot more than most---I WORKED for this one!!
Comments and "better ideas" encouraged!!!
Ed