monophoto
Member
Here's a suggestion for those of you whose significant other is into knitting or some other yarn-based craft.
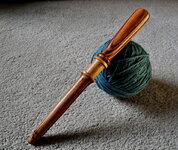
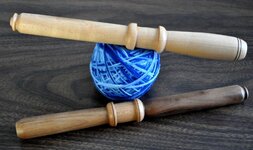
A nøstepinne is a tool used to wind yarn balls. The word translates from the Scandinavian as 'next stick', and is a simple turning - a 4" handle on the end of a 5" spindle (and the dimensions aren't critical). The spindle is about 1" at the handle end, and has a very slight taper so that it is easier to remove the completed yarn ball. It is important that the spindles be as smooth as possible so that there is nothing for the yarn to catch on.
I've been making a version with a yarn gage between the handle and the spindle. A yard gage is nothing more than a square-sided 'cove' that is exactly 1" wide. To use it, wind the yard into the gage without stretching, and then count the number of turns required to fill that 1" space to determine the yarn gage in threads-per-inch.
The nøstepinne on the yarn ball was made from maple, while the tool in the foreground was made from scraps of walnut and cherry. Both were sanded to 800 grit, polished with Dr. Kirk's Scratch Freee, and the finished with a home-made shellac/wax mixture.
There are a number of very good videos on YouTube on how to use a nøstepinne. Here are some links:
[FONT="]http://[/FONT][FONT="]www.youtube.com/watch?v=DNovkZdRl7M[/FONT]
How to Wind a ball of yarn on the nostepinne by Noreen Crone-Findlay (c) - YouTube
Nostepinne - YouTube
Using a Nostepinne - The Woolery | The Woolery
Attachments
Last edited: