
A week or so ago, I started a thread for discussing what we would want in a kitless slimline pen.
I think there was a preference for a click pen; definitely people wanted it slim and as close to the original Slimline as possible; also wanted was shirt pocket length. . An important requirement was that the refill should be a Parker-style rather than a Cross-style as in the original slimline.
Over the last few days I have been working on making such a pen. Here it is in its nearly finished form; the clip still needs some work and the final polishing process is required which will get rid of the photographically exaggerated scratches you see. .Trust me - they are very superficial. . Please excuse the photography, especially the out-of-focus first picture.
To make this pen, I used parts from the PSI Slimline Pro kit which is based on 8 mm tubes for a two-barrel pen. . I have made it as a single barrel instead, thereby omitting the centerband/tube_coupler. I also left out the brass tubes. . The other parts I have used, two of them in modified form. One feature of the Slimline Pro is that you unscrew the nose cone in order to replace the refill. . I have retained that feature. . Although the Slimline Pro kit is supplied with a gel refill, I have replaced that with the metal Parker-style; it happens to be the same length which is good.
The click mechanism, pushbutton, clip, and nose_cone coupler have been used unaltered. . The nose_cone has been reduced in diameter to 0.33" to be the same as the original slimline. . The top finial, through which the pushbutton protrudes, has been reduced to the same diameter. . You may not notice the fact that the clip support ring has not yet been reduced, but it should be and it will be when I figure out how to do that. . Obviously, I could use a fine file but I would like to find a machine method which is not so tedious.
OK, so let's see some pictures ! . I will describe my methods in the second post of this thread.
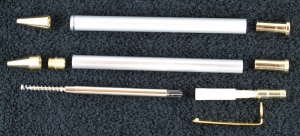
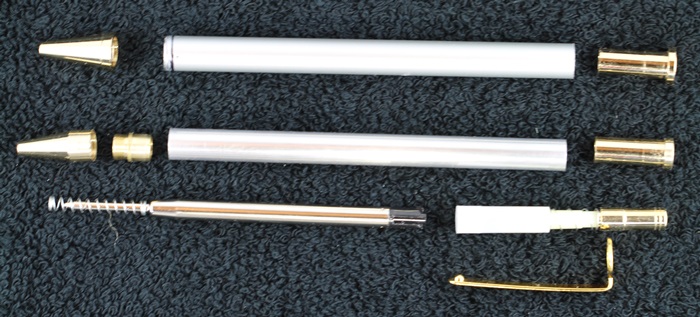
The first picture shows the unassembled parts plus the 3/8" aluminum rod that was the start at the top. Parts that were used unaltered are shown once in the picture, and parts that were altered are shown in both their original and altered form. . I hope that makes the picture meaningful.
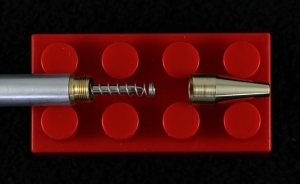
The second picture is an end view of the correctly sized aluminum barrel with the end bored out to accept the nose_cone_coupler threaded piece. . The other end of the barrel is also bored out, to the same diameter but greater depth, to accept the click mechanism and the top finial.
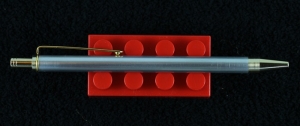
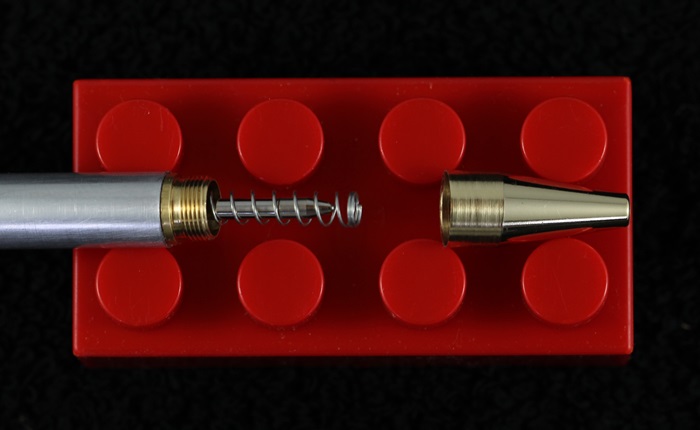
The third picture shows the nose_cone unscrewed so that you can see the threaded nose_cone_coupler, the main spring, and the method of replacing the refill.
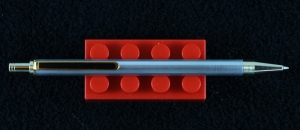
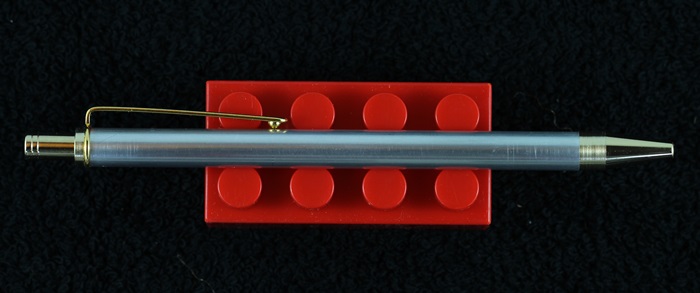
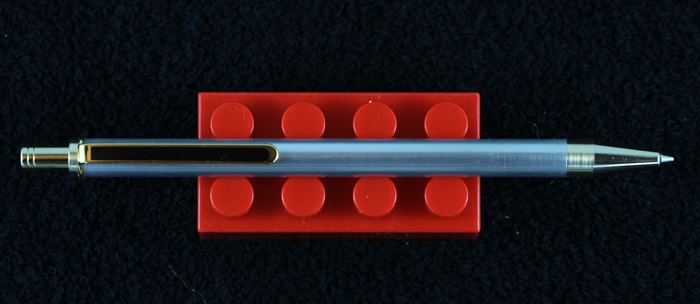
Pictures four, five and six show some views of the nearly finished pen with the refill both extended and retracted.


I think there was a preference for a click pen; definitely people wanted it slim and as close to the original Slimline as possible; also wanted was shirt pocket length. . An important requirement was that the refill should be a Parker-style rather than a Cross-style as in the original slimline.
Over the last few days I have been working on making such a pen. Here it is in its nearly finished form; the clip still needs some work and the final polishing process is required which will get rid of the photographically exaggerated scratches you see. .Trust me - they are very superficial. . Please excuse the photography, especially the out-of-focus first picture.
To make this pen, I used parts from the PSI Slimline Pro kit which is based on 8 mm tubes for a two-barrel pen. . I have made it as a single barrel instead, thereby omitting the centerband/tube_coupler. I also left out the brass tubes. . The other parts I have used, two of them in modified form. One feature of the Slimline Pro is that you unscrew the nose cone in order to replace the refill. . I have retained that feature. . Although the Slimline Pro kit is supplied with a gel refill, I have replaced that with the metal Parker-style; it happens to be the same length which is good.
The click mechanism, pushbutton, clip, and nose_cone coupler have been used unaltered. . The nose_cone has been reduced in diameter to 0.33" to be the same as the original slimline. . The top finial, through which the pushbutton protrudes, has been reduced to the same diameter. . You may not notice the fact that the clip support ring has not yet been reduced, but it should be and it will be when I figure out how to do that. . Obviously, I could use a fine file but I would like to find a machine method which is not so tedious.
OK, so let's see some pictures ! . I will describe my methods in the second post of this thread.
The first picture shows the unassembled parts plus the 3/8" aluminum rod that was the start at the top. Parts that were used unaltered are shown once in the picture, and parts that were altered are shown in both their original and altered form. . I hope that makes the picture meaningful.
The second picture is an end view of the correctly sized aluminum barrel with the end bored out to accept the nose_cone_coupler threaded piece. . The other end of the barrel is also bored out, to the same diameter but greater depth, to accept the click mechanism and the top finial.
The third picture shows the nose_cone unscrewed so that you can see the threaded nose_cone_coupler, the main spring, and the method of replacing the refill.
Pictures four, five and six show some views of the nearly finished pen with the refill both extended and retracted.


Last edited:

")