Minimizing Speed Changes

Signed-In Members Don't See This Ad

tv68

Member
Joined
Jan 2, 2020
Messages
55
Location
MD
Hi all, I'm new to the forum so apologies in advanced if this has been covered at length elsewhere.

I just started penturning and in the interest of cost opted for the Excelsior Mini Lathe. Well after turning my first pen yesterday, I now see why variable speed is the way to go.😄 Nevertheless, I'm stuck with the Excelsior for the time being.

So my question to you all is this - is there a way to turn pens that requires no (or minimal) speed changes and still produces an excellent result? This should take into account drilling (which I'm doing on the lathe), turning, sanding, finishing, etc.

Thanks for your help!
 
Signed-In Members Don't See This Ad

leehljp

Member Liaison
Joined
Feb 6, 2005
Messages
9,331
Location
Tunica, Mississippi,
Find a happy medium. Turn at about 1800 rpm. Go easy on the sandpaper. You probably won't like the results until you get well experienced. 1800 is too high for CA application or other finishes, but it is doable. Until I got VS, I swapped from low to high, just used those two. It was a pain.

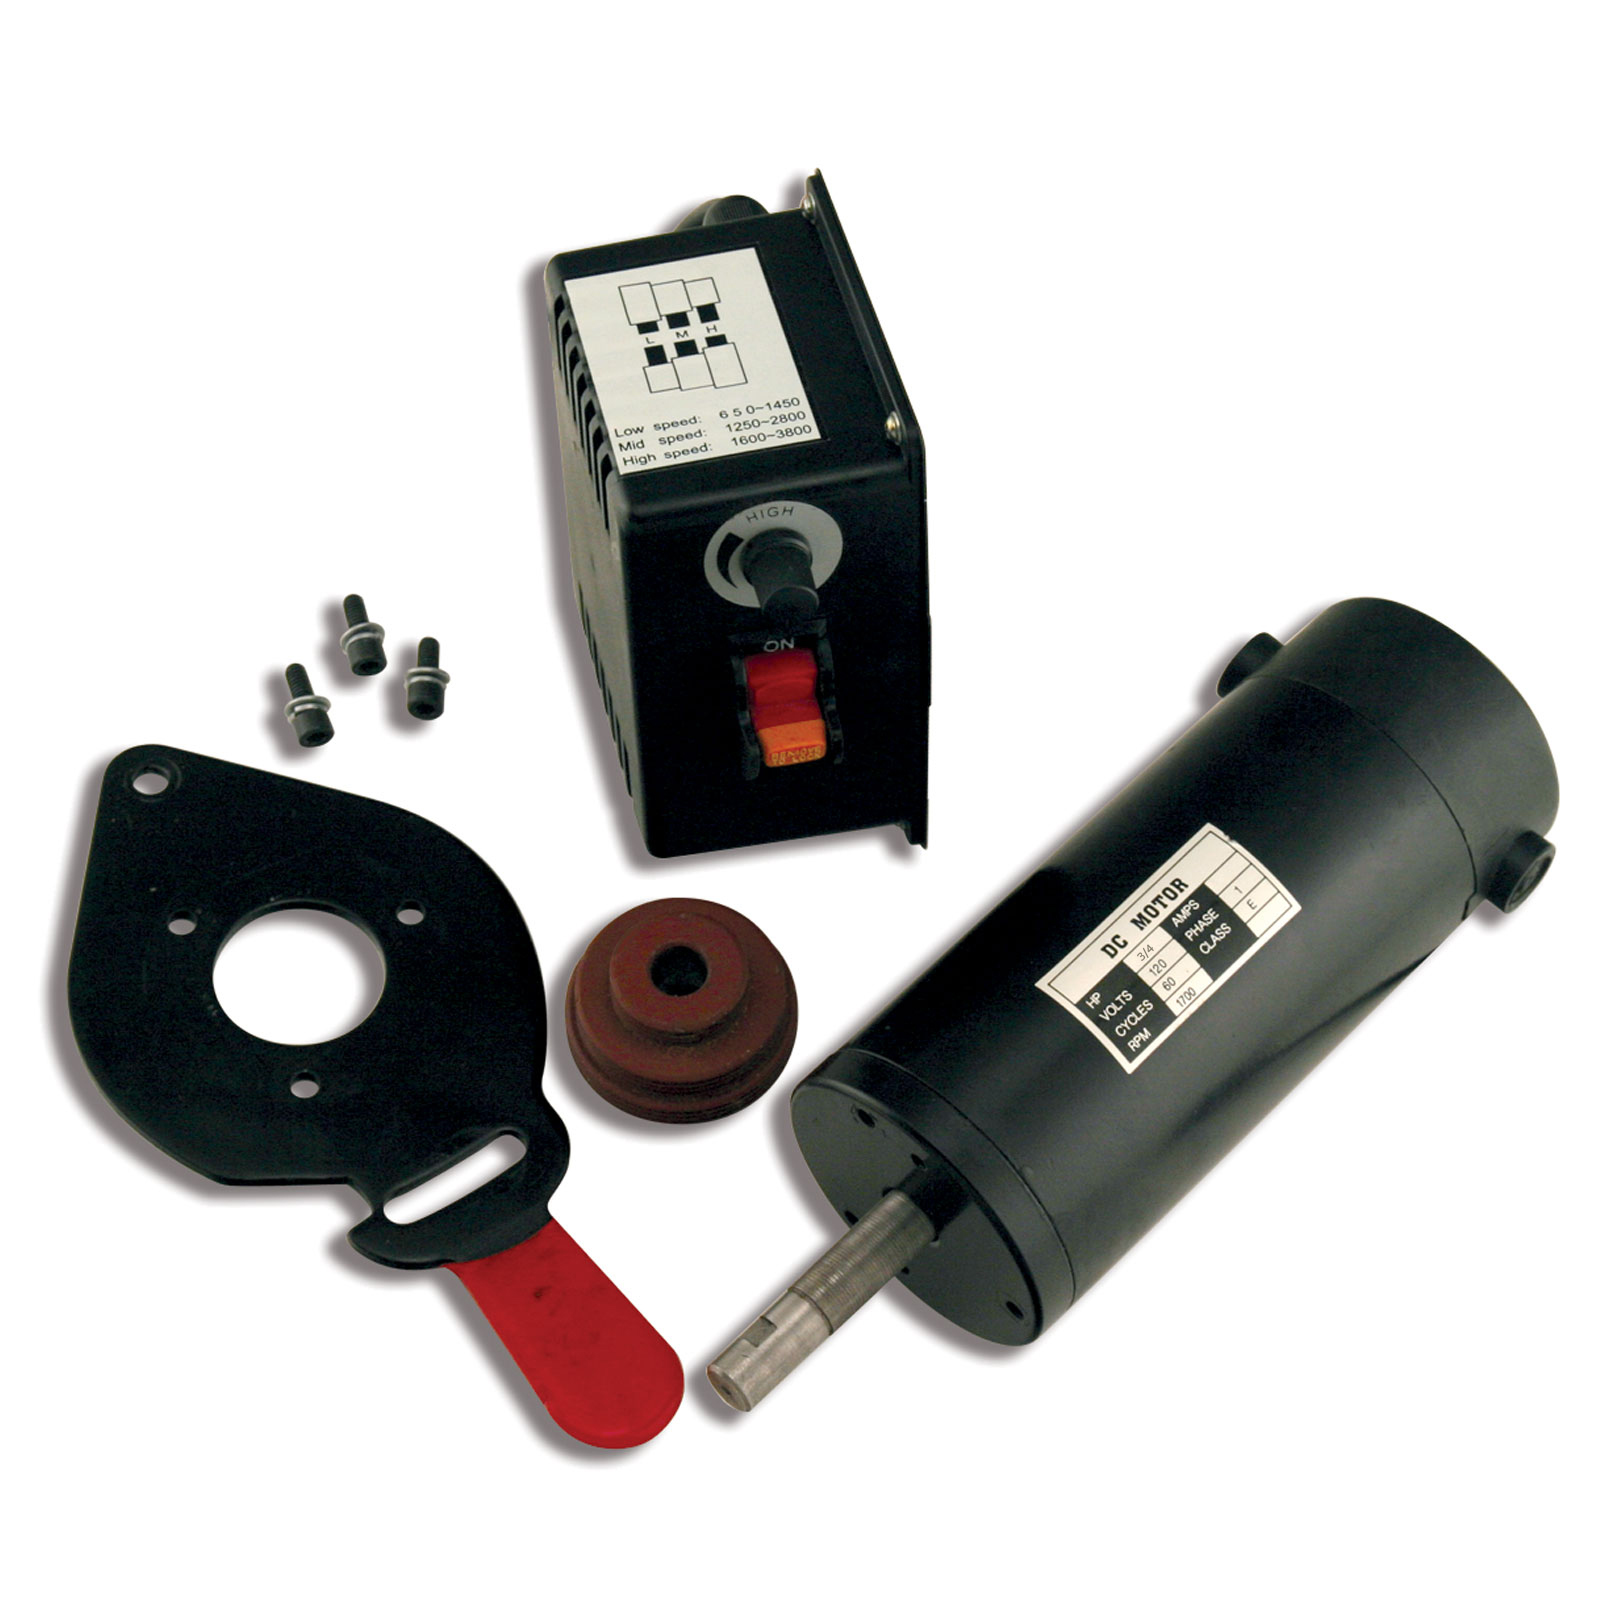
Here is a VS conversion kit for $170 plus shipping:

I have that on my Rikon and also have a VS Grizzly.
 

tv68

Member
Joined
Jan 2, 2020
Messages
55
Location
MD
Find a happy medium. Turn at about 1800 rpm. Go easy on the sandpaper. You probably won't like the results until you get well experienced. 1800 is too high for CA application or other finishes, but it is doable. Until I got VS, I swapped from low to high, just used those two. It was a pain.

Here is a VS conversion kit for $170 plus shipping:

I have that on my Rikon and also have a VS Grizzly.

Thanks, Hank. Is it possible to just turn the lathe off and turn by hand for the CA application?
 

Grampy

Member
Joined
Dec 28, 2019
Messages
61
Location
Michigan
We all have some 'envy' for the next 'better' tool.. don't lament, use what you have.. If you decide V/S is important, you'll have it someday and you can either have a "dual" lathe setup (OH YEAH!!! mans dream) or pass it down to your kids etc.

My perspective... Belt / pulley changes (aka speed changes) are one of many "re-toolings" we encounter being 'small' operations.

Handle it as such, and get into the habit (as I do) make several at a time (even different styles)
-Cut all the blanks ( I made a "sled for my band saw to make this easier)
-drill all the blanks (slowest speed) (bunch together by drill sizes, change bits between)
-glue tubes in all the blanks
-square all the blanks (slowest speed) (bunch together by drill sizes, change bits between)
-turn all the blanks (speed based on mat'l and tools) (re-tooling the mandrel for different styles)
etc...

I have contemplated using my drill press for drill / squaring operations to limit the re-tooling on the lathe.. but man I love using the lathe as a horizontal boring machine.
 

Roger Schlenz

Member
Joined
Feb 10, 2016
Messages
40
Find a happy medium. Turn at about 1800 rpm. Go easy on the sandpaper. You probably won't like the results until you get well experienced. 1800 is too high for CA application or other finishes, but it is doable. Until I got VS, I swapped from low to high, just used those two. It was a pain.

Here is a VS conversion kit for $170 plus shipping:

I have that on my Rikon and also have a VS Grizzly.
It also fits on the Harbor Freight #65345 lathe (which I was told at my Rockler store was made by the same company in China that produces the Excelsior lathe.) The kit goes on with NO problems on my Harbor Freight lathe, except what to do with the old single speed lathe motor.
 
Last edited:

magpens

Member
Joined
Feb 2, 2011
Messages
15,911
Location
Canada
@tv68
Thanks, Hank. Is it possible to just turn the lathe off and turn by hand for the CA application?
Doug, I know that you addressed the question to Hank, but perhaps I can "butt in".

You can indeed turn the lathe by hand as you apply the CA from a piece of blue shop towel (which is my preference), or piece of craft foam.
However, I find that it is better for the lathe to be turning at constant speed so that the CA goes on more uniformly. . You cannot get constant speed when turning by hand.
FWIW, I like to have the lathe turning at (I am guessing) about 15 RPM when I apply the CA.

I might add that my CA application technique has evolved to a two-handed method, and for this method a powered lathe is required.
With my left hand, I hold the CA bottle just slightly above the turning blank and drip the CA from a small hole in the CA bottle's nozzle.
With my right hand, I oscillate the blue shop towel underneath, and in contact with, the turning blank, in order to spread the CA.

Applying CA to a blank is a very personal process, I found. . Everybody needs to experiment and develop their own method.
 

Roger Schlenz

Member
Joined
Feb 10, 2016
Messages
40
Hi all, I'm new to the forum so apologies in advanced if this has been covered at length elsewhere.

I just started penturning and in the interest of cost opted for the Excelsior Mini Lathe. Well after turning my first pen yesterday, I now see why variable speed is the way to go.😄 Nevertheless, I'm stuck with the Excelsior for the time being.

So my question to you all is this - is there a way to turn pens that requires no (or minimal) speed changes and still produces an excellent result? This should take into account drilling (which I'm doing on the lathe), turning, sanding, finishing, etc.

Thanks for your help!
Hi Doug, and welcome! Pen turning is an addictive hobby, but it is FUN!
 

tv68

Member
Joined
Jan 2, 2020
Messages
55
Location
MD
We all have some 'envy' for the next 'better' tool.. don't lament, use what you have.. If you decide V/S is important, you'll have it someday and you can either have a "dual" lathe setup (OH YEAH!!! mans dream) or pass it down to your kids etc.

My perspective... Belt / pulley changes (aka speed changes) are one of many "re-toolings" we encounter being 'small' operations.

Handle it as such, and get into the habit (as I do) make several at a time (even different styles)
-Cut all the blanks ( I made a "sled for my band saw to make this easier)
-drill all the blanks (slowest speed) (bunch together by drill sizes, change bits between)
-glue tubes in all the blanks
-square all the blanks (slowest speed) (bunch together by drill sizes, change bits between)
-turn all the blanks (speed based on mat'l and tools) (re-tooling the mandrel for different styles)
etc...

I have contemplated using my drill press for drill / squaring operations to limit the re-tooling on the lathe.. but man I love using the lathe as a horizontal boring machine.

That's a great point. I'm probably jumping the gun wishing for the VS so soon, and batching each step seems like it would make speed changes much less of an issue. I'm looking to turn a few more this weekend and will give this a try. Thanks for making me feel much better about my lathe choice!
 

tv68

Member
Joined
Jan 2, 2020
Messages
55
Location
MD
@tv68

Doug, I know that you addressed the question to Hank, but perhaps I can "butt in".

You can indeed turn the lathe by hand as you apply the CA from a piece of blue shop towel (which is my preference), or piece of craft foam.
However, I find that it is better for the lathe to be turning at constant speed so that the CA goes on more uniformly. . You cannot get constant speed when turning by hand.
FWIW, I like to have the lathe turning at (I am guessing) about 15 RPM when I apply the CA.

I might add that my CA application technique has evolved to a two-handed method, and for this method a powered lathe is required.
With my left hand, I hold the CA bottle just slightly above the turning blank and drip the CA from a small hole in the CA bottle's nozzle.
With my right hand, I oscillate the blue shop towel underneath, and in contact with, the turning blank, in order to spread the CA.

Applying CA to a blank is a very personal process, I found. . Everybody needs to experiment and develop their own method.

Ah, ok..unfortunately looks like the lowest speed on my lathe is 760. Would that still be considered too fast for CA? Good to know there's some room for experimentation with the process, though I see your point about the glue going on more evenly if it's running.
 

tv68

Member
Joined
Jan 2, 2020
Messages
55
Location
MD
Hi Doug, and welcome! Pen turning is an addictive hobby, but it is FUN!

Hi Roger, appreciate the welcome! I figure I'll give it at least 6 months as-is, then if I'm still really wanting a VS this seems like a great addition.

My hope is that this will all turn out to be a great investment. I had initially planned to get into traditional woodworking, but with limited dedicated time in the evenings and weekends I really like the idea of being able to create something artistic and useful inside of an hour. And the pens I've seen on this site have given me something to strive for as I gain experience!

For now my goal is simply to enjoy learning the process while hopefully selling a few pens in the meantime. I have no idea how to go about the latter at this point, but that's the goal. :)
 

Grampy

Member
Joined
Dec 28, 2019
Messages
61
Location
Michigan
@tv68

Doug, I know that you addressed the question to Hank, but perhaps I can "butt in".

You can indeed turn the lathe by hand as you apply the CA from a piece of blue shop towel (which is my preference), or piece of craft foam.
However, I find that it is better for the lathe to be turning at constant speed so that the CA goes on more uniformly. . You cannot get constant speed when turning by hand.
FWIW, I like to have the lathe turning at (I am guessing) about 15 RPM when I apply the CA.

I might add that my CA application technique has evolved to a two-handed method, and for this method a powered lathe is required.
With my left hand, I hold the CA bottle just slightly above the turning blank and drip the CA from a small hole in the CA bottle's nozzle.
With my right hand, I oscillate the blue shop towel underneath, and in contact with, the turning blank, in order to spread the CA.

Applying CA to a blank is a very personal process, I found. . Everybody needs to experiment and develop their own method.
Mal, you may have helped me with an idea...

I'm new to this, and I am struggling with the CA application process, I get it almost glossy enough.. go for another set of applications and threads / ridges form.. then another sequence of sanding begins.. My lathes minimum (design) speed is 500 RPM.. sounds like time to get the thinking cap on and devise a contraption to turn it slower..
 

magpens

Member
Joined
Feb 2, 2011
Messages
15,911
Location
Canada
@Grampy

In my opinion, 500 RPM is way to fast for applying CA. . It would fling everywhere, including all over your glasses !!

Now .... quoting from what you wrote ....
... CA application process, I get it almost glossy enough.. go for another set of applications and threads / ridges form.. then another sequence of sanding begins..

Sorry .... not quite getting your meaning there .... "go for another set of applications and threads" ... ?? ..... threads .... ???????

Do you mean "thread-like features and ridges form" ... ?

Yeah, I know there is a tendency for the CA to form ridges. . That's one of the challenges with doing a CA finish.

That is one reason I was looking for a means of applying the CA directly out of the bottle without having to first transfer the CA to a blue shop towel and then apply it to the pen blank. . The method actually sorta works but you still have to do some sanding, etc.

I don't think there is an "easy" method for applying CA. . And going through multiple sanding steps in the process is commonly required.

Another member has developed a finishing technique using, instead of CA, "wipe on poly" (or WOP) with a dipping method. . He has kindly written a tutorial for this technique which is in the IAP Library. . That dipping method using WOP is fairly time-consuming, I believe.

I am sorry that his username escapes me at the moment. . But if you do a search for "WOP" or "dipping method" you should find it.

He actually posted a thread today with "Going to the UK" in the title, and that thread shows some of his finished blanks using the WOP.
 

1080Wayne

Member
Joined
Feb 5, 2006
Messages
3,344
Location
Brownfield, Alberta, Canada.
My lathes minimum speed is also 500 rpm , and I apply CA at that speed without problem . Don`t try to drip it on top of the spinning blank . Use a strip of craft foam about an inch wide , run a bead of CA across the full width , apply to the underside of the blank , beginning at one end .

For the next coat , use a clean piece of the foam (cutting off about 1/4 inch from the end used in the first pass , or use the other side) and apply starting at the other end . Repeat the process , probably 3 times (6 coats) , at which time the total amount applied usually needs to be allowed to cure , or bumps and ridges will start to develop .

The main tricks to learn for each coat are to apply the foam very lightly to the blank as you move it back and forth to distribute the CA , and to stop as soon as you feel a very slight resistance to its movement .
 

Woodchipper

Member
Joined
Mar 15, 2017
Messages
5,257
Location
Cleveland, TN
I apply CA by hand- mark the mandrel with a Sharpie, turn at least twice and apply accelerator, repeat as needed.
My Rikon lathe has VS but also has different ratios with changing belts. I have always kept mine on the highest ratio. The "best" was my old HF lathe with the Reeves drive- just move the lever.
 

Grampy

Member
Joined
Dec 28, 2019
Messages
61
Location
Michigan
@Grampy

In my opinion, 500 RPM is way to fast for applying CA. . It would fling everywhere, including all over your glasses !!

Now .... quoting from what you wrote ....


Sorry .... not quite getting your meaning there .... "go for another set of applications and threads" ... ?? ..... threads .... ???????

Do you mean "thread-like features and ridges form" ... ?

Yeah, I know there is a tendency for the CA to form ridges. . That's one of the challenges with doing a CA finish.

That is one reason I was looking for a means of applying the CA directly out of the bottle without having to first transfer the CA to a blue shop towel and then apply it to the pen blank. . The method actually sorta works but you still have to do some sanding, etc.

I don't think there is an "easy" method for applying CA. . And going through multiple sanding steps in the process is commonly required.

Another member has developed a finishing technique using, instead of CA, "wipe on poly" (or WOP) with a dipping method. . He has kindly written a tutorial for this technique which is in the IAP Library. . That dipping method using WOP is fairly time-consuming, I believe.

I am sorry that his username escapes me at the moment. . But if you do a search for "WOP" or "dipping method" you should find it.

He actually posted a thread today with "Going to the UK" in the title, and that thread shows some of his finished blanks using the WOP.

The thread title "Going to the UK", sounds familiar I'll look for it and the WOP info..

Comically on my 1st attempt (the wrench pen) it seemed to go better....


Yes to clarify: "thread-like features and ridges form" , so far in my experience (limited as it is) the micro mesh pads are not enough to remove those ridges, So I usually try 500 grit, if that doesn't do it, 220 grit .. fells like I'm starting over.. maybe I expected it to be "easier" .

you commented"there is a tendency for the CA to form ridges.", to be honest that is a bit re-assuring, so I'm not alone.

I was wondering if I'm pressing too hard, generating heat, maybe causing the ridges.
I'm experimenting with my technique hoping for the best.
Thanks for your insights.
 

Grampy

Member
Joined
Dec 28, 2019
Messages
61
Location
Michigan
My lathes minimum speed is also 500 rpm , and I apply CA at that speed without problem . Don`t try to drip it on top of the spinning blank . Use a strip of craft foam about an inch wide , run a bead of CA across the full width , apply to the underside of the blank , beginning at one end .

For the next coat , use a clean piece of the foam (cutting off about 1/4 inch from the end used in the first pass , or use the other side) and apply starting at the other end . Repeat the process , probably 3 times (6 coats) , at which time the total amount applied usually needs to be allowed to cure , or bumps and ridges will start to develop .

The main tricks to learn for each coat are to apply the foam very lightly to the blank as you move it back and forth to distribute the CA , and to stop as soon as you feel a very slight resistance to its movement .

Thanx for these insights..I'll see if that works for me..
 

magpens

Member
Joined
Feb 2, 2011
Messages
15,911
Location
Canada
@Grampy

Quoting you above ....
"Yes to clarify: "thread-like features and ridges form" , so far in my experience (limited as it is) the micro mesh pads are not enough to remove those ridges, So I usually try 500 grit, if that doesn't do it, 220 grit .. fells like I'm starting over.. maybe I expected it to be "easier" . "

You are right ... "micro mesh pads are not enough" ... at this stage of the process.

I attempt at that stage to sand with 320 grit. . Sometimes that is too fine, and I go down to 240 grit.
Otherwise, if the 320 feels right, I carry on. . When the ridges have been levelled and the surface has become matte, I move up through the grit sequence 400, 600, 800 .... and then, if the total CA applied has been adequate (a somewhat subjective call), move on to the finishing with 1000, 1200, 1500, 2000. . Then it's polishing with Novus 3, Novus 2, and Meguiar's PlastX. . I myself don't usually use micro mesh, but if I were to do so, I would start using it after the 800 grit sandpaper. . I find that my Novus sequence gives a quite pleasantly shiny finish.

So your experience seems very much in keeping with my own, and our procedures are very much in sync.

I hope these comments reassure you. . I find them reassuring also. . Confidence in what you're doing builds with time.
Communication with others who are going through the same learning curve helps a lot at every stage. . Thank you for sharing.
 

Grampy

Member
Joined
Dec 28, 2019
Messages
61
Location
Michigan
@Grampy

Quoting you above ....
"Yes to clarify: "thread-like features and ridges form" , so far in my experience (limited as it is) the micro mesh pads are not enough to remove those ridges, So I usually try 500 grit, if that doesn't do it, 220 grit .. fells like I'm starting over.. maybe I expected it to be "easier" . "

You are right ... "micro mesh pads are not enough" ... at this stage of the process.

I attempt at that stage to sand with 320 grit. . Sometimes that is too fine, and I go down to 240 grit.
Otherwise, if the 320 feels right, I carry on. . When the ridges have been levelled and the surface has become matte, I move up through the grit sequence 400, 600, 800 .... and then, if the total CA applied has been adequate (a somewhat subjective call), move on to the finishing with 1000, 1200, 1500, 2000. . Then it's polishing with Novus 3, Novus 2, and Meguiar's PlastX. . I myself don't usually use micro mesh, but if I were to do so, I would start using it after the 800 grit sandpaper. . I find that my Novus sequence gives a quite pleasantly shiny finish.

So your experience seems very much in keeping with my own, and our procedures are very much in sync.

I hope these comments reassure you. . I find them reassuring also. . Confidence in what you're doing builds with time.
Communication with others who are going through the same learning curve helps a lot at every stage. . Thank you for sharing.

Thanx for your perspective and support.. I turned and completed 4 blanks / pens tonite.. they all turned out awesome...and the work was less than what it took me to do 1 previously.

The micromesh instructions talk about sanding to 400-600 before switching, After 500 I normally use 1000 or 1200, then switch

Based on yours (and other) input(s) I sort of figured out, at my lathes min speed (600 rpm) I was likely using too much CA.

I believe the heat / friction of my "towel" caused it to cure too soon. (I believe) and how long I had my "towel" riding on it generated heat and cured the ridges... the CA on the towel became hard and abrassive..So my "new" (to me) process is to apply the CA only 1 drop at a time, wipe it side to side smoothly but quickly, spray the accelerant, . Go to a new (soft) spot on the towel and repeat 4 more times.

I noticed if I use too much CA I can see it "spin up / rise up", like water does. (my brain thinks a slower RPM may kill this phenomenon)

Then I STOP the lathe and inspect, if there is even a hint of uneven or a small ridge forming I sand horizontally (with the grain).

When micromeshing I'm now using a small amount of water, I can fell it get warmer.. gives me a degree of control, as I believe aggressive "meshing" was causing problems in the finish also..

Go thru my sanding (micro mesh) process. then repeat.. Works for me, and it is plenty more satisfying aka less frustrating..

Again thanks for your time and help. I really did not mean to "hi-Jack" this thread.
 

tv68

Member
Joined
Jan 2, 2020
Messages
55
Location
MD
Just wanted to thank everyone for all the helpful advice. I had a chance to turn an acrylic yesterday and found that 760 (lowest speed) for drilling/sanding/polishing and 3200 for turning seemed to work well. I also attended a local woodworking show on Saturday and had the opportunity to chat with Barry Gross. He seemed to think the slowest speed should also work for CA application which was great to hear. So 2 speed changes seems manageable, especially if batching steps for multiple pens as others have mentioned.

Oh, and not to derail the thread too far, but would anyone have recommendations for masks/respirators when turning acrylics? I'm not sure if they're harmful or not, but the vapors seemed very strong when cutting, drilling or turning. I don't yet have a dust collection system, but I am using the Fightech mask.
 
Top Bottom