Making Decal Pens

Signed-In Members Don't See This Ad
Nice tutorial, thank you for taking the time to put it together. When I do decals, I spray them with Krylon Crystal Clear Acrylic. You might find it a lot cheaper. An 11 oz. can is around $5.
 
Thanks Paul.
I hope that they make since for everyone.

I have tried the Krylon Crystal Clear Acrylic and the ink has always bleed when i wet the decals. But I think that was do to the inks I was using.

I will try it again after this can runs out, I was using aftermarket ink in my printer and have since went back to the OEM inks.
 
Thanks for the write up. Good, clear, and to the point. :smile: 
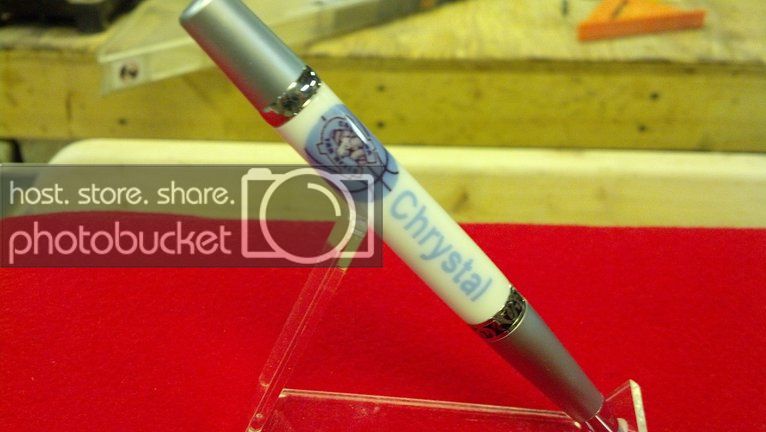
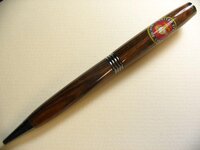
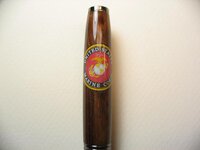
I've made some decal pens put it's been awhile.
 
Glad to see you post this John. The last time I made a decal pen, I got 14 PMs asking how I did it. I'm working on two more now. It looks good. I recommend cutting out the decals BEFORE spraying with the sealer. Ink doesn't want to print over it. DAMHIKT :redface:
 
Been there and done that also.
Now I only print on half of sheet unless I have enough to print a full sheet. I have tried to send a sheet threw the printer after spraying the sealer on it and it doesn't work to good.
 
I have a question about your logos. It says you use paint.net but the web site sells paint. I've been having trouble getting a good picture printed on my labels.
 
Glad to see you post this John. The last time I made a decal pen, I got 14 PMs asking how I did it. I'm working on two more now. It looks good. I recommend cutting out the decals BEFORE spraying with the sealer. Ink doesn't want to print over it. DAMHIKT :redface:

I lay sheets of paper or something around the decal so that I only spray the decal.
 
I print the decal ( it is at the top of the page), cut off the top of the page, spray that part and reuse the lower part of the page since nothing is printed on it.

Nice work on the tutorial.
 
Last edited:
Well.....since I have two decal pens to make, I went looking all over this place for my decal paper and bonder spray that I had three years ago, and didn't find them. So, went to Hobby Lobby,and picked up the Testors kit ($11.49) Got an extra package of paper ($14.99) Got home and installed the software. The kit comes with some rolled up sheets of paper, which it says to sandwich between two heavy books to flatten them out, so it will feed thru your printer without messing anything up. The software doesn't allow for custom decal making. It has images for model decals to select from. (I forgot this part) You have to order the software for custom decal making, (Decal Maker:Standard $14.99) I remembered I HAD that CD, and found it. This one allows you to print your own images. So....I have downloaded my images, and and test printed on regular paper, but the decal paper still has curl in them. I was thinking I would use that paper, and take the other $14.99 back for a refund. I guess I'll wait for awhile , and see if this paper flattens out.
 
nice job. i also use the krylon crystal clear but either will work. at least you remembered the step i always forget. let the ink dry well before fixating with the spray. makes a big difference in the fuzziness after application.
again real nice job.
 
Where is the best placement for the picture on the decal? Obvious it is not behind the clip. I was wondering is it to the right, the left or on the reverse side?
 
the clip is on the reverse side of the decal.
photobucket-24689-1354493211402.jpg
 
I like how you mention the image size for the sierra (might work for a wallstreet also?). Now if only I can figure out the size for a slimline..
Good Job..

If you know the diameter then x by 3.141 and you have the circumference.

Regards
Peter
 
Decal Pen

Recent decal pen I made using inkjet printer, decal paper from the hobby shop, and Krylon Gloss spray. After decal was applied to the pen I top coated it with about 10 thin coats of CA and Micromesh. This decal was on a white backed paper versus clear so the white would show on the dark wood.

When using the paper I print the decals at the top of the paper and trim it off after printing. I apply the spray after trimming thereby saving the remainder of the sheet for printing more decals.

After punching out the circle decals from the sheet they require another shot of Krylon to seal the edges otherwise the water will affect the ink when removing it from the paper. You could also punch the decals and then apply the Krylon.

Hope the pics appear, I have only done this 2 times.
 

Attachments

  • IMG_1344.jpg
    IMG_1344.jpg
    38.7 KB · Views: 331
  • IMG_1343.jpg
    IMG_1343.jpg
    27.9 KB · Views: 395
You can also just use Word (or Pages if you have a Mac) to create your logos. Use the drawing functions. Or, import an image into your word processor and then put the decal paper in the printer and then print to it. No need for graphics or photo editing software.


Thanks for the download info. Unfortunately I have a Mac

You can most likely use any photo editing software or paint program (like windows paint should work)
 
Thanks John,this is awesome!
last week I had a request for a Burberry plaid design (what ever the hell that is) after google research it`s all the rage. A decal is the only way it would ever work. The only thing that makes me nervous is that it would be a complete wrap around decal.
Time to practise on the old blanks.
 
When I try to use an imported image it always looks fuzzy when I print it.

Are you resizing it with a photo editing program or resizing it in word?

can you post a link to the image?

I barley can use any editing software. I might not be able to help with that.
I have had some that the picture wasn't clear and looked fuzzy,

Also is your ink new or kinda old.
I had some knock off ink that didn't print good and clear. went back to the orignal OEm ink and print turned out a lot better and clearer.
 
Last edited:
Thanks John,this is awesome!
last week I had a request for a Burberry plaid design (what ever the hell that is) after google research it`s all the rage. A decal is the only way it would ever work. The only thing that makes me nervous is that it would be a complete wrap around decal.
Time to practise on the old blanks.

I would take a piece of paper and wrap it around the completed pen to figure out the correct side and maybe make it just a little bigger. Then measure it and try one that size.
 
Signed-In Members Don't See This Ad
Back
Top Bottom