egnald
Member
Hello fellow IAP members,
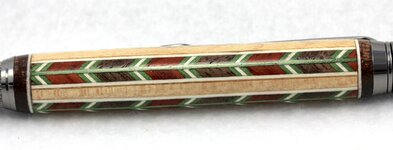
Today I tried my had at a more complex segmented blank. It isn't perfect, but I did learn a lot and have some new tweaks to try the next time. The blank is made from Walnut, Cherry, and Tongue Depressor in the style some would refer to as Gisi. I finished it with GluBoost that came from Ed at Exotic Blanks. The kit is a Gunmetal Magnetic from Crooked Mill that I got before I realized I could get the Zen from EB instead.
I used my own 30-degree fixture with the technique I learned from Ken Burgess (KenB259) to cut the segments. One of the things I think that will improve things the next time is to build a sanding fixture so that I can touch up the saw cuts while keeping a more perfect angle.
Anyhow, here are the pictures,
Dave