Lazer Inlay Blanks

Signed-In Members Don't See This Ad

CabinetMaker

Member
Joined
Mar 16, 2009
Messages
256
Location
Arvada, CO
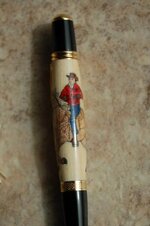
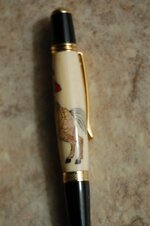
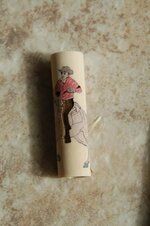
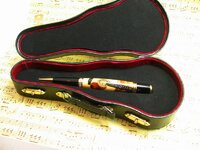
I just finished assembling the Cowboy blank from LazerLinez. I was careful to get all the pieces as flush to the blank as I could. Its not perfect, but its close.

This blank has a lot of lightly etched detail on it that will easily disappear even with very light cuts or sanding.

How do you turn and finish these blanks to maintain the fine detail in the laser cut pieces?
 
Signed-In Members Don't See This Ad
I haven't done this one and I don't see any instructions on his page for this one. I have done the Patriotic Eagle which has etching and the etching goes all the way through the blank. If you rub fine bown sawdust into them and then soak with CA they stay really sharp. Check out the instructions for the Bald Eagle on his page step 7.
 
Last edited:
Somewhere in the instructions it says to tack in the pieces with CA at the edges only, and avoid getting glue into the "detail" cuts. Do that and the rub in of dark fine sawdust, especially at the point of almost finished turning/sanding, you will see the detail. I blow out the detail areas just prior to rub in of contrasting color, thus getting rid of light color dust and filling only with the dark.
Steve
 
I actually have the same question. I have two blanks where I assembled the pieces, but it was almost impossible to get them all the way flush with the main part of the blank. The pieces are only proud about 1/64th of an inch, but my concerns are that when I sand down the blank, it will wipe out the detail lines that are so important to the laser blank. I was actually considering getting a very fine wood buring kit and making the lines deeper so they will still be visible after sanding. Any other recommendations would be very much appreciated.

Jim Smith
 
I always have a little jar of ebony saw dust that a crush into a fine power. After I put the pieces together on the tube ( use rubber bands if they won't stay in place ) I rub the power into the cracks and flood with thin CA. Don't use excelorator, it will turn cloudy !! Finish as you would normaly do. You only have to take of a small mount to get your blank to size. Check once or twice during turning, and add another coat of CA. When your done sanding make sure you clean off your blank before final finishing. Jim S
 
Use a digital calipers that reads in inches and metric. I usualy round over the ends a little so you don't have to be exact. A small metal file works great for this. Hold it horizontal on the end of your blank, and move it to vertical. Jim S
 
I just finished assembling the Cowboy blank from LazerLinez. I was careful to get all the pieces as flush to the blank as I could. Its not perfect, but its close.

This blank has a lot of lightly etched detail on it that will easily disappear even with very light cuts or sanding.

How do you turn and finish these blanks to maintain the fine detail in the laser cut pieces?

A lot of the inlay kits have to be turned with more material in the middle of the blank where the inlay is. If you look at a most of the Sierra kits you would find that if you turn bushing to bushing or a straight cylinder there will be very Little wood left on the brass tube.
Now when the inlays are cut I try to to cut almost through but still have everything stay together. There is a fine balance between all cuts fall apart or for it look great when turned.
When the laser lens gets dust on it it would cut with less power and therefor not cut through and cause the detail lines to disappear.

Please send me a pm with address and I will be more than happy to send you a replacement.
 
Any experience regarding shaping so that the body meets nicely with the ends?


Are you using TBC/MTBC bushings or just a mandrel?
TBC is the best and you would turn ends of the barrel to the same size as your bushings or the way I do slightly undercut the ends and finish with CA and then end up with the correct size that match the pen parts.

I only use a skew for turning and use micro-mesh to finish the barrel.
 
I just put together about 12 of the Lazerline kits with the same question. I know how to do them now but I watched a video on u-tube that I found googling Lazerline. Russell Eaton and Constant Laubscher are doing a complete kit. They are doing a demo. for gwinnettwoodworkers. It is long but it sure helped. On my search it is the second article. Rich
 
I turn a lot of Constant's Sierra laser kits and always give them a very slight taper. Starting at the nib end which is around .519 increase the diameter to about .535, 2/3's of the way up and then tapering back down to the bushings. Doing this in a gentle curve will give your pen a more pleasing shape and and leave all of the detail Constant has cut into the blank. YMMV
 
Last edited:
I just looked at an as yet unused Lazerlines kit. The dedicated "detail" cuts go all the way thru the wood. So if you do not mistakenly fill the detail cuts with clear CA glue, those details will be there at the point of finish sanding. So at that point, be sure to fill the cuts with the dark , fine sawdust. As I mentioned before, I blow them out first to be sure there is only dark fill in the cuts. It works very well, bu if you have already filled these details with CA, it is too late!
 
I just finished assembling the Cowboy blank from LazerLinez. I was careful to get all the pieces as flush to the blank as I could. Its not perfect, but its close.

This blank has a lot of lightly etched detail on it that will easily disappear even with very light cuts or sanding.

How do you turn and finish these blanks to maintain the fine detail in the laser cut pieces?

A lot of the inlay kits have to be turned with more material in the middle of the blank where the inlay is. If you look at a most of the Sierra kits you would find that if you turn bushing to bushing or a straight cylinder there will be very Little wood left on the brass tube.
Now when the inlays are cut I try to to cut almost through but still have everything stay together. There is a fine balance between all cuts fall apart or for it look great when turned.
When the laser lens gets dust on it it would cut with less power and therefor not cut through and cause the detail lines to disappear.

Please send me a pm with address and I will be more than happy to send you a replacement.
i don't need anything replaced, at least not yet. I just got to this point and I don't want to muck it up.
 

Attachments

  • image.jpg
    image.jpg
    49.7 KB · Views: 197
I just looked at an as yet unused Lazerlines kit. The dedicated "detail" cuts go all the way thru the wood. So if you do not mistakenly fill the detail cuts with clear CA glue, those details will be there at the point of finish sanding. So at that point, be sure to fill the cuts with the dark , fine sawdust. As I mentioned before, I blow them out first to be sure there is only dark fill in the cuts. It works very well, bu if you have already filled these details with CA, it is too late!

I might be in trouble. My CA had suffered a bit of thickening so my small controlled drops weren't quite so small and a bit less controlled.
 
Any experience regarding shaping so that the body meets nicely with the ends?


Are you using TBC/MTBC bushings or just a mandrel?
TBC is the best and you would turn ends of the barrel to the same size as your bushings or the way I do slightly undercut the ends and finish with CA and then end up with the correct size that match the pen parts.

I only use a skew for turning and use micro-mesh to finish the barrel.

So car I have had good results turning on a Mandral.
 
I'll preface this with "this works for me." If another way works for you I'm in no way Saying you're wrong. There's always different ways of doing things and arriving at the same finished product.

Its been my experience with the details I've never filled them in with sanding dust and they show up fine. My normal way of doing them is to get all the pieces In place and flood with thin CA. It will darken the details in most cases and prevent any light sanding dust to get into the details. I've not turned all of Constance's kits but the ones I have have been this way. Like I said before YMMV.
 
Good day - Bad day

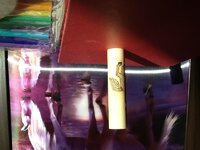
My daughters found a burned piece of wood in bale of hay. I took a piece of sandpaper to the log and in a very short time I had a nice pile of very black powder. I rubbed this into my pen blank, tapped it to get it to settle into the cracks and then added CA. I had mess of pen blank put I put it on the lathe and this what happened.

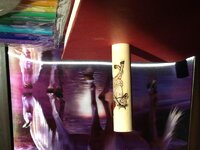
The second picture, though it did not turn out well at all, is the reason I started this thread in the first place. I took the diameter down slowly and stopped when I saw the detail in the tail starting to get very light.

I like the way this pen turned out.
 

Attachments

  • DSC_4646.jpg
    DSC_4646.jpg
    24.6 KB · Views: 142
  • DSC_4647.jpg
    DSC_4647.jpg
    20 KB · Views: 135
I had two blanks for the Cowboy. And the first on turned out so nicely I went to work on the second blank. And this is what happened. I was not cutting fast since I was paying attention to the tail details. I must not have gotten enough glue inside the blank and the skew caught a small piece of cowboys leg and that was the end of it. *sigh*
 

Attachments

  • DSC_4648.jpg
    DSC_4648.jpg
    28.7 KB · Views: 147
My favorite Constant's blank is the Comical Golfer. Very challenging but neat looking. Every time I make one and carry it to a show it sales. Most comments I get are " Hey thats the way I look when I golf". I keep about two dozen of his laser cuts at any given time and they sell well.
 
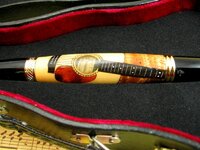
I too have done several of the laser kits but the one pictured was the most difficult. The fine lines, like the guitar strings, are burned deep enough that you shouldn't cut through when turning with REALLY sharp tools.
WB
 

Attachments

  • 053.jpg
    053.jpg
    62.5 KB · Views: 109
  • 055.jpg
    055.jpg
    70.5 KB · Views: 136
Back
Top Bottom