Honeycomb Pen Blank Problems

Signed-In Members Don't See This Ad

StuartCovey

Member
Joined
Oct 2, 2013
Messages
568
Location
Rogers, AR
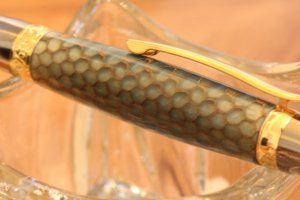
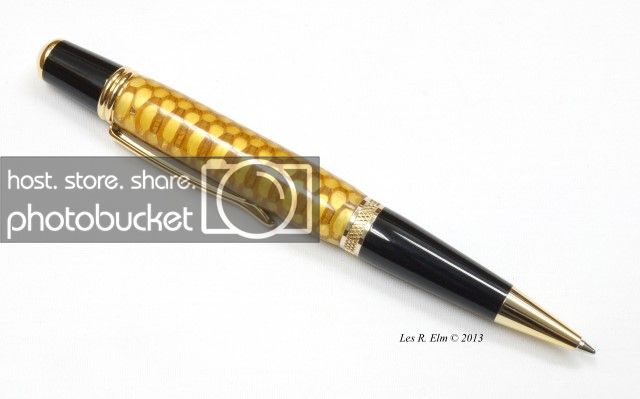
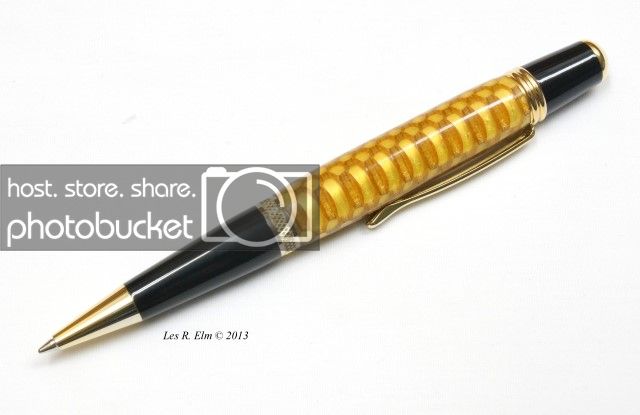
I recently bought some honeycomb pen blanks from Mike. I decided to try one today but ran into some problems. The paper honeycomb kept chipping away. I tried every different tool I had. I had just sharpened all my tools so I don't think that was a problem. Any advise? Am I doing something wrong? I mainly tried to use a a sharp skew barely shaving it away but still no luck.
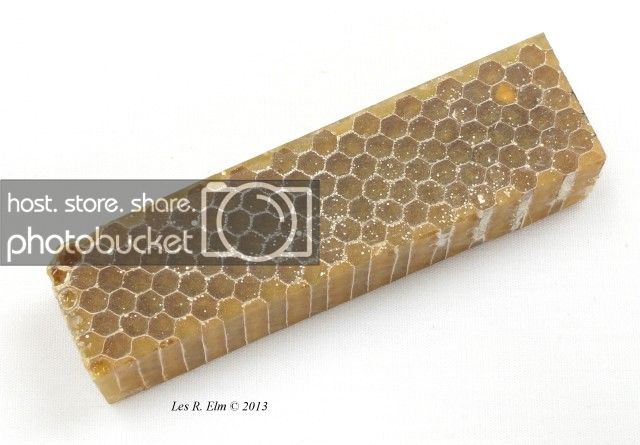
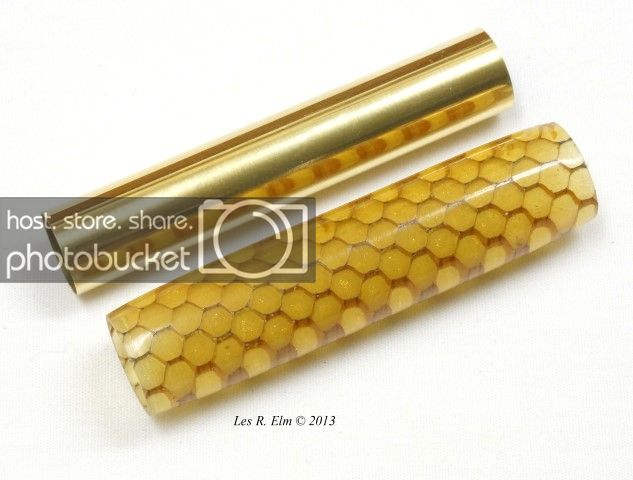
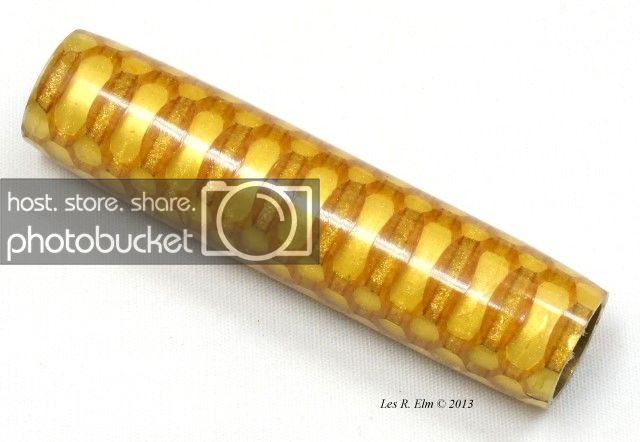
I posted a pic so you all know what I'm talking about.

Since the honeycomb didn't work I had to make something :frown: So I made a Sierra out of some stabilized oak I had. Posted some pics too.

IMG_4881.jpg

IMG_4894.jpg

IMG_4892.jpg

IMG_4891.jpg
 
Last edited:
Signed-In Members Don't See This Ad

Dan Masshardt

Member
Joined
Jan 30, 2013
Messages
4,806
Location
Mechanicsburg, PA
I had the same exact result with the first one I did. :-(. Unused brand new carbide and light cuts. I should have waited on doing the color I liked best. Haha.

I didn't have much hope for doing the second one the same way, so I decided to take a different route which worked great and I would highly recommend. You might have to buy something though.

I put the square blank in my chuck with pin jaws. Used a live center in the tailstock for added support. Then I use a flap disc in an angle grinder, ran the lathe around 800-1000 and sanded the sucker down to round. (Quick)

Flip the blank around and repeat.

Once round, I had no problem turning.
 

StuartCovey

Member
Joined
Oct 2, 2013
Messages
568
Location
Rogers, AR
I had the same exact result with the first one I did. :-(. Unused brand new carbide and light cuts. I should have waited on doing the color I liked best. Haha.

I didn't have much hope for doing the second one the same way, so I decided to take a different route which worked great and I would highly recommend. You might have to buy something though.

I put the square blank in my chuck with pin jaws. Used a live center in the tailstock for added support. Then I use a flap disc in an angle grinder, ran the lathe around 800-1000 and sanded the sucker down to round. (Quick)

Flip the blank around and repeat.

Once round, I had no problem turning.


That sounds interesting, but I think i'll try it! I'll let you know how it works.
 

healeydays

Member
Joined
Nov 30, 2012
Messages
1,057
Location
Bedford NH
Hi guys, just got back on line. These blanks are not paper, it's Nomex. Each cell should be looked at as a separate poured cell and if yo don't take it slow getting to round, you can have a blowout, but once you get to round, they turn nice. You catch an edge of one of the cells and it will tear. Dan has come up with an interesting way to round them. I haven't tried it yet, but will after the 1st of the year when I find some free time in the basement.
 
Last edited:

StuartCovey

Member
Joined
Oct 2, 2013
Messages
568
Location
Rogers, AR
Well, I'm going to try another one tomorrow. First I'll use Dan's method, if that works I will try another and just taking it extremely slow.

Thanks guys for all the advise.
 
Joined
Aug 25, 2011
Messages
298
Location
Nashville, TN
I make the honeycomb blanks using the Nomex and what I do is when I sand the blank square to the tube I also sand the corners down on a rough 45 degree angle before turning. I use carbide tools and they have turned very easy after doing that. I cast using Alumilite and I do not have to take shallow cuts when turning.
 

Sabaharr

Member
Joined
Mar 7, 2009
Messages
598
Location
Slidell, LA
You may also try a sled on the band saw with the table at 45° and trim the corners off the blank. It would take most of the trauma off the blank at the beginning. I built a sled with a blank holder so I could trim the corners off blanks. That way I keep the table flat. Its a tool and time saver.
 

rd_ab_penman

Member
Joined
Jun 1, 2007
Messages
1,646
Location
Red Deer, Alberta, Canada.
Never had a problem with Mike's blanks.
I just drill mine out, knock off the corners and TBC using a razor sharp 1/2" spindle gouge.
I like to turn these prior to gluing in the tube. That way I can experiment with different colored tubes prior to gluing.
For this one I polished the brass tube.
Works great for me!

DSC04834Custom.jpg


DSC04990Custom.jpg


DSC04961Custom.jpg


DSC05006Custom.jpg


DSC05004Custom.jpg


Les
 
Last edited:
Joined
Aug 25, 2011
Messages
298
Location
Nashville, TN
Nomex is a honeycomb paper product impregnated with a fire retardant chemical, it is used in the front of race car radiators to stop objects from hitting the aluminum radiator but does not restrict air flow. you can get the material with 3 different size cells if my memory is correct.
 

healeydays

Member
Joined
Nov 30, 2012
Messages
1,057
Location
Bedford NH
The products do come in different cell sizes and thicknesses. The radiator stuff is 3/8" thick and I've used it in the past on cars and it does protect the crumple zone real well as it is cheap insurance for an expensive radiator.

The bigger stuff I use is specifically made for the aviation industry and is a different product than the radiator stuff. It needs to be for the stresses associated with how it is used and it ain't cheap...

Mike B
 
Last edited:

StuartCovey

Member
Joined
Oct 2, 2013
Messages
568
Location
Rogers, AR
Ok guys, I got the honeycomb blank glued up and sanded round with a belt sander. Tomorrow I will turn it and see what happens.

1_IMG_4902.jpg
 
Last edited:

OKLAHOMAN

Member
Joined
May 17, 2006
Messages
10,228
Location
Costa Rica
Even though you have it round take lite cuts. I did one blank this morning with my Rotundo (a carbide tool with a round carbide blade) did not sand it round first but took very lite cuts until round than just lite cuts.
 

edstreet

Member
Joined
Aug 12, 2007
Messages
3,684
Location
No longer confused....
So has anyone confirmed what the real problem is here? Looking over this several times I see some mention 'no problems' and others say they have had the same problem. So in short is this a blank material problem, a skill set problem or a method problem?
 

OKLAHOMAN

Member
Joined
May 17, 2006
Messages
10,228
Location
Costa Rica
Ed, remember 80% of the members here started with wood which you can be more aggressive with before going to acrylics and after mastering the acrylics they again became aggressive as their skill level rose. These blank require a much lighter touch as do other blanks such as Inlace, and another skill level is required for high end Cebloplast when drilling and gutting. These blanks are a combination skill set and method.
 

StuartCovey

Member
Joined
Oct 2, 2013
Messages
568
Location
Rogers, AR
Even though you have it round take lite cuts.
I will, don't want to ruin another blank:rolleyes:


So has anyone confirmed what the real problem is here? Looking over this several times I see some mention 'no problems' and others say they have had the same problem. So in short is this a blank material problem, a skill set problem or a method problem?

I really have absolutely no idea.
 

edstreet

Member
Joined
Aug 12, 2007
Messages
3,684
Location
No longer confused....
Ok cool. I was curious as I have never turned one but I could see several reasons there could be problems but was not sure which one it was. So what I am hearing is these blanks are indeed more delicate than many. Which is fine and all and a very good thing to know when looking at blanks.
 

StuartCovey

Member
Joined
Oct 2, 2013
Messages
568
Location
Rogers, AR
So what I am hearing is these blanks are indeed more delicate than many. Which is fine and all and a very good thing to know when looking at blanks.

This was probably my biggest downfall. I had absolutely no idea how delicate these blanks where, so I went at it like any other acrylic. From what I'm reading, bad idea.
 

edstreet

Member
Joined
Aug 12, 2007
Messages
3,684
Location
No longer confused....
So what I am hearing is these blanks are indeed more delicate than many. Which is fine and all and a very good thing to know when looking at blanks.

This was probably my biggest downfall. I had absolutely no idea how delicate these blanks where, so I went at it like any other acrylic. From what I'm reading, bad idea.


Well how did they handle when drilling? That should be a very good indicator when evaluating a blank.
 

OKLAHOMAN

Member
Joined
May 17, 2006
Messages
10,228
Location
Costa Rica
Yes, just as I would not recommend Cebloplast unless they know the inherent risk, even thought it's been around for years I still tell them about the heat factor as I will on these let them know that the risk of tear out with to aggressive use of the tool of choice.

Ok cool. I was curious as I have never turned one but I could see several reasons there could be problems but was not sure which one it was. So what I am hearing is these blanks are indeed more delicate than many. Which is fine and all and a very good thing to know when looking at blanks.
 

StuartCovey

Member
Joined
Oct 2, 2013
Messages
568
Location
Rogers, AR
Well how did they handle when drilling? That should be a very good indicator when evaluating a blank.

Surprisingly they went pretty well. There was a little chipping when the bit broke through, but wasn't all that bad.
Actually this Sierra blank will be about 1/16" shorter than usual because of this. (I didn't allow for chipping into the length)
 
Last edited:

edstreet

Member
Joined
Aug 12, 2007
Messages
3,684
Location
No longer confused....
Yes, just as I would not recommend Cebloplast unless they know the inherent risk, even thought it's been around for years I still tell them about the heat factor as I will on these let them know that the risk of tear out with to aggressive use of the tool of choice.

Ahh yes, while currently there is no 'rating system' for blank difficulty or very little listing as how they turn or any precautions to take I am curious if there could listing this on the description to reflect this? I am wondering if that would cut down on the complaints or problems that came up. Perhaps even some video, iap link or what not in how best to turn them. While not all would need that it would be greatly helpful to many, I know I have struggled with many blanks in the past due to lack of information also lack of skill mind you.

Surprisingly they went pretty well. There was a little chipping when the bit broke through, but wasn't all that bad.
Actually this Sierra blank will be about 1/16" shorter than usual because of this. (I didn't allow for chipping into the length)

Well chipping does mean certain things but from the original post photo I see fiber type strands, chips, rips and various other things going on there. Do you know how to read the shavings from a drill bit?
 

edstreet

Member
Joined
Aug 12, 2007
Messages
3,684
Location
No longer confused....
Well chipping does mean certain things but from the original post photo I see fiber type strands, chips, rips and various other things going on there. Do you know how to read the shavings from a drill bit?

No, I do not.

This will likely get you started but keep in mind this article is mostly for metal use in machine shops. However this same principal applies to every material that we use as well. It not only applies to the drill bits but also our chisels and end mills and all methods of finishing.

Read Your Chips : Modern Machine Shop

The key thing is to pay attention to how the lathe handles when you drill and chisel. Take note of what the chips looks like, size and how the hole looks, color, temperature and feel. Once you start making adjustments those things will drastically change and your quality can vastly improve.
 

StuartCovey

Member
Joined
Oct 2, 2013
Messages
568
Location
Rogers, AR
This will likely get you started but keep in mind this article is mostly for metal use in machine shops. However this same principal applies to every material that we use as well. It not only applies to the drill bits but also our chisels and end mills and all methods of finishing.

Read Your Chips : Modern Machine Shop

The key thing is to pay attention to how the lathe handles when you drill and chisel. Take note of what the chips looks like, size and how the hole looks, color, temperature and feel. Once you start making adjustments those things will drastically change and your quality can vastly improve.

Ok, I will read up on that. Thanks
 

Dan Masshardt

Member
Joined
Jan 30, 2013
Messages
4,806
Location
Mechanicsburg, PA
I had no problems drilling

I think that the material is what it is It's going to be challenging to get round no matter what If I was selling I'd put a big warning Mike has done so with the blanks he's sold

I'm no expert but I went as gingerly as I felt I could and ripped about to the tube The second one after rounding with the flap disc was fine using carbide

I think the blanks turn very well once round
 

StuartCovey

Member
Joined
Oct 2, 2013
Messages
568
Location
Rogers, AR
Well, I tried doing the blank today and it did not work. But I did find out that my skew is the culprit. It might be its not sharp enough or its the way I'm using it, but it definitely is not working for me. After I ruined the blank I did some experimenting with all of my tools and found that my gouge works the best without chipping.
So, now that I've ruined another blank I'm a little hesitant to try again, but after finding that the gouge works better I think I'll take another shot at it soon.
 

Dan Masshardt

Member
Joined
Jan 30, 2013
Messages
4,806
Location
Mechanicsburg, PA
Well, I tried doing the blank today and it did not work. But I did find out that my skew is the culprit. It might be its not sharp enough or its the way I'm using it, but it definitely is not working for me. After I ruined the blank I did some experimenting with all of my tools and found that my gouge works the best without chipping. So, now that I've ruined another blank I'm a little hesitant to try again, but after finding that the gouge works better I think I'll take another shot at it soon.
we're you rounding it from square with the skew?
 

StuartCovey

Member
Joined
Oct 2, 2013
Messages
568
Location
Rogers, AR
Ok, before I start on another blank I would like to know what you guys have been doing and using on your Honeycomb Blanks. Tool, lathe speed, etc.

Thanks

P.S. Mikes sending me some to practice on so it will be a couple days before I try again. Thanks Mike!
 

healeydays

Member
Joined
Nov 30, 2012
Messages
1,057
Location
Bedford NH
I use a Carbide turning tool with indexable carbide inserts size 15mm x 15mm x 25mm

I haven't been able to get much turning done over the last couple weeks, but turned a piece of the honeycomb last night and will try to post a picture tonite.

Mike B
 

StuartCovey

Member
Joined
Oct 2, 2013
Messages
568
Location
Rogers, AR
I use a Carbide turning tool with indexable carbide inserts size 15mm x 15mm x 25mm

I haven't been able to get much turning done over the last couple weeks, but turned a piece of the honeycomb last night and will try to post a picture tonite.

Mike B

What speed did you turn it at?
 
Signed-In Members Don't See This Ad

carlmorrell

Member
Joined
May 14, 2013
Messages
691
Location
Cary, NC
9/16" fingernail gouge, turned on it's side so it acts more like a skew. Less than 2000 rpm. Light passes. Stop 1/16 short of bushings, then switch to sandpaper. YMMV:biggrin:
 
Top Bottom