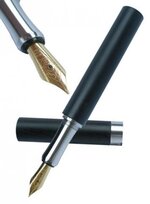
I have been meaning to start making fountain pen parts and I kept putting it off. There was always something else going on or had to be done. Recently I was given enough motivation to get started on them. I have posted earlier about the first part, the nib holder its self but thought I would throw this out there for your consideration or amusement.

In the first picture there is the feed and the three parts that fit together.
right behind the feed is the feed and nib holder. it is contoured on the inside and tapped to match the feed. The internal threads are tapped 7.4x.05mm the outside threads are 10x.05mm I cut the diameter down to about 9.8mm to allow a little play in the threads as they fit together.

Next the piece that is epoxied into the tube, IT is threaded inside for the nib holder and on the outside for the cap lower piece.
there is very little room for error on this piece. I tapped the inner threads first and then the outer threads. Then I had to re thread the inner threads because threading on the outside pushed the inside diameter slightly smaller. Next time I will thread the outside first.

You can see the threads on the inside of the piece for the upper cap.

Here it is assembled.
I made up two sets and it took a couple of tries to get it right. I sometimes have to stop and build a tool/fixture to hold the piece in order for me to be able to work on that piece.
Edited in. THis feed is from Meisternib.com I picked up a few pieces from Lou and will be using them on the next ones.
Mike

In the first picture there is the feed and the three parts that fit together.
right behind the feed is the feed and nib holder. it is contoured on the inside and tapped to match the feed. The internal threads are tapped 7.4x.05mm the outside threads are 10x.05mm I cut the diameter down to about 9.8mm to allow a little play in the threads as they fit together.

Next the piece that is epoxied into the tube, IT is threaded inside for the nib holder and on the outside for the cap lower piece.
there is very little room for error on this piece. I tapped the inner threads first and then the outer threads. Then I had to re thread the inner threads because threading on the outside pushed the inside diameter slightly smaller. Next time I will thread the outside first.

You can see the threads on the inside of the piece for the upper cap.

Here it is assembled.
I made up two sets and it took a couple of tries to get it right. I sometimes have to stop and build a tool/fixture to hold the piece in order for me to be able to work on that piece.
Edited in. THis feed is from Meisternib.com I picked up a few pieces from Lou and will be using them on the next ones.
Mike
Last edited:

