First time with polymer clay

Signed-In Members Don't See This Ad

PaulD

Member
Joined
Jun 8, 2007
Messages
76
Location
Stevens Point, WI, USA.
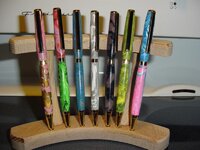
Thanks Paul, actually I think that what you are seeing is the red showing through the translucent. I did however get just the slightest amount of red in there too but not as much as appears in the photo. I did wash my hands twice before going from working the red to the translucent and still got a touch of pink. Might have to go the handwipe route next time I work with the red. Another thing I just thought of; work the light/other color first and the red last. That should help, I would think.

Sounds like you did everything right Smokey and your explanation makes sense. I couldn't tell from the photo that you worked with translucent, I was thinking white clay which made the photo color shift look more dramatic then it probably was.
 
Signed-In Members Don't See This Ad
Joined
Aug 7, 2009
Messages
700
Location
Jamestown, NC
I am a fan of Premo. It has been the most durable for the pieces I have made. Kato and Studio also get good reviews with the Studio becoming one of my favorite, but it is very matte and will not shine up like the others.

There have been a few reformulations of the clay so I am not sure how that has effected the durability. About 2 years ago (could be wrong on my timeline) they switched some of the plasticizers. The biggest complaints about the new formula was the softness and loss of durability after curing.
 

SamThePenMan

Member
Joined
Aug 31, 2008
Messages
183
Location
Clearwater, Florida
Wow, all these PC pens are great! We've got a Michaels a few miles from here and I may have to hit it after the holidays and see what they have. Or maybe I'll see if I can stop by the one at my in-laws this weekend. Wonder what someone will find to make pens out of next! :)
 

SKEETERPROV

Member
Joined
Oct 22, 2009
Messages
88
Location
Brantford ontario
This Weeks pens from poly

I have been hard at it again.....I have some off cut oak so i decided to take a try building some pen stands...they seem to work but i am still in the proto type stage.....cant have them too fancy ...It wood take from the pens...found my camera finaly after the move it takes a little better picture...well heres this weeks pens.....:beauty:
 

Attachments

  • nov 25 2009 043.jpg
    nov 25 2009 043.jpg
    67.3 KB · Views: 217
  • nov 25 2009 044.jpg
    nov 25 2009 044.jpg
    100 KB · Views: 231
  • nov 25 2009 045.jpg
    nov 25 2009 045.jpg
    99.6 KB · Views: 222

PaulD

Member
Joined
Jun 8, 2007
Messages
76
Location
Stevens Point, WI, USA.
I have been hard at it again.....I have some off cut oak so i decided to take a try building some pen stands...they seem to work but i am still in the proto type stage.....cant have them too fancy ...It wood take from the pens...found my camera finaly after the move it takes a little better picture...well heres this weeks pens.....:beauty:

A polymer machine has been unleashed!
 

SKEETERPROV

Member
Joined
Oct 22, 2009
Messages
88
Location
Brantford ontario
Austin Powers

Just turned this one out.....:biggrin: My wife calls it the Austin Powers..LOL..Thank you for all your kind comments
 

Attachments

  • 002.jpg
    002.jpg
    63.8 KB · Views: 294

BigguyZ

Member
Joined
Aug 8, 2007
Messages
764
Location
Minneapolis, Minnesota, USA.
What brands have the translucent clays? I gotta get me some of that...

You know, I already have too many ideas I want to try... and not enough kits to try them on. This isn't helping! :biggrin:
 
Joined
Aug 7, 2009
Messages
700
Location
Jamestown, NC
I have used the Premo and just come some Cernit to try. Hobby Lobby is carrying a couple new clays that I will have to try. It looks like they are going designer polymer. I have heard the Kato translucent is very good from a few friends.

If you really want to have fun the pearlized clays have a great effect. The clay has mica particles mixed in giving it a shimmer. When this stuff is polished it looks pretty amazing.
 

SteveH

Member
Joined
Jan 7, 2008
Messages
59
Location
Port Orchard, WA.
Smokey

I saw your candy cane style pen, loved it, and would like to make some of those for Christmas, but I have problems getting my 2d brain around 3d ideas. So please tell me how you roll out and put the colors together, or put the colors together and roll out or what. and please use small words, I am an engineer.

Thanks so much
 

Smokey7385

Member
Joined
Dec 14, 2006
Messages
140
Location
Topeka, KS
Smokey

I saw your candy cane style pen, loved it, and would like to make some of those for Christmas, but I have problems getting my 2d brain around 3d ideas. So please tell me how you roll out and put the colors together, or put the colors together and roll out or what. and please use small words, I am an engineer.

Thanks so much

Hi Steve,

As I mentioned, that was my very first attempt at using PC so I am a newbie.

Tutorial mode on:

I did not use a pasta machine, but I think using one would be much easier. I rolled out two long strips of each color about 1/4" wide and laid them side by side. On the side that would go against the brass tube I took a molding tool and pushed the two together trying not to infiltrate (opps, "mix up") the two colors. I then just twisted the now 1/2" wide clay around the tube and baked it. You will need to start the twist by leaving some waste at the top and bottom in order to get the stripes to completley cover the tubes. I also used the molding tool to VERY gently press the two stips together on what is now the outside. You need to be careful here so you don't get the colors mixed and you want to try to keep the seperation of the colors as straight as possible.

I made the strips quite thin and rather than turn them with any tool, I cheated and after giving the two sections a good bath in thin CA I sanded with 100 grit paper to shape. I then followed my normal sanding process and finished with 4 to 6 coats of thick CA followed by HUT plastic polish.

Tutorial mode off:
 

papaturner

Member
Joined
Apr 5, 2007
Messages
3,397
Location
Buchanan,Georgia USA
Hi Steve,

As I mentioned, that was my very first attempt at using PC so I am a newbie.

Tutorial mode on:

I did not use a pasta machine, but I think using one would be much easier. I rolled out two long strips of each color about 1/4" wide and laid them side by side. On the side that would go against the brass tube I took a molding tool and pushed the two together trying not to infiltrate (opps, "mix up") the two colors. I then just twisted the now 1/2" wide clay around the tube and baked it. You will need to start the twist by leaving some waste at the top and bottom in order to get the stripes to completley cover the tubes. I also used the molding tool to VERY gently press the two stips together on what is now the outside. You need to be careful here so you don't get the colors mixed and you want to try to keep the seperation of the colors as straight as possible.

I made the strips quite thin and rather than turn them with any tool, I cheated and after giving the two sections a good bath in thin CA I sanded with 100 grit paper to shape. I then followed my normal sanding process and finished with 4 to 6 coats of thick CA followed by HUT plastic polish.

Tutorial mode off:

Thanks Rusty,that`s very helpful.
 

snyiper

Member
Joined
Aug 24, 2009
Messages
1,601
Location
St Inigoes, MD
Ok PC gurus I have the scupty as well as sculpty3 I used the 3 and mixed 2 colors and it cured and turned nice but the colors were bland. It was a red and green equal amounts one with a pasta machine one by hand both looks like the colors blended together into a dull red. Now before I try again anyone tell me the secret to getting clean crisp colors?
 

PenAffair

Member
Joined
Sep 8, 2008
Messages
217
Location
Queensland, Australia
Ok PC gurus I have the scupty as well as sculpty3 I used the 3 and mixed 2 colors and it cured and turned nice but the colors were bland. It was a red and green equal amounts one with a pasta machine one by hand both looks like the colors blended together into a dull red. Now before I try again anyone tell me the secret to getting clean crisp colors?

If you were using a marbling technique, it just means you're worked the clay too much. You can use caning techniques to get more colour separation and different patterns as well.

Russell.
 
Joined
Aug 7, 2009
Messages
700
Location
Jamestown, NC
For me Sculpy just doesn't do it. This is only my opinion as others have had a great deal of luck with it. Premo (made by the same company as Scuply) can be picked up for the same price on sale and the colors have a lot more contrast once baked...IMHO. Use the pearlized clays if you want a deeper effect.

Try not to mix the clay to much. Roll the different colors into ropes. Group them together, roll into a rope again, bend it, twist it, and fold it in half. Do this until you get the desired effect. If you just mush it together you will get....mush.

Good luck!
 

papaturner

Member
Joined
Apr 5, 2007
Messages
3,397
Location
Buchanan,Georgia USA
For me Sculpy just doesn't do it. This is only my opinion as others have had a great deal of luck with it. Premo (made by the same company as Scuply) can be picked up for the same price on sale and the colors have a lot more contrast once baked...IMHO. Use the pearlized clays if you want a deeper effect.

Try not to mix the clay to much. Roll the different colors into ropes. Group them together, roll into a rope again, bend it, twist it, and fold it in half. Do this until you get the desired effect. If you just mush it together you will get....mush.

Good luck!

This pen was made doing exactly what Keith said.
 

Attachments

  • IMG_0503.JPG
    IMG_0503.JPG
    22.1 KB · Views: 202

snyiper

Member
Joined
Aug 24, 2009
Messages
1,601
Location
St Inigoes, MD
Ok makes sense I use sculpty3 and have since read they tend to blend more than others... So I guess Ill look for some Fimo and try making canes and twisting together see how that works.
 

SamThePenMan

Member
Joined
Aug 31, 2008
Messages
183
Location
Clearwater, Florida
Maybe I've missed it, but I was wondering if anyone has tried doing lettering in a PC pen? Would that work or would it just be too hard to get letters in with out it blending too much? My though would be to roll out a background color, then cut out (either freehand or with some sorta letter stamp thing) and then fill the cutout with another color, and roll it on to a tube. Just a thought, I haven't tried PC yet so maybe it wouldnt work that well.
 

wb7whi

Member
Joined
Aug 29, 2008
Messages
304
Location
Spokane WA
2 things

I have yet to see any pendents made with the clay:)

It is time for a video of the process. I have seen a few on youtube but nothing relating to pens. We could also use some definitions here, "cane?"

Thanks

Wayne
 
Joined
Aug 7, 2009
Messages
700
Location
Jamestown, NC
There are pendants everywhere. I have made a few and if you search the net most of what is being made of polymer clay is jewelry.

As for the videos there are a couple on youtube. Craftygoat (??) does a quick tutorial on pen making. I am hoping one day when I am not dealing with the weather and my 19 month old gives me time to do some video tutorials or at least some more indepth photo tutorials.

Lettering is tricky. It can be done with canes, but the only one I know that can do it with precsion is a crazy Canadian (Wes Warren). Wes is brilliant when it comes to Millifiore techniques and canes. His Flickr site is a lesson in what your not supposed to be able to do with clay http://www.flickr.com/photos/beadopolis/. Many artist use stamps to creat lettering and highlight the effect with oil paints.
 
Last edited:

randyrls

Member
Joined
Feb 2, 2006
Messages
4,821
Location
Harrisburg, PA 17112
When i put my fittings in they cracked. How can i stop it from cracking? Any ideas?

In the past, I have expanded the tube ends so the fittings are a slip fit. Then CA glue in the fittings. Put a drop of medium or thick CA inside the tube and insert the fitting with a twisting motion. Use a transfer punch to enlarge the last 1/4" or so of the tube. If you turn with bushings, you may have to add tape to the bushings to fit correctly and keep the bushings concentric.
 
Joined
Jun 29, 2014
Messages
29
Location
Australia
I made some more blanks up tonite and when i was rolling out the clay i noticed small pockets of air and i believe thats what causing the breakouts....I guess i will have to invest in a pasta machine.....
 
Top Bottom