Feathered Kitless Proof of Concept.

Signed-In Members Don't See This Ad
See more from Curly

Curly

Member
Joined
Nov 20, 2010
Messages
4,976
Location
RM of Aberdeen, SK.
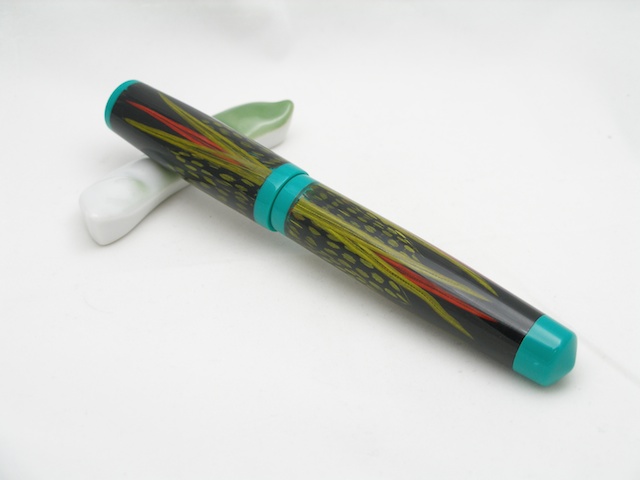
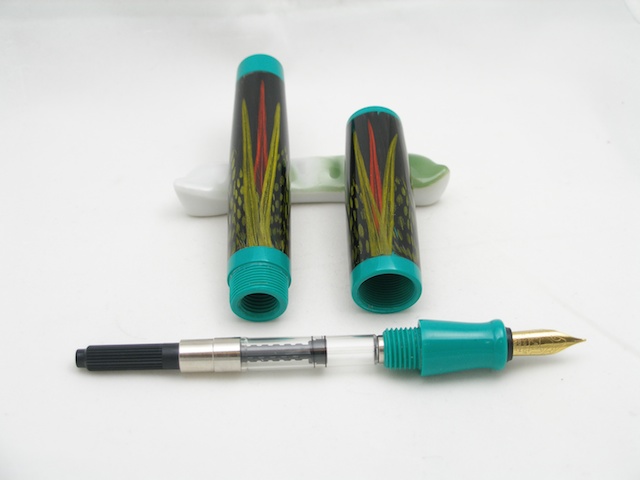
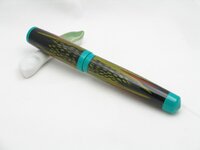
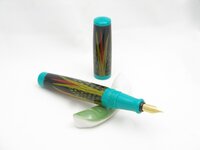
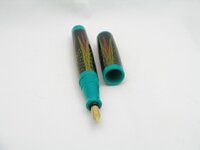
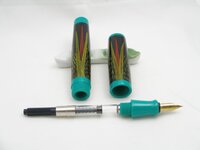
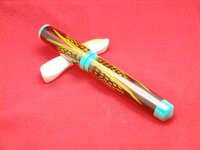
This is my fourth kitless pen made to see if a feathered pen could be done in the kitless format. Naturally I took advantage of Marla and had her apply the feathers. The green virgin sewer pipe was handy but isn't going to wow too many people and isn't in my plans for future pens. Nib and feed are Schmidt 6mm medium. Now that I know it can be done I will refine the how and improve on the shape. I know it is a little rough around the edges and would like to hear what you have to say.

attachment.php


attachment.php


attachment.php


attachment.php


attachment.php


attachment.php
 

Attachments

  • PA310019.jpg
    PA310019.jpg
    46.8 KB · Views: 1,270
  • PA310020.jpg
    PA310020.jpg
    46.2 KB · Views: 1,276
  • PA310023.jpg
    PA310023.jpg
    40.3 KB · Views: 1,266
  • PA310025.jpg
    PA310025.jpg
    41.5 KB · Views: 1,279
  • PA310028.jpg
    PA310028.jpg
    50 KB · Views: 1,266
  • PA310030.jpg
    PA310030.jpg
    44.2 KB · Views: 1,275
Signed-In Members Don't See This Ad
Very unique, I love the contrasting colors on this one. Really stands out in a positive way!
 
Wow, very cool!! Am I correct in saying that's a solid piece of pipe and you just cut indentions for the feathers to be placed and then recast or CA'd on top of that, sort of an inlay?
 
I like the shape, I like the feathers, but the green... not so much. But as a Proof of concept... Top notch!
 
Looks really great from here. I too really like the color combination. If you have issues with the pipe, you could always cast some. Only thing I might do different is recess the feed so its flush with the top of the section.
 
Although I'm not a huge fan of the color of the components, I do like where you are going with the whole idea. Keep going!
 
I knew you would come up with something that would impress alot of people, including me. I guess mopping the bathroom floor paid off. Marla made some really nice blanks for you. I may never post another pen now :biggrin: Great work Pete.
 
Thanks for all the encouragement. There are no brass tubes, so in essence you have to make them from the blank and then cast. A lot more precision and work involved. Now I have to grab the thinking stick and get back to cleaning. :biggrin:
 
There are no brass tubes, so in essence you have to make them from the blank and then cast. A lot more precision and work involved.

That explains quite a bit. I think you have hit a milestone with your design and can see you taking it much farther. I am really impressed with your results.
 
Awesome Pete! I've been staring at a set of feather blanks wondering about doing something just like this. Mine are tubed but I think I can work with that. VERY inspiring!
 
If you shot that pen with a darker background, I bet people would react differently to the colors. The color is loud, and still, most folks won't dig it, but the light background makes the image look "sick", if you will.

I think the pen is pretty wicked all around. Bonus points for originality.
 
If you shot that pen with a darker background, I bet people would react differently to the colors. The color is loud, and still, most folks won't dig it, but the light background makes the image look "sick", if you will.

I think the pen is pretty wicked all around. Bonus points for originality.

Well okay, try these on for size. :smile: 
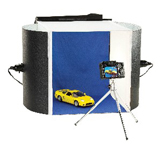
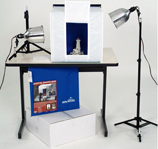
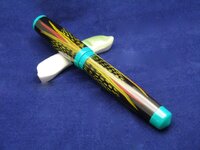
They're the other background colours that came with the little light tent. The red one should be a bit redder. :rolleyes:

attachment.php


attachment.php


attachment.php
 

Attachments

  • PB010001.jpg
    PB010001.jpg
    102.8 KB · Views: 496
  • PB010003.jpg
    PB010003.jpg
    111.9 KB · Views: 456
  • PB010004.jpg
    PB010004.jpg
    96.2 KB · Views: 455
I see nothing but positive with that sewer pipe. I think you are off your rocker, it's a perfect combination. The entire pen looks spectacular, the shape, the polish the photo's, it's an exceptional pen. The only thing I don't like is that it seems to have no clip and maybe the alignment is a touch off, but that's pretty minor.
 
IMHO, I agree with you about the sewer pipe. I think ebonite would have been a much better choice. LOML agrees, you dont wanna know what she said.

Otherwise, love the pen. When I saw the thread, I HAD to click. Beautiful concept.
 
Pete,
Great looking pen. How was the C-900 to thread? I turned quite a bit of PVC, but haven't used it for a "kitless" application. Now that I know it can be done that's a different story all together
 
Thanks for your views folks.

I will put clips on in the future when I get some nice ones. :rolleyes:

Since the pipe was handy and free I used it because it wouldn't bother me a bit to toss the screw ups. Having to toss Ebonite at about $20 a blank :eek: would be another story. Because it was free there were no rejects. :rolleyes:

Threading the PCV is very easy. I used Pam to lubricate the taps and dies. When done I thoroughly cleaned off the metal lathe and re-oiled the surfaces to stop rust. The threads will need to have the cuttings pulled off at the ends of the thread grooves because it doesn't break on its own. Just like the long strings when you turn it and they wrap around everything, forming big nests.

 
LOOOOOOOOOOOOOOOOOOOVE the colors on it! That PVC is totally awesome. And the black background really syncs with the pen. Great work, I hope that one doesn't wind up having a ton of new parts made for it!
 
I love this pen, Pete !!! Great work !!! Thanks for reviving this thread !

Where did you get your light tent ? I need to buy one.
 
Thanks Mal.
Look in eBay or Amazon (both US & Canadian) for "photo light tents" or "photo light boxes" and you'll find tons to chose from, with or without the lights. Mine was a kit with fluorescent lights, and a 12" and 30" pop up cubes with a few colours of background sheets. There are a number of threads in the Pen Photography part of this forum that describe ways of making your own.
 
Overall a nicely shaped pen. Great concept. I do agree the colors are a bit too contrasting but as a proof of concept it's wonderfully executed. For me, the nib itself is too small in size for the overall pen and puts the proportions a bit off. A #6 would be more to size in my opinion.
 
I agree Ty. Four years ago when I made the pen I was just starting to play with kitless pens. All I had was a 14mm triple tap and die set from a group buy and my basic imperial tap and die set that I had from my wrenching days. I picked the #5 Schmidt nib because the tap for it also was the same as their cartridge rollerball. Proprietary nibs from every maker have to have the special tap to match. :rolleyes: The Schmidt is the only one that does double duty, so was a good, in my mind, first choice.
 
...nicely done, great concept! I would not change a dang thing! The onliest person you need to please is yourself! Stay on your own path and trudge onward! Be well.......Jan
 
I love this pen, Pete !!! Great work !!! Thanks for reviving this thread !

Where did you get your light tent ? I need to buy one.

Thanks Mal.
Look in eBay or Amazon (both US & Canadian) for "photo light tents" or "photo light boxes" and you'll find tons to chose from, with or without the lights. Mine was a kit with fluorescent lights, and a 12" and 30" pop up cubes with a few colours of background sheets. There are a number of threads in the Pen Photography part of this forum that describe ways of making your own.

Awesome pen Pete

The light tents are great. Henry's camera storw carries them, that's where I got mine. But don't make my mistake. I thought I would save a couple of bucks and buy the one that had the lights attached. Great I thought, cheaper and easier to pack up and store. Big mistake. The inability to adjust the postion of the lights really sucks. I am actually planing on cutting the light panels off my kit and mounting them on stands, similar to the second picture.

The white front panel on the second one is also a good feature. It helps to block the reflection of your camera and things behind you. I never noticed it until I read one of the articles here, now I see it all the time. Now I try to use a piece of white cloth or card on the front.

This is the kit that I bought. Do not buy this one.

Products12901-1300x1300-158850.jpg


This one would be better. It allows much more flexibility with the ligting, and its on sale for the same price right now.

Products12797-1300x1300-153090.jpg
 
Back
Top Bottom