Bottle openers

Signed-In Members Don't See This Ad
See more from sbarton22

sbarton22

Member
Joined
Sep 7, 2011
Messages
268
Location
Kansas City
I'm looking for some bright ideas. I would like to make some bottle openers, and it could be turned or otherwise. I've seen and used the typical "turned openers" you would find at craft supplies, penn state, rockler, etc. Those are great.

However, what I am really looking for is something different. I don't know what that might be, but not the standard fare. To me, those openers telegraph the lathe aspect of the final product. I'm looking for something different.

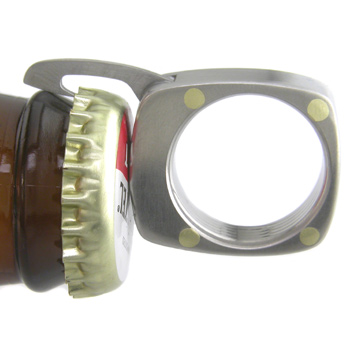
I have been thinking about the flat type with the circle on one end and opener on the other (see below), but I can't quite figure out how get wood to stick to it w/o a bolt or screw. I don't really understand the rivet things that hold a knife together either, so I'm just an idiot on those things.

Any ideas or suggestions would be greatly appreciated.

flat opener
 
Signed-In Members Don't See This Ad

gwilki

Member
Joined
May 20, 2007
Messages
971
Location
Ottawa, ON, Canada.
You could start with the opener that you are looking at, grind or cut away much of the "handle" portion, then mount it in a blank by drilling the blank and epoxying it into the blank. You would turn the blank to whatever shape you wanted first, of course, but you would be totally free to do whatever you wanted. You could do some off center design to make a funky shaped handle. The possibilities are endless.
 

btboone

Member
Joined
Dec 5, 2004
Messages
2,421
Location
Roswell, GA, USA.
utilitybottleopener.jpg


Here's a bottle opener on a ring. I actually am showing it for the rivets, which could be applied to wood parts with metal outside of them. I used 1/16" brass rods, available at hobby shops and each plate has 1/16" holes drilled though it. On the outside plates, I used a 3/32" ball endmill to do open the hole on one side to a cup shape so that the brass could be flared out to fill the cup and be sanded down to flush. It works well and is solid as a rock. It would need solid metal on the outside plates, but some inner plates could be replaced by wood and still work.
 

sbarton22

Member
Joined
Sep 7, 2011
Messages
268
Location
Kansas City
You could start with the opener that you are looking at, grind or cut away much of the "handle" portion, then mount it in a blank by drilling the blank and epoxying it into the blank. You would turn the blank to whatever shape you wanted first, of course, but you would be totally free to do whatever you wanted. You could do some off center design to make a funky shaped handle. The possibilities are endless.

This is where I was leaning. I was trying to keep the "additional" work on the metal part to minimum as about the only tools I have that might work on it would be a grinding wheel and hacksaw.

I have made some custom wedding cake sets in this manner. I don't mind it for a one off, but if I wanted to make some for selling, I would like to keep the metalwork down to a minimum.

Still is my best choice at the moment. Heck, maybe it will convince me to get a chop saw! :biggrin:
 

sbarton22

Member
Joined
Sep 7, 2011
Messages
268
Location
Kansas City
Here's a bottle opener on a ring. I actually am showing it for the rivets, which could be applied to wood parts with metal outside of them. I used 1/16" brass rods, available at hobby shops and each plate has 1/16" holes drilled though it. On the outside plates, I used a 3/32" ball endmill to do open the hole on one side to a cup shape so that the brass could be flared out to fill the cup and be sanded down to flush. It works well and is solid as a rock. It would need solid metal on the outside plates, but some inner plates could be replaced by wood and still work.

This is the opposite direction I was thinking...having metal on the outside...but this is the reason I asked. You've now made me look at the design solution differently. The process you describe seems easy enough. Going to have to give this real thought. Thanks for opening up my perspective on this.

And how are you flaring the brass out? just tapping at it w/ a hammer?
 

btboone

Member
Joined
Dec 5, 2004
Messages
2,421
Location
Roswell, GA, USA.
Yes. For the first side, I put the brass in a mill collet and have it stick out about 1/16" or so, grip it tight, then tap it with a small hammer. This will make a nicely mushroomed end. I then take the collet out of the mill and hammer the brass into the hole in the sheet using the collet on the other side of the plate as a backer so I don't overstress the hole. Once the brass is seated well in the first side, it won't move much and works better to stack the laminates tighter. I put the plates on and cut the brass with some wire cutters about 1/16" from the other end then sand it until it is perpendicular to the surface. I then put the whole assembled unit on a solid surface like a steel milling vice and hammer the other side until the hole is completely filled. Use lots of fine taps instead of heavy hits to spread the brass in the cupped hole. The brass can then be sanded to flush.
 

sbarton22

Member
Joined
Sep 7, 2011
Messages
268
Location
Kansas City
Yes. For the first side, I put the brass in a mill collet and have it stick out about 1/16" or so, grip it tight, then tap it with a small hammer. This will make a nicely mushroomed end. I then take the collet out of the mill and hammer the brass into the hole in the sheet using the collet on the other side of the plate as a backer so I don't overstress the hole. Once the brass is seated well in the first side, it won't move much and works better to stack the laminates tighter. I put the plates on and cut the brass with some wire cutters about 1/16" from the other end then sand it until it is perpendicular to the surface. I then put the whole assembled unit on a solid surface like a steel milling vice and hammer the other side until the hole is completely filled. Use lots of fine taps instead of heavy hits to spread the brass in the cupped hole. The brass can then be sanded to flush.

Wow...that is a really great explanation! I had actually thought that is how you would tap and sand the second end, but I didn't' even think about the first end. The collet trick is pretty slick.

Thanks a lot for sharing that. I'm going to give some serious thought and see if I can make that kind of idea work.
 

sbarton22

Member
Joined
Sep 7, 2011
Messages
268
Location
Kansas City
How about using paint can openers?

I cut off the paint can end and use the bottle opener end. Most have a flat shank on them, but it doesn't show when filled in with epoxy.

Very nice idea...and so obvious! How could I forget the good ol' church key!

These are great ideas from everyone. Thanks!!
 
Top Bottom