Displaced Canadian
Member
I want /need to build a few laser kits. I'm a little nervous. Any tips. What about black CA? Any advise would be appreciated.

Christopher,
If you get the kits from Constant or from Ken at Kallenshan Woods they will have good, detailed instructions included or available on their respective web sites. READ and FOLLOW the directions!! DAMHIKT!!
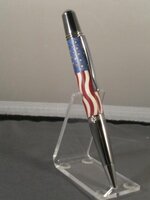
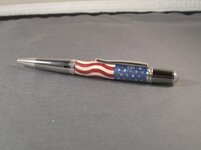
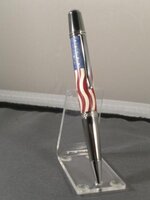
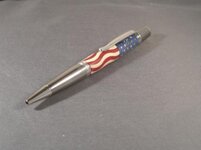
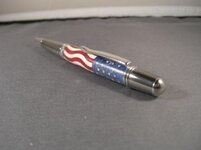
I just finished assembling one of Constant's American Flag kits. His and Ken's are slightly different, but again, if you follow their directions you should be OK. The stars gave me some trouble just because it took me 4-5 settings to get all 50 in place.
Give a kit a try, and let us know how it goes.
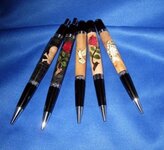
Looking at the humming bird, deer, poker, and puzzle pen. My friend saw Constant's web site and got ALL excited.
 But they all worked out perfectly if you take a little care and don't lose any of the small parts.