almond wood goblet

Signed-In Members Don't See This Ad
See more from triw51

triw51

Member
Joined
Feb 14, 2012
Messages
2,062
Location
407 East Cottonwood Drive, Cottonwood AZ
Saw an ad for free almond wood in a local craigslist. The tree was dying and the lady said if I cut it down I could have the wood. A friend and I spent a few hours cutting it down. This is one of the branches from the tree, turned the bowl and hollowed it out. Then the finished goblet. The wood reminds me of olive wood rich colors and nice grain patterns.
Please comments and suggestions welcome.
 

Attachments

  • almond  goblet start.jpg
    almond goblet start.jpg
    94.3 KB · Views: 415
  • almond goblet started.jpg
    almond goblet started.jpg
    59.7 KB · Views: 439
  • almond goblet finished.jpg
    almond goblet finished.jpg
    38.5 KB · Views: 1,276
Signed-In Members Don't See This Ad

robutacion

Member
Joined
Aug 6, 2009
Messages
6,514
Location
Australia - SA Adelaide Hills
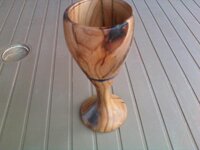
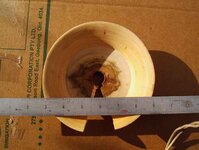
Nice looking goblet. I really like that wood.

I hope the branch was dry enough that it won't crack.

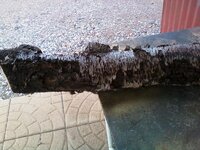
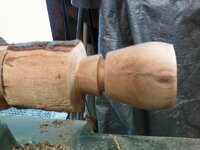
Dan this branch was well seasoned and was nice to turn.

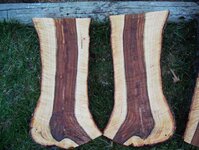
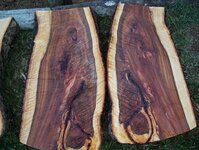
Yes, the wood is beautiful and if you're lucky and from the size of that branch, he tree has to be fairly big (for a fruit tree) the main trunk and particularly the crotch pieces will have some amazing grain. The older the Almond tree (any tree) the richer the colours are, it take a lot of years for the heartwood grain and colours to develop and that's where you will find your "treasures".

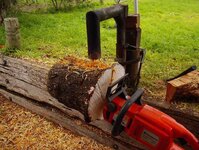
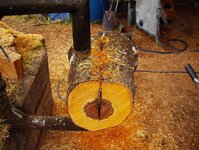
Almond tree wood does crack severely unfortunately, the younger the tree the worse it will crack, the best way to void most of the cracking is to process the wood immediately, turn as many rough pieces as you can and seal/treat them (many ways to do this) if you can't turn them all, cut your logs 4" longer than its diameter (2" will be wasted on each end) and them split them through the "pith", at least that and you are helping the wood to dry without going nuts and crack/rip the log into almost unworkable wood, even for getting pen blanks out of it, I sometimes wast 70% of it, just crazy, it is.

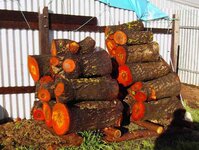
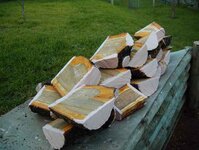
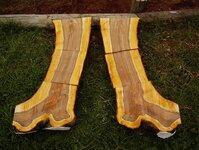
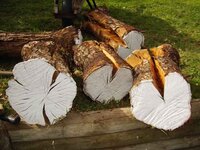
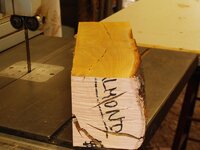
I know that this thread is about your Almond wood and not mine but, allow me to show everyone some examples of what one can expect when cutting and storing a mature Almond tree wood logs, from the most beautiful and bazaar to the worse case scenario. Oh...! and if you are really lucky, you may find a burl PIC08619.jpg hanging from one of the logs, half in, half out, that's gold in my eyes...!

Some of these pics are quite old and show my failed attempts to stock a large amount of 28 years old almond plantation trees that were bulldozed out due to pour nut prices.

I know that I made a Internet thread about these almond trees, I'm not sure if was here or before that, when I was with the Australian Wood-Worker forum, lots of stuff in there so, point I'm making is, there is a considerable wast with Almond wood, make as many pieces as you can, you will lose some but you won't lose them all...!

Best of luck...!:wink::biggrin:


Cheers
George
 

Attachments

  • washing sand out of timbers 004_(1).jpg
    washing sand out of timbers 004_(1).jpg
    77.4 KB · Views: 326
  • Timbers preparation 054_(1).jpg
    Timbers preparation 054_(1).jpg
    77 KB · Views: 339
  • Timbers preparation 053.jpg
    Timbers preparation 053.jpg
    110.5 KB · Views: 303
  • Timbers preparation 053a_(1).jpg
    Timbers preparation 053a_(1).jpg
    54.5 KB · Views: 353
  • Cutting & loading the Almond trunks 037_(1).jpg
    Cutting & loading the Almond trunks 037_(1).jpg
    63.3 KB · Views: 1,245
  • Cutting & loading the Almond trunks 038_(1).jpg
    Cutting & loading the Almond trunks 038_(1).jpg
    78.8 KB · Views: 2,841
  • Timbers preparation 060.jpg
    Timbers preparation 060.jpg
    101.4 KB · Views: 663
  • Timbers preparation 001_(1).jpg
    Timbers preparation 001_(1).jpg
    65.7 KB · Views: 251
  • Timbers preparation 004_(1).jpg
    Timbers preparation 004_(1).jpg
    43.2 KB · Views: 277
  • PIC06845_(1).JPG
    PIC06845_(1).JPG
    66.5 KB · Views: 434
  • PIC06856.JPG
    PIC06856.JPG
    59.2 KB · Views: 305

triw51

Member
Joined
Feb 14, 2012
Messages
2,062
Location
407 East Cottonwood Drive, Cottonwood AZ
Thank you George: What I did was cut the logs into sections (wish I heard the 2" rule first but such is life) then I painted the cut ends with latex paint to seal. Will this work or should I cut them and turn them?
 

robutacion

Member
Joined
Aug 6, 2009
Messages
6,514
Location
Australia - SA Adelaide Hills
Thank you George: What I did was cut the logs into sections (wish I heard the 2" rule first but such is life) then I painted the cut ends with latex paint to seal. Will this work or should I cut them and turn them?

If you can, rough turn as much as you can about 1" thick and coat them with the best sealer you can afford, if you can't turn it all, a least rip the logs through the centre (pith) and then seal the ends. You said that you already sealed the ends so, rip then in half and re-paint about 1" over the end-grain, as I shown you on one of my pics.

This one case where boiling the rough turned pieces, would be one of the best ways to endup with the highest percentage of turned pieces, without any major cracks.

One of the big problems with fruit trees is that, they are difficult to dry without twisting, buckling or cracking, the bigger the surface/volume/size of the wood piece, the worse it behaves. It should also be said that, fruit trees are capable to produce some of the best grains and colours of any trees, out there so, you game some, you lose some...!

PS: the 2" rule for each side of the green log, is one of the greatest lessons I have acquired dealing with woods for wood-turning and pen-making, it does saves yiuy from waiting a lot more, later on...!

Cheers
George
 
Last edited:
Top Bottom