Advice for creating my first shop

Signed-In Members Don't See This Ad

Dalecamino

Local Chapter Leader
Joined
Jan 2, 2008
Messages
14,572
Location
Indianapolis, In.
Great pictures. You're working hard. My thought is, you might consider more than one bench. Lots of salvaged lumber to recycle. I may be behind your thoughts, but thought I would mention it. Since I don't have anything else to do right this minute. :biggrin: Thanks for sharing with us!
 
Signed-In Members Don't See This Ad

bmachin

Member
Joined
Jul 28, 2013
Messages
613
Location
Owensboro, KY
If you are considering using reclaimed framing lumber for building your workbench, I suggest that you take a look at Paul Sellers YouTube channel where he builds a bench entirely from reclaimed lumber using only hand tools. With the power tools that you have in hand you could make quick work of this bench. Granted, it is a bench that is oriented toward hand tool woodworking, but most bench work is, for the most part, hand or small power tool work.

My son and I are building this bench for him right now out of poplar since we didn't have a good source of dry construction lumber--what comes out of the big box store is still way to wet IMHO.

Worth a look anyhow.

Bill
 

Herb G

Member
Joined
Nov 13, 2015
Messages
1,461
Location
Southern Maryland
I have helped a few close friends build their shops in the past.
I did all the electrical work, they did everything else.

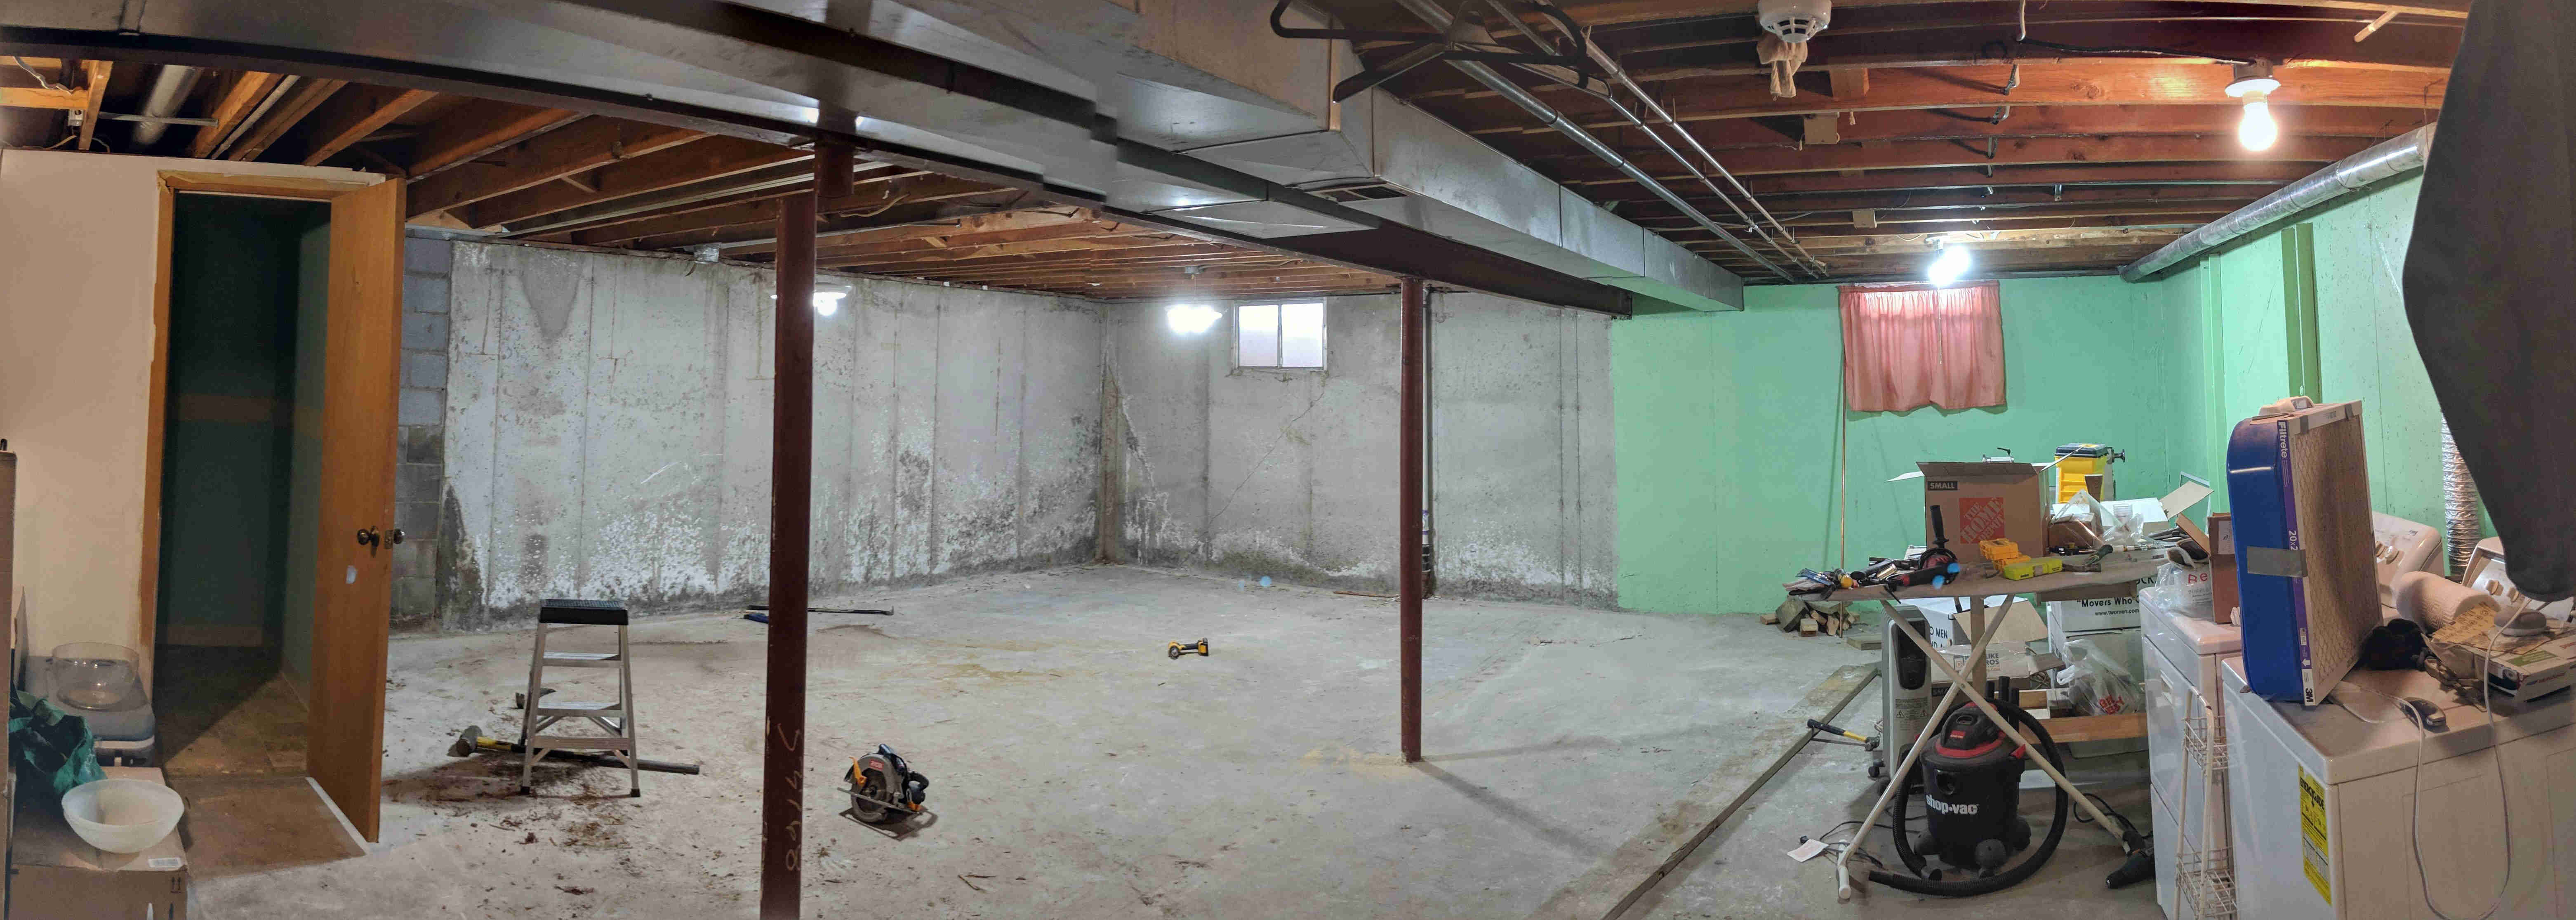
The best way to approach it is get some graph paper, and make cut outs of thin cardboard to scale for the tools you will have. You can look up the appx. size of them online, and go accordingly. Make a scale model of your shop on the graph paper first. Mark them table saw, bandsaw, etc.

That way, you can move the scale pieces of cardboard around on the graph paper until your layout is the way you want it. You definitely do not want to waste an electricians time by moving outlets & adding them willy nilly until you get close to what you're aiming for, believe me.
Electricians are not cheap on an hourly basis by any means.
At least I'm not.

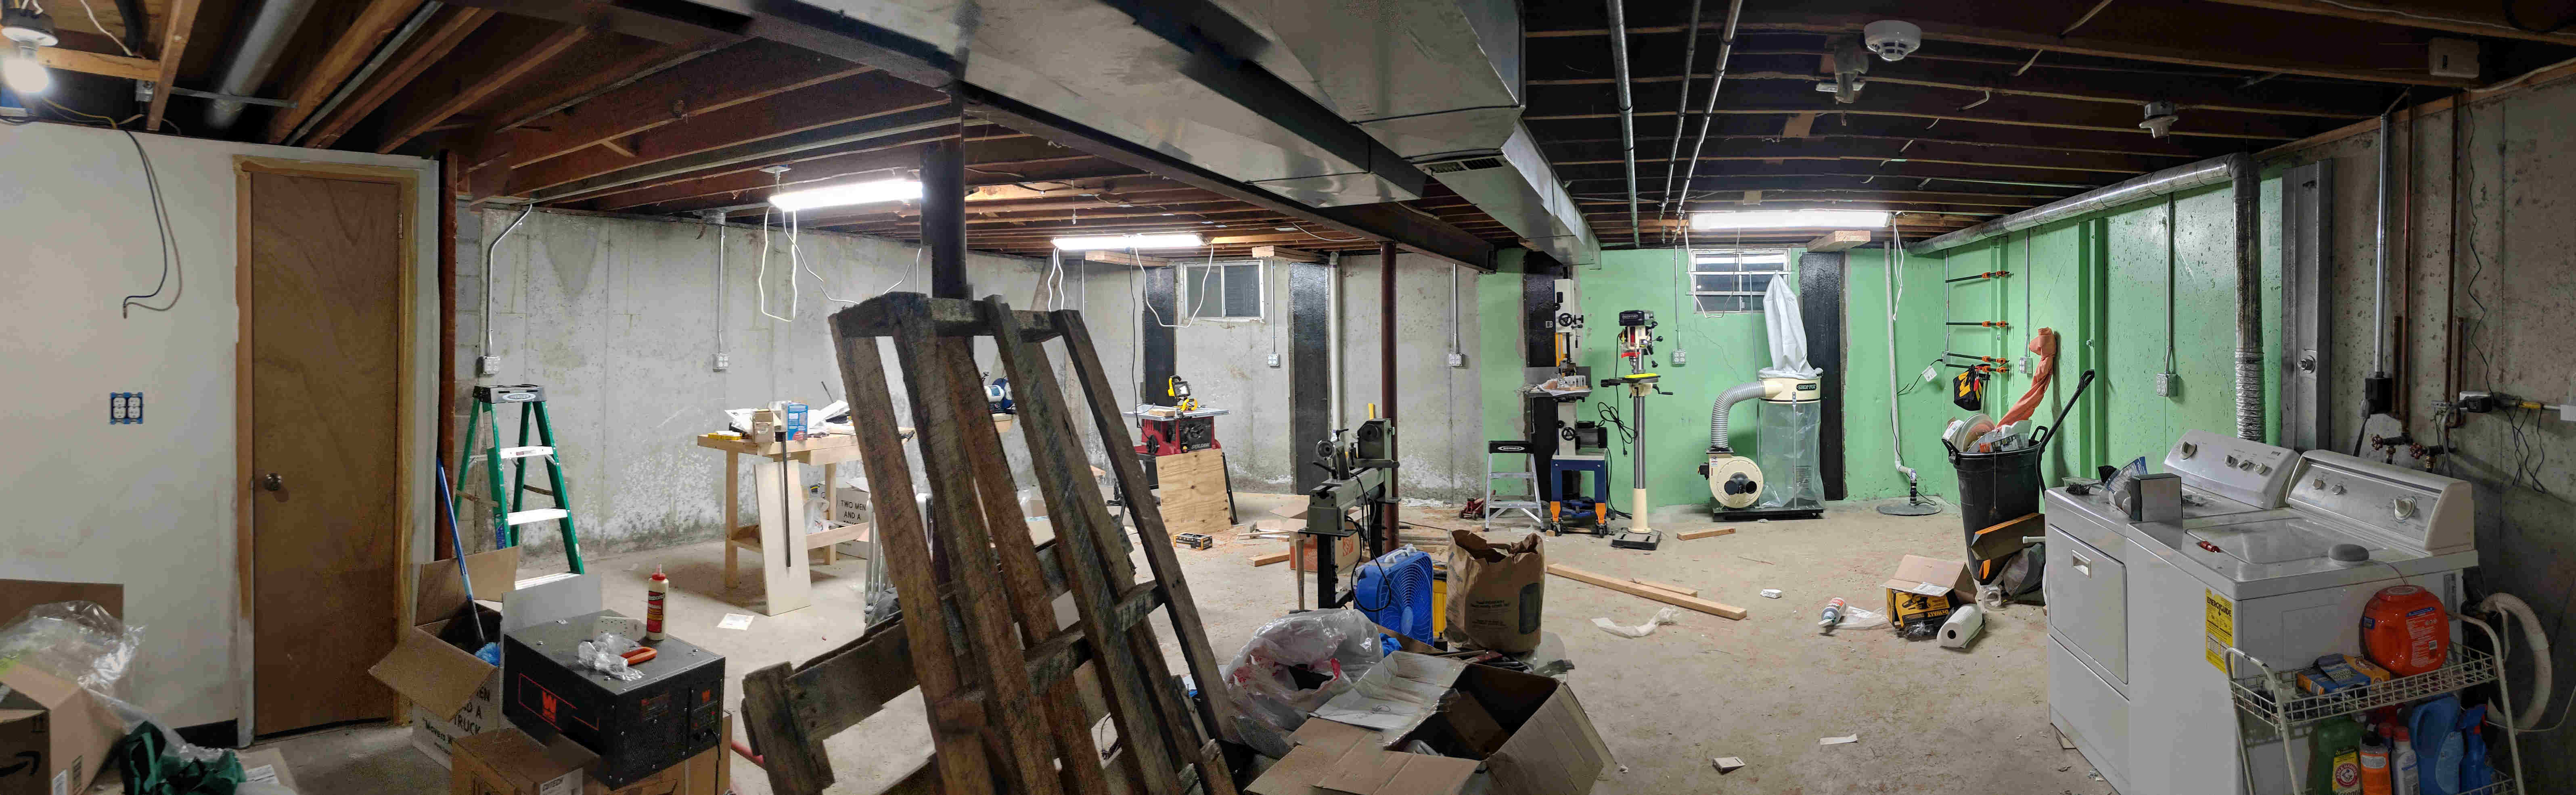
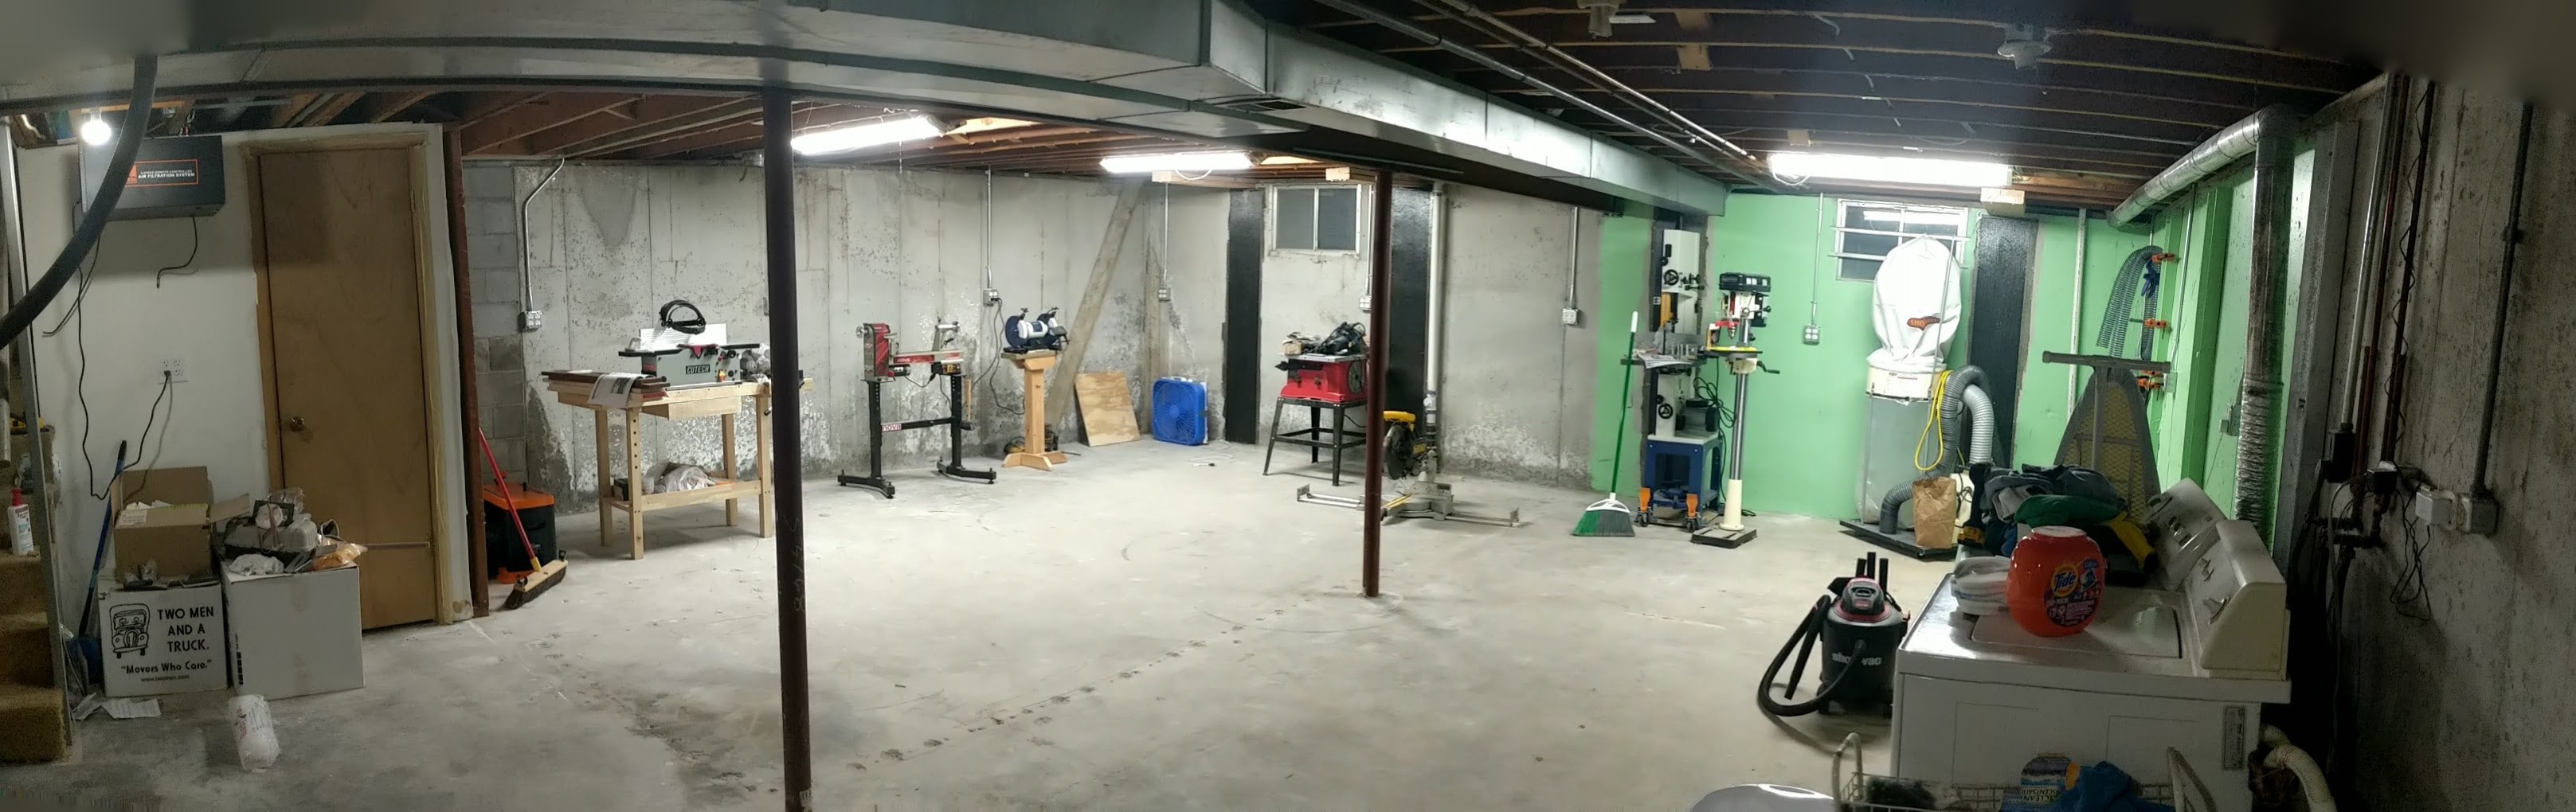
Next, you want to design & build a dust collection system BEFORE you do anything else. It's a royal PITA to go adding DC stuff after your tools are in place. After you get the DC system in place, you can decide where you want your outlets. I have never installed any outlets below 50" to the bottom of the box.

Why 50" ?
So, you can lean sheet goods against the wall & not cover up any outlets doing so.

I would insulate any open joists above the shop to keep the noise down in the living space above it. Believe me, your wife or partner will appreciate the extra effort. After you install the basics, then install fire rated drywall on the ceiling to further deaden the noise, and keep dust from migrating up into the living space.

That should get you started & keep you busy for a year at least.
Get back to me after you do all that & I'll help you out some more.
:)
 

brailsmt

Member
Joined
Dec 6, 2018
Messages
102
Location
Kansas City, MO, USA
All cleaned out! Foundation work begins tomorrow, then electrical. Final dimensions are 25'x21' with room left over if needed for assembly. Today we ripped out some termite eaten floor joists and replaced them with pressure treated lumber, removed the carpet, and junk. After electrical I'll be painting the walls and ceiling white, then I'll start actually placing my equipment in all the wrong places. :D


View in Gallery
 

jttheclockman

Member
Joined
Feb 22, 2005
Messages
19,135
Location
NJ, USA.
Are you putting anything on the walls??? I would not sheet rock a basement ceiling ever. You will need access. I would hang a grid system and insert sheet rock panels if you choose. I used regular tiles. If you are not hanging any ceiling and just painting what is there, then I am out of suggestions for you. You have duct heating so that could present some problems for dust control if you plan to keep entire room open. Believe me dust travels no matter what dust control system you use. You keep saying foundation work, are you planning on blowing a wall out and extending the basement??? If you are painting the bare concrete walls, I recommend using DryLoc paint it is a moisture sealer. You can use the waterbased stuff indoors so less fumes.
 
Last edited:

brailsmt

Member
Joined
Dec 6, 2018
Messages
102
Location
Kansas City, MO, USA
Are you putting anything on the walls??? I would not sheet rock a basement ceiling ever. You will need access. ... You keep saying foundation work, are you planning on blowing a wall out and extending the basement?

Nothing but white paint on the walls and ceiling. The foundation work is repair only. Two of the walls have moved in a few inches, so they are pulling them back to flush and piering, which is common in the area due to the clay soils native to Missouri.
 

Pjohnson

Member
Joined
Feb 16, 2012
Messages
278
Location
Plympton, MA
My personal opinion - skip painting the walls.
You will be hanging cabinets and probably pegboard. Your bench and machines will fill the rest of the wall space. The paint will look great - then you will not see it again.

Being new to the home, you do not know if there are any moisture issues or effervescence coming through the concrete.

I debated this on my shop which is being built right now (we moved last year) and opted not to do it. I am glad i didnt for all the reasons above.

Great job and best of luck.
 

jttheclockman

Member
Joined
Feb 22, 2005
Messages
19,135
Location
NJ, USA.
My personal opinion - skip painting the walls.
You will be hanging cabinets and probably pegboard. Your bench and machines will fill the rest of the wall space. The paint will look great - then you will not see it again.

Being new to the home, you do not know if there are any moisture issues or effervescence coming through the concrete.

I debated this on my shop which is being built right now (we moved last year) and opted not to do it. I am glad i didnt for all the reasons above.

Great job and best of luck.

You can see it on the walls now. This is the reason I suggested using Dry Loc paint if he is painting the walls. You can tint any color you want but comes in white and use to tan too. I painted mine a grey/blue
 

Pjohnson

Member
Joined
Feb 16, 2012
Messages
278
Location
Plympton, MA
In my experience Dry-Loc is a good product. In this instance it may cause more harm than good. You may find over time that the pressure of the moisture will cause the dry-loc to blister and peel.

To solve for the issue 100% - the concrete would need to be sealed on both sides.

A link to my shop build. One wall is painted with DryLoc and I have some peeling. After the cabinets and pegboard went up. You cannot see the wall. The other photo shows the extent of the effervescence in my basement (and a humongous dehumidifier)

1_A41DC726-12D5-4CD2-835A-4E2930627AA0.jpeg


IAP Home - Photos - Shop Walls
 
Last edited:

jttheclockman

Member
Joined
Feb 22, 2005
Messages
19,135
Location
NJ, USA.
The thing is you do not know what will happen but it can not hurt if he plans on painting. I wish the OP all the best with this build. Fun to get a shop where things are brand new and just starting out. I remember when I was doing mine and the thoughts running through your head. I wish I had more room and built my dream shop. Too old for all that now and won't be long before the big sell off.
 

brailsmt

Member
Joined
Dec 6, 2018
Messages
102
Location
Kansas City, MO, USA
In my experience Dry-Loc is a good product. In this instance it may cause more harm than good. You may find over time that the pressure of the moisture will cause the dry-loc to blister and peel.

To solve for the issue 100% - the concrete would need to be sealed on both sides.

A link to my shop build. One wall is painted with DryLoc and I have some peeling. After the cabinets and pegboard went up. You cannot see the wall. The other photo shows the extent of the effervescence in my basement (and a humongous dehumidifier)

1_A41DC726-12D5-4CD2-835A-4E2930627AA0.jpeg


IAP Home - Photos - Shop Walls

Thank you for the advice. The walls have been sealed on the outside with a product called mel-rol, that was part of the foundation work and why they tore up my yard. I think I am going to skip painting anything at all. I thought I was going to do it, but I just want to get to work on all these projects that are lining up. I can always move stuff and paint later if I determine I don't have enough light. I'm pretty sure the only sources of moisture in my basement were the chimney clean out (solved with a chimney cap) and the walls that have now been sealed. The previous owners had put up drywall that held in the moisture, allowing mold to grow. Once that was gone, everything dried right up.

In other news, I have all my equipment and I'm just waiting for the electrician before I can start using everything. As for now, I have a single 10 gauge extension cord outlet allowing me to run one machine at a time. Much less than ideal. I have managed to build a stand for my grinder though. I'll be mounting it and the wolverine jig tonight to the stand and maybe get started on making the cuts for my first workbench.
 

MDWine

Member
Joined
Mar 22, 2005
Messages
2,693
Location
Manassas Park, Virginia, USA.
Excellent! Are you building a "primo" bench, or just a serviceable bench? I just watched the Woodsmith shop program to build a "first bench" that looked really nice, and was a very simple build.

Have fun, above all! ;o)
 

brailsmt

Member
Joined
Dec 6, 2018
Messages
102
Location
Kansas City, MO, USA

pturley

Member
Joined
Dec 4, 2018
Messages
33
Location
Cleveland, Ohio
Inferred, but not specifically mentioned yet, but the primary means of dust control should be by controlling the pressure differential between your shop and the rest of your house. Control your airflow so that the workshop is always NEGATIVE pressure to the rest of the house.

Only EXHAUST air from your shop to the outside. That way, all of the make-up air in your shop is coming from cleaner areas inside of the house. This will help prevent fines and fumes from getting where they are not desired.

Same as designing a clean-room, except in reverse! (in a past life!)

Keep us posted!
Sincerely,
Paul Turley
 

bmachin

Member
Joined
Jul 28, 2013
Messages
613
Location
Owensboro, KY
I think the bench you have chosen is a good starter. I would advise you to get a good cast iron vise to go with it. I built a European style bench 40 years ago with wood front vise, tail vise, dog holes, the whole bit. After watching Paul Sellers (I know I keep mentioning him) my son and decided to go with a cast iron vise for his bench. This is the one that he recommends:

https://www.amazon.com/dp/B0043YHD4A/ref=twister_B016DNZDTU?_encoding=UTF8&psc=1

Kind of pricey and you may be able to find it cheaper elsewhere, but you'll never break it, and you can always move it when you upgrade your bench. The 9" is probably the one to go with.

FWIW,
Bill
 

Rodney W

Member
Joined
Feb 27, 2019
Messages
19
Location
Centralia, WA, USA
Congrats on your new shop!
You can get by just fine with bare concrete walls but if you can you might want to think about putting up wood walls (not drywall) and painting them a light color. Much easier to hang cabinets and such instead of trying to drill and install anchors every time you want to hang something on the walls. Best done before the shop is full. I have an above ground shop. I regret not covering the inside of the studs when I built it.

If you plan to turn bowls get the biggest bandsaw you can fit in there for processing your blanks, also better for resawing if you want to do flat work. When I started processing my own wood I quickly maxxed out my 14" saw. A riser kit can help but remember those saws were never designed for cutting 12" of wood. A big saw can cut little stuff but a little saw can't cut big stuff.

As you upgrade, get the best tools you can afford. Buy once, cry once.
Rodney
 
Joined
Dec 22, 2017
Messages
3,053
Location
Wolf Creek Montana
My first workbench, which I still have and use, was 6 4x4's as the legs, sides and middle, 1x4 to hold the shelving about 8" off the floor and the top was a solid core door that was going to get tossed. I've had it for well over 40 years and it been a great work bench. My other two benches I got when we closed our retail store and they were the counters, and they work great. They have doors and drawers and are rock solid. On my original work bench I have a very large Wilton vise and on each of the others I have smaller vises I got from Sears a number of years ago. To hold the door to the 4x4 posts I just screwed the door the posts. The bench probably weighs close to 200lbs and I've moved it 3 times and it's still rock solid. I've got holes drilled in it for reloading presses etc. and to mount other items like swing lights. To plug the holes to keep sawdust etc. out of them I use dowels or bolts. It's worked great for many years and I figure for many years to come. I also made my own lathe stand that works great and has wheels on it to roll it around. It's probably at least 40 years old too, if not older. My pen lathe is mounted to one of the retail store counters. My table saw stand is an old typewriter stand with the table top cut out to allow for sawdust to fall to the floor. It's not my old Jet cabinet saw but it does what I need it to do and I can put it wherever it's needed. My Makita planer I mounted on wheels so I could move it around. To make it a stationary tool so that it won't move during use I cut 2x4's, mortised out a section for the wheels and when I need to use it I raise the front or back , or both usually, and put the wheels in the mortise and it becomes a stationary machine. My band saw, drill press scroll saw and sander are all stationary tools as is my joiner and shaper. All my "portable" tools are kept on shelves in their original boxes. My hand tools are mounted on peg board which keeps them well organized and easy to reach.
 

brailsmt

Member
Joined
Dec 6, 2018
Messages
102
Location
Kansas City, MO, USA
Electrical work is almost completed. I've got the big pieces of equipment set up, but still have a few benchtop tools that I need to get set up. Once I get it cleaned up, I'll post another shot. I still have a lot of work to make the space functional, but all my outlets are wired and have power now. I can't wait to complete the other home renovation work I'm doing so I can get into my shop making things.


View in Gallery
 

brailsmt

Member
Joined
Dec 6, 2018
Messages
102
Location
Kansas City, MO, USA
Well, I finally got all the home renovations done and got back to working on the shop. I'm finally ready to at least start making pens again. I hope to turn out a few over the next couple of days. I'm missing all sorts of stuff, like cabinets, a workbench or two, tool organization, etc... All in good time. I'm already scheming on where to add additional power, I have plenty, but none in the middle of the room. I already plan to run some power to the support poles. Anyway, thank you everyone for the advice.


View in Gallery
 

StanBrown

Member
Joined
Jul 24, 2018
Messages
90
Location
Waller,Texas
My shop is 40 x 20 and it is too small. My advice: draw an outline to scale on a large piece of paper. Cut out scale "models" of your stationary items (table saw, work bench, etc) and place them in the outline. Moving them around on paper is a lot easier than moving them around in the basement. Lastly, have as many things on casters as you can. Just make sure they are the kind that lock from both turning and rolling. This could include nearly all of the "stationary" items such as the band saw, table saw, etc. That way you can easily and very quickly rearrange your space as needed.
 
Top Bottom