Advanced Kit Contest POLL

Signed-In Members Don't See This Ad

Pick your favorite 3

  • Entry 1

    Votes: 43 51.8%
  • Entry 2

    Votes: 32 38.6%
  • Entry 3

    Votes: 22 26.5%
  • Entry 4

    Votes: 29 34.9%
  • Entry 5

    Votes: 17 20.5%
  • Entry 6

    Votes: 20 24.1%
  • Entry 7

    Votes: 14 16.9%
  • Entry 8

    Votes: 32 38.6%

  • Total voters
    83
  • Poll closed .

Brooks803

Member
Joined
Sep 13, 2009
Messages
5,632
Location
Aiken, South Carolina
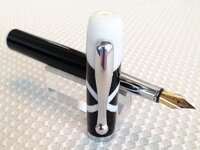
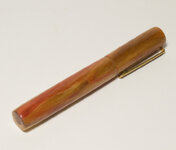
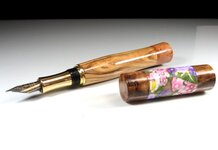
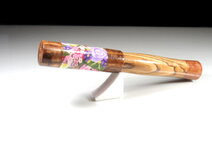
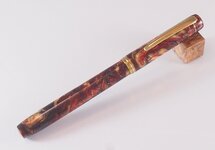
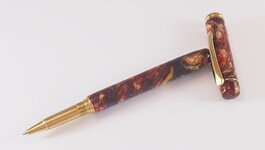
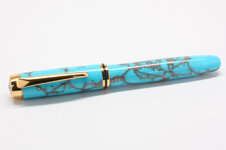
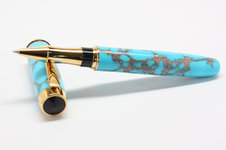
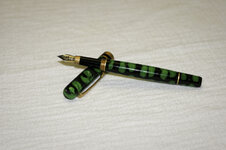
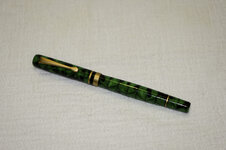
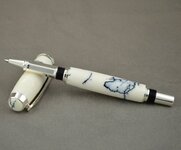
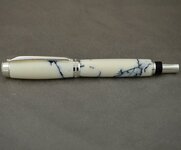
Here's the criteria that each contest entry had to go by. Please vote for your 3 favorites. This poll will last for 3 days.


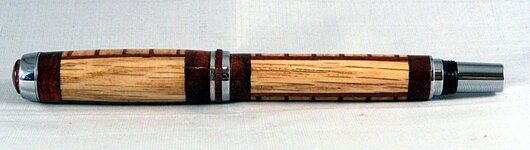
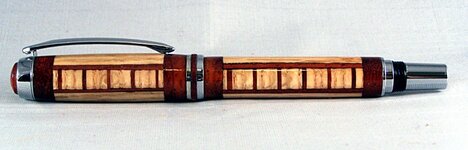
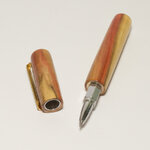
  1. Any Rollerball or Fountain pen kit is allowed
  2. You MUST eliminate a minimum of 1 component
  3. You MUST use a minimum of 2 components
  4. Brass tubes, refills, ink converters, & spring do NOT count as components within the scope of this contest.
There are no restrictions on tools or techniques. Everything is allowed as long as you are the one doing the work.


You will judged by your peers for the following criteria
1 - creativity
2 - techniques used to alter the pen
3 - looks, we all like a pretty pen!

Voters please take EVERYTHING into consideration before you vote. This is not just a pretty blank competition.


Last edited:
Signed-In Members Don't See This Ad

Brooks803

Member
Joined
Sep 13, 2009
Messages
5,632
Location
Aiken, South Carolina
Entry 1

Statement:
After viewing high end executive pens by key manufacturers I came up with this design for an executive pen:

Kit: Atrex - Removed the end caps, retained the clip, center band and internals.
Pen body -- Black acrylic segmented with white acrylic.

Design features:
Closed ends -- very smooth, feels good in the hand, high end look
Multi blank segmenting -- unique, generates interest
Hidden clip -- adds a bit of magic
Cast and framed initial window -- Key focal point, one of a kind, personalized for owner (who retains bragging rights). Just plain fun!
 

Attachments

  • Entry 1.jpg
    Entry 1.jpg
    321.6 KB · Views: 343
  • Entry 1a.jpg
    Entry 1a.jpg
    214.4 KB · Views: 292

Brooks803

Member
Joined
Sep 13, 2009
Messages
5,632
Location
Aiken, South Carolina
Entry 2

This is a Smitty Caballero rollerball. I created the blank using oak and padauk. I removed the stock black finial and the black center band accent and replaced them both with a piece of padauk.
 

Attachments

  • Entry 2.jpg
    Entry 2.jpg
    115.5 KB · Views: 275
  • Entry 2a.jpg
    Entry 2a.jpg
    129.2 KB · Views: 326

Brooks803

Member
Joined
Sep 13, 2009
Messages
5,632
Location
Aiken, South Carolina
Entry 3

Long description:


Started with a nice 3/4x3/4x5" blank of Stabilized Flame Boxelder, and a PSI Vertex Rollerball kit. Turned the centerband/ring-magnet portion of the kit down, removing the centerband portion and leaving the ring magnet and nib housing tube intact and full length.


Drilled the blank with several diameters at different portions:


First a 1/4" pilot/mandrel hole was drilled through the length of the blank, before cutting. Cut into cap/body sections with narrow-kerf bandsaw blade to leave minimum interruption of grain pattern.


Cap drilled 9/32 to depth of 1 1/2", 15/32 to depth of 7/8". A 5/8" section of 8mm tube was flared to allow nib to fit and glued into 'top' of cap (9/32 portion). Turned-down centerband/magnet was glued into 'bottom' of cap, seated flush. Nib thus passes through magnet into protective tube in cap.


Body drilled 8mm to depth of 2 3/4", 10.5mm to depth of 1/2", 33/64" to depth of 3/16". A 2" section of 8mm tube was glued into bottom of body. Coupler ring from Vertex kit was pressed into a 1/2" section of 10.5mm tube and glued flush (inset) into top of blank body.


THEN the blank was turned on a mandrel. A "homemade" bushing was used to fill the centerband/magnet nib opening in the cap and the coupling opening in the body, to hold the blank halves in the same alignment as when the nib is seated. Blank was turned "straight" with very slight rounding at ends. Slimline clip added using "invisible clip" method found in IAP library!


(I tried to turn an earlier attempt between centers, but with no center band to hide slight imperfections, concentricity was not perfect - turning the cap gave a 'gap' or 'bulge' around the center at various positions. Using the mandrel/bushing approach let me rotate the cap periodically while turning and improved concentricity.)


Finish is standard CA. Openings at ends for mandrel were filled with Flame Boxelder plugs before finishing ends.
 

Attachments

  • Entry 3.jpg
    Entry 3.jpg
    137.8 KB · Views: 249
  • Entry 3a.jpg
    Entry 3a.jpg
    107.8 KB · Views: 281

Brooks803

Member
Joined
Sep 13, 2009
Messages
5,632
Location
Aiken, South Carolina
Entry 4

This is Sn. gentleman fountain pen kit
Polymer clay flowers on Myrtle wood burl and Olive wood
working on metal lhathe
 

Attachments

  • Entry 4.jpg
    Entry 4.jpg
    43.2 KB · Views: 312
  • Entry 4a.jpg
    Entry 4a.jpg
    32.4 KB · Views: 312

Brooks803

Member
Joined
Sep 13, 2009
Messages
5,632
Location
Aiken, South Carolina
Entry 6

It is a full sized Gentlemen's from CSUSA. The blank is a Turquoise Trustone. I omitted the post for a closed end.
 

Attachments

  • Entry 6.jpg
    Entry 6.jpg
    84.1 KB · Views: 295
  • Entry 6a.jpg
    Entry 6a.jpg
    93.3 KB · Views: 277

Brooks803

Member
Joined
Sep 13, 2009
Messages
5,632
Location
Aiken, South Carolina
Entry 7

The pen is a Berea Flat Top American fountain pen kit with a Mutagenic blank.


I incorporated the top finial into the cap and turned a custom one for the bottom. The clip is epoxied into the hole in the top that was drilled on the lathe using a tiny dremel grinding bit. I wanted a brass ring look at the end of the pen so I turned off the threads for the bottom cap making it non-postable. I had to turn the bottom piece on a metal lathe to get it to drill and turn concentric. This was a lot more work than I expected but I learned a bunch.
 

Attachments

  • Entry 7.jpg
    Entry 7.jpg
    238.8 KB · Views: 293
  • Entry 7a.jpg
    Entry 7a.jpg
    247.5 KB · Views: 264

Brooks803

Member
Joined
Sep 13, 2009
Messages
5,632
Location
Aiken, South Carolina
Entry 8

I used a silver Baron and a white marble Tru-Stone blank for materials. I kept the modifications simple. I replaced the finial button with a piece turned from the offcut from the blank. I also replaced the decorative center ring on the center band with a ring turned from the offcut from the blank.
 

Attachments

  • Entry 8.jpg
    Entry 8.jpg
    85.6 KB · Views: 256
  • Entry 8a.jpg
    Entry 8a.jpg
    82.8 KB · Views: 307
Top Bottom