Abalone strips

Signed-In Members Don't See This Ad

Larryreitz

Member
Joined
Feb 8, 2015
Messages
711
Location
Salem, CT USA
I am going to have some time on my hands for a while and am thinking about trying to make a pen with Abalone strips. My questions for those who make them is how wide do you cut the strips for gluing on the tubes. Thanks for reading. Any and all replies appreciated.
Larry
 
Signed-In Members Don't See This Ad

jttheclockman

Member
Joined
Feb 22, 2005
Messages
19,180
Location
NJ, USA.
I believe the standard is 1/8" and is adjusted on the last few to make up any discrepancies. Now from what I read because I have looked into this and have not been able to master it and have not gotten back to it. But at some time I will. Depending on the material and thickness you are using, the laser seems to be a great way to get clean and consistent cuts. But it is a nonshared secret how and what type laser is used. I have used the razor knife method but it is tedious and time consuming and blades dull quickly. I have switched to carbide coated blades and that helped some. My next trial operation will be to use the flexible abalone that is out there. I got mine from MudHole. The problem with that is the color choices are limited. But the standard green one is available. I have tried wrapping that stuff as opposed to strips but no matter what you do it will crack. What helps is if you use as large a tube as you can so the wrap is not as tight with thinner tubes. But you have a hard time seeing the cracking. The heavier stuff will crack if you look at it wrong. But makes for a nicer look.

Now there is chatter that a few people like to cut their strips on a slight angle inward and what this does is helps hide the seams. You will always see seams. But some people cut them this way and some people sand the edges slightly. Think about it, if you put 2 90 degrees cuts side by side on a curve piece there will be a gap. Ever so small but non the less a gap. Again I have not jumped into this with both feet yet but have gathered some info over the years. Some people like to cut their strips from one sheet of abalone to keep the pattern around the entire pen consistent. Others do a random cutting and even mix colors.

One more thought or method I tried and did not work for me when it came to cutting them, was the guillotine style paper cutters and also the roller blade type. They both cracked the abalone. Strips crumbled. Again I have not tried any of this with the thin flexible stuff so maybe better results. Just wanted to share as much info as I could.

Good luck and if you do get into this I hope you share your methods and some pointers of what you find. This way we can build a data base for others as we do for many different methods of various pen turning projects.

One thing that should be mentioned is safety. The dust from abalone shells is not good for lungs so wear safety equipment.
 
Last edited:

Kenny Durrant

Member
Joined
Sep 11, 2012
Messages
2,523
Location
Sachse Tx. 75048
John brought up all the points that I think you should think about as well. Personally I like the thin sheets. The reason is that you will have a seam no matter what method you go with. The sheets will crack randomly as you bend it around the tube. So I like the random cracks rather than several straight lines going around the blank. With the darker color abalone the seam hides well. Don't get me wrong I still like the strip blanks but I prefer using the sheets along with the look.
 

Bayouusaf

Member
Joined
Dec 6, 2017
Messages
27
Location
Columbia, Tennessee
To answer your question. The width of the strips will be determined by
1. The number of strips you want on the tube.
2. The size of the tube. (Circumference)
I'm not a mathematician, so I'm not going to lay out a formula for you, but divide your circumference by the desired number of strips.
 

TDahl

Member
Joined
Dec 11, 2019
Messages
1,894
Location
Brentwood
I have cut them down to 1/8 inch, which leaves the last one either wider or narrower depending on the diameter you are working with. I use an Exacto knife to cut the strips. Other options are to use inlay pieces, or cut the strips into smaller pieces.
 

Larryreitz

Member
Joined
Feb 8, 2015
Messages
711
Location
Salem, CT USA
Thanks much for the replies. As soon as my brother gets the hood for his laser cutter / engraver put together he will be cutting strips. Then we'll see if I can get them glued on straight. Stay tuned. If I have any success I'll post details.
 

jttheclockman

Member
Joined
Feb 22, 2005
Messages
19,180
Location
NJ, USA.
Thanks much for the replies. As soon as my brother gets the hood for his laser cutter / engraver put together he will be cutting strips. Then we'll see if I can get them glued on straight. Stay tuned. If I have any success I'll post details.
As far as straight goes, here is an old trick I picked up years ago. I thought I had a photo of the jig but it is so simple an explanation will do because I can not find photo. To adhere something in a straight line on a round tube require just a straight edge that is about 1/8" to 3/32" thick. You can use something about 1/4" thick if you want. It has to be less than the diameter of the tube. You lay it on a flat surface. Now place your tube next to it. Keeping the tube up against the straight edge you then take a maker or pencil and draw a line down side of the tube with the marker resting on top of straight edge. One quick swipe. Now whatever your material is you lay against that line gives you the starting point of being straight. I many times use a colored sharpie that comes close to the material I am wrapping the tube in in case the seam shows through. I do this all the time too when wrapping a vinyl or some other material around tube and need to join both ends without overlapping. In that case I use 2 pieces of 3/32" strip of aluminum about 4" wide I stack the aluminum on top of each other using double sided tape and leave one hanging over the edge of other about 1/4" to 3/8". This is not important how much. I now use double sided tape on bottom piece to secure this jig to my desk or table top. I now wrap the tube with vinly or other material and over lap the ends. I start on line as I explained at the top of this. I then after getting all wrinkles out lay the tube against the jig with the tube laying on the lower section of al. Holding the seam at the edge of the top piece of al. I take my exacto knife and score through both pieces of wrapping in one quick swipe. This cuts all the way through and down to tube. I now peel off the excess of both top and bottom portion of wrapping and lay them back down and the seam edges should match and lay flat next to each other. What this all does is avoids having to calculate the exact width of material needed to wrap the tube with accuracy. Maybe you can understand this explanation but if not I can take photos. Just my way of wrapping a tube.

I use this similar method when I need to do some equal division of the tube to lay objects around a tube without having to place on the lathe and use indexing wheel. I use a drawing with a circle and divide as many times as needed. Example 4 equal parts. I place tube on edge inside the circle and mark the sides where all hash marks go. Now take tube and again lay against my other straight edge jig and draw a line down each hash mark. Now they correspond to each other on both ends of tubes. Easy solution. An example when I needed to align 4 pieces of aluminum on tube to make this blank. This blank produced this pen. if others remember me showing this.
Copy of Copy of IMGP0402.JPG
Copy of Copy of IMGP0404.JPG
Copy of Copy of IMGP0297.JPG
 
Last edited:

Larryreitz

Member
Joined
Feb 8, 2015
Messages
711
Location
Salem, CT USA
As far as straight goes, here is an old trick I picked up years ago. I thought I had a photo of the jig but it is so simple an explanation will do because I can not find photo. To adhere something in a straight line on a round tube require just a straight edge that is about 1/8" to 3/32" thick. You can use something about 1/4" thick if you want. It has to be less than the diameter of the tube. You lay it on a flat surface. Now place your tube next to it. Keeping the tube up against the straight edge you then take a maker or pencil and draw a line down side of the tube with the marker resting on top of straight edge. One quick swipe. Now whatever your material is you lay against that line gives you the starting point of being straight. I many times use a colored sharpie that comes close to the material I am wrapping the tube in in case the seam shows through. I do this all the time too when wrapping a vinyl or some other material around tube and need to join both ends without overlapping. In that case I use 2 pieces of 3/32" strip of aluminum about 4" wide I stack the aluminum on top of each other using double sided tape and leave one hanging over the edge of other about 1/4" to 3/8". This is not important how much. I now use double sided tape on bottom piece to secure this jig to my desk or table top. I now wrap the tube with vinly or other material and over lap the ends. I start on line as I explained at the top of this. I then after getting all wrinkles out lay the tube against the jig with the tube laying on the lower section of al. Holding the seam at the edge of the top piece of al. I take my exacto knife and score through both pieces of wrapping in one quick swipe. This cuts all the way through and down to tube. I now peel off the excess of both top and bottom portion of wrapping and lay them back down and the seam edges should match and lay flat next to each other. What this all does is avoids having to calculate the exact width of material needed to wrap the tube with accuracy. Maybe you can understand this explanation but if not I can take photos. Just my way of wrapping a tube.

I use this similar method when I need to do some equal division of the tube to lay objects around a tube without having to place on the lathe and use indexing wheel. I use a drawing with a circle and divide as many times as needed. Example 4 equal parts. I place tube on edge inside the circle and mark the sides where all hash marks go. Now take tube and again lay against my other straight edge jig and draw a line down each hash mark. Now they correspond to each other on both ends of tubes. Easy solution. An example when I needed to align 4 pieces of aluminum on tube to make this blank. This blank produced this pen. if others remember me showing this.View attachment 346087View attachment 346088View attachment 346088View attachment 346085
I don't know if this will help, but here's a jig sold by Ptownsubbie that he uses for affixing labels to tubes. https://ptownsubbie.com/products/tube-in-rolling-jig. It has hard vertical and horizontal stops for alignment help.
Thanks JT. I still have to wait till my brother get his laser cutter enclosed before I'll have strips. But, my initial plan is to use Rick Herrel's sanding jig sans the rod used to connect to the drill chuck. Then mount the brass tube on it leaving the tube extended past the metal rod. Under a shop light the tube shows a nice shine line which I should be able to use to align a strip. If it works I'll post pictures.

Larry
 

jttheclockman

Member
Joined
Feb 22, 2005
Messages
19,180
Location
NJ, USA.
Thanks JT. I still have to wait till my brother get his laser cutter enclosed before I'll have strips. But, my initial plan is to use Rick Herrel's sanding jig sans the rod used to connect to the drill chuck. Then mount the brass tube on it leaving the tube extended past the metal rod. Under a shop light the tube shows a nice shine line which I should be able to use to align a strip. If it works I'll post pictures.

Larry
I do know what you mean. Good luck and will forward to reading how progress is going because this is a line of pens I want to get into also. Have some real nice dials that will scream to be put on those type blanks. Can easily command $300
 

Aurelius

Member
Joined
Feb 26, 2021
Messages
103
Location
Pittsburgh, PA
Using a laser has been mentioned. One thing I will note is that, if you go this route, make sure you have good ventilation. The fumes from cutting abalone 1) stink and 2) are quite toxic. That said, when I was tinkering with abalone, I got a sample pack from Aqua Blue Maui. If I remember correctly, they work in the shellfish industry and this is a repurposing of what would otherwise be scrap. Good selection and good prices but the main reason I went with them is they have the ultra thin sheets. Much easier to cut, but you have to be careful because the un-backed ones can be brittle (ie. snap them in your fingers if you aren't careful). Hope that helps.
 

jttheclockman

Member
Joined
Feb 22, 2005
Messages
19,180
Location
NJ, USA.
Using a laser has been mentioned. One thing I will note is that, if you go this route, make sure you have good ventilation. The fumes from cutting abalone 1) stink and 2) are quite toxic. That said, when I was tinkering with abalone, I got a sample pack from Aqua Blue Maui. If I remember correctly, they work in the shellfish industry and this is a repurposing of what would otherwise be scrap. Good selection and good prices but the main reason I went with them is they have the ultra thin sheets. Much easier to cut, but you have to be careful because the un-backed ones can be brittle (ie. snap them in your fingers if you aren't careful). Hope that helps.
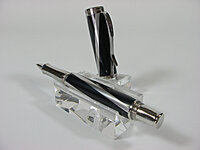
That is who I bought mine from. They do have a couple versions as you said. Even the thin ones are not easy to cut with a knife. They do have the adhesive on the back though which is good. Some real nice colors too.
 

Aurelius

Member
Joined
Feb 26, 2021
Messages
103
Location
Pittsburgh, PA
That is who I bought mine from. They do have a couple versions as you said. Even the thin ones are not easy to cut with a knife. They do have the adhesive on the back though which is good. Some real nice colors too.
One thing to note is that the adhesive backing is an option. If you want material without the backing, they are perfectly capable and more than happy to send you stuff that doesn't have any adhesive.
 

jttheclockman

Member
Joined
Feb 22, 2005
Messages
19,180
Location
NJ, USA.
One thing to note is that the adhesive backing is an option. If you want material without the backing, they are perfectly capable and more than happy to send you stuff that doesn't have any adhesive.
Yep have that also. Ordered that when I did not know what I was doing. To me better to order with it.
 
Top Bottom