3D Printed Pen Parts

Signed-In Members Don't See This Ad

budnder

Member
Joined
Dec 28, 2015
Messages
527
Location
Chicago/Tucson
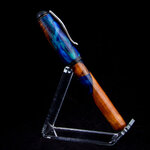
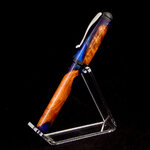
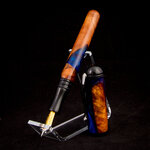
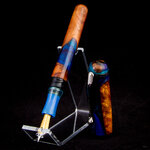
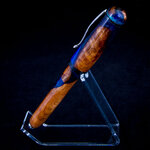
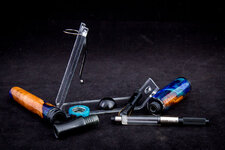
I spend the last couple of weeks working on a "proof of concept" to see if a 3D resin printer could produce parts for kitless pens (section, section coupler, finial, finial coupler, and threaded cap end. I'm using a purchased nib (Bock #6), and a purchase clip (Triton). Just thought I'd share some of what I learned...

3DPenParts-9389.jpg
3DPenParts-9391.jpg
3DPenParts-9395.jpg


It worked! The threading possibilities are really cool - I did a 2 TPI triple start round (e.g. not flat ACME, not shart V threads, but smooth and round) for the cap to body thread. No special taps/dies needed - it's whatever you can imagine/design on the PC. For now, I am tapping the 7.9mm x .6mm nib thread manually, partly because I wanted to see how the material taps (and it worked fine). I've printed working threads that the nib mates with as a test, so I'll put that into the next iteration. That also means I don't have to buy special taps for every nib I may want to use (including vintage)... cool beans!

Jury's out on how these parts will wear. I'd like to do a "user" pen next, and use it regularly for awhile to see how it holds up. There are lots of resins on the market, and ways to make it more and less flexible, and more and less brittle, so I'm hopeful, it'll just be more trial and error on this front as well if there are issues. It's a technology that's improving a lot as well.

Many of the resins available are somewhat transparent, and I didn't find that to be a good look with the wood. Black looked best to my eye. Also, some of the blacks I tried weren't black enough - more of a dark grey. I kinda liked a contrasting color for just the section, though... I could see that working for certain bodies.

It is a messy and involved manufacturing process. Everything is coated in toxic liquid resin after it's printed which has to be cleaned away. That leaves the part with a flat finish. The material polishes up pretty well, you can see the difference in the two finials above... it comes off the printer as a satin... hit it with micro mesh and it shines right up. I don't find the smell bad at all - nowhere near as bad as casting resin. The parts aren't fully hardened after you've cleaned them either... they have to go under a UV light, or under some sunshine for awhile first. If you think you use a lot of paper towels and rubber gloves doing pen finishes... this is easily quadruple that.

The wood I turned for my proof of concept is a bit fugly... I didn't really put much time or thought in it as I wasn't sure any of this was really gonna work. One big change in the next iteration is to make the walls on the wood thicker... not sure what I was thinking in making them so narrow. Also, this is a bit of a fat pen for me, in part because of the Bock #6 nib, so I can see moving down to a #5 at some point.

Here's a video that shows some of the process and tools I used:

 
Signed-In Members Don't See This Ad

FGarbrecht

Member
Joined
Aug 22, 2019
Messages
618
Location
NY
Nice work! I've done some similar work. I found that the threading was a PITA, especially for the internal section threading since it is non-standard and you've got to modify the thread spec files in Fusion. I also found that the cap and barrel threads did not hold up well when I printed in Anycubic green resin (I used a standard iso M13 thread). Perhaps a coarser thread would hold up better. I would probably also skip the custom thread sizes and just print things smooth walled and add threads with tap and die after printing and curing, since the modification of thread files takes a lot of time and has to be redone every time Fusion decides to upgrade itself to the newest version! I have some Blu resin that is supposed to be tougher and plan to test that when I get a minute free.

I'm using an Anycubic Photon and the machine precision is just a tad bit shy of perfect so as you've pointed out there is a lot a fiddling around necessary when doing parts that need to fit together. If you find a resin that has good mechanical strength to hold up to repeated mating of threaded parts would love to hear about it.
 

budnder

Member
Joined
Dec 28, 2015
Messages
527
Location
Chicago/Tucson
Nice work! I've done some similar work. I found that the threading was a PITA, especially for the internal section threading since it is non-standard and you've got to modify the thread spec files in Fusion. I also found that the cap and barrel threads did not hold up well when I printed in Anycubic green resin (I used a standard iso M13 thread). Perhaps a coarser thread would hold up better. I would probably also skip the custom thread sizes and just print things smooth walled and add threads with tap and die after printing and curing, since the modification of thread files takes a lot of time and has to be redone every time Fusion decides to upgrade itself to the newest version! I have some Blu resin that is supposed to be tougher and plan to test that when I get a minute free.

I'm using an Anycubic Photon and the machine precision is just a tad bit shy of perfect so as you've pointed out there is a lot a fiddling around necessary when doing parts that need to fit together. If you find a resin that has good mechanical strength to hold up to repeated mating of threaded parts would love to hear about it.

I think the Elegoo Mars is practically a clone of the Photon, so should be very similar.

I didn't care for the Anycubic resin (red and black) that I tried - too chalky/powdery with wear. The Elegoo black was noticeably better. Siriya Tech Blu was really nice although the color wasn't to my taste. I have some Siriya Tenacious, which has a bit of flex in it that I haven't tried. My instinct at this point is to try a mix of 80% Elegoo Black to 20% Blu or Tenacious, to see if I can retain the nice black color and yet add some durability insurance. The cap threads would seem to me to be the critical wear point, and I've screwed/unscrewed a bunch of times and they seem fine so far.

I've been customizing the Fusion thread files and have basic metric sizes working, and have had some success with the custom nib thread (M7.9 x .6). It's easier to simply have your own category of threads rather than modify the existing files - that makes migrating after Fusion changes a bit easier (one file to move without worrying about clobbering any of their changes). I think it's simply a matter of getting the resin dialed in for exposure/precision and getting the tolerances right in the file. I found I had to max out the tolerances, by the way. All that said, I love using a simple COIL for the other threads and don't plan on going away from that. You know, really, a COIL is simply turning a shape into a part while it's rotating and advancing, so identical to threading on a lathe... I should be able to COIL an M7.9 x 0.6 if I wanted to go that route. But as you said, simply sticking a tap in the section and twisting the threads in is pretty simply and what I've been doing so far.
 

FGarbrecht

Member
Joined
Aug 22, 2019
Messages
618
Location
NY
I haven't done threading using COIL but am aware that it is possible. One more thing in Fusion to learn!
You are exactly right about the Anycubic green resin - very chalky threads. I have some Blu so maybe I'll see how things turn out with that. I do like the Blu appearance generally but probably not for pen parts. I printed a full cap and barrel out of Anycubic green (it was pretty cool) but didn't spend a lot of time trying to get a section to fit once I saw that the threading on cap and barrel were not going to be satisfactory.
Keep us updated on your resin mixing experiments. I may be inspired by your post to devote a little more time to this project :)
 

FGarbrecht

Member
Joined
Aug 22, 2019
Messages
618
Location
NY
Oops, just stabbed a hole in my FEP. Probably won't get to any printing until I can afford an hour to change the film.
 

FGarbrecht

Member
Joined
Aug 22, 2019
Messages
618
Location
NY
I have lots of problems with prints failing by sticking to the FEP, a recurring problem that I've never managed to solve completely. Usually I can get things off without ruining the FEP, but lately I've been going through them. Anyway, just changed it and have a Blu section printing; will see how it goes.
 

budnder

Member
Joined
Dec 28, 2015
Messages
527
Location
Chicago/Tucson
I did a mix of 16% Blu / 84% Elegoo Black... same exposure as for 100% Black and result was only ever so slightly a lighter black. Didn't seem to be any less opaque... I think it would be an acceptable black. No change it growth/shrinkage.
 

budnder

Member
Joined
Dec 28, 2015
Messages
527
Location
Chicago/Tucson
Version 2...

3DPenPartsV2-9412.jpg


3DPenPartsV2-9401.jpg3DPenPartsV2-9399.jpg3DPenPartsV2-9402.jpg3DPenPartsV2-9403.jpg3DPenPartsV2-9405.jpg3DPenPartsV2-9406.jpg3dPenCompare.jpg


Finished Version 2 over the weekend. Changes from the first attempt:

1) Made the body and cap walls of the wood thicker. Aside from ease of turning, I was nervous about how fragile in use it would be since I don't have a metal tube backing it.

2) Added threads to the section to accept a K6 convertor (so both friction and thread hold). A K5 will fit on the section also, but it's really too tight on the K5 where the K6 threads are. Next iteration I'm going to loosen up the internal K6 threads some to see if there's a happy place where both fit comfortably.

3) Printed all threads - no taps or dies on this one.

4) Segmented the 3d parts on the cap before finishing. I like the smooth integrated look, and it's actually easier than trying to finish the little bits independently.

5) Did an alliterative finial with body material by using a printed thread insert into a turned finial. Looks wise, I think it's a little tall - I should have taken it down a little further. I like the proportions of the black printed finial, which is a little shorter.

6) Changed the threaded cap end to come completely down over the section holder. I mostly got it, though I think it still shows a hair, so maybe a little more room next time for that.

7) Used a resin mix of black, tough, and flex. This worked out well, though I think I'm going to try just black and flex next time to see if I can get something a little closer to a hard nylon.

8) I tried an alternative section by back-painting a translucent green section. I didn't quite get the blue color right, but the effect is pretty cool and could be a really nice accent look with some bodies.


Issues/next version:

1) The clip ring is a friction fit inside the printed clip holder, and it was really, really tight. I thought this was a good thing, but when I put a some stress on the clip, the side force torque blew out the clip holder wall - you can see that in a couple of the photos. I think a less tight fit will fix this, but I'm also going to try a resin mix with a bit more flex, so that will help also. As an aside, I think I may try and drill out the damaged bit and fix it... it will be interesting to see how this epoxied resin is to repair.
2) The hole in the body should be just right to accommodate a alternative rollerball section and spring. I'd like to actually try that next time.
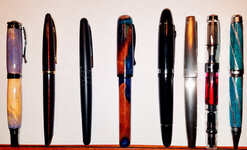
3) I like the body shape and size a lot, but the cap doesn't seem quite right. Visually, I think it's a little tall and a bit wide.I'm going to noodle a bit on the visual cap/body transition as that's currently kinda harsh and perhaps what is catching my eye. I don't really want to change the section or section holder as that's pretty much what I want for a writing experience. I included a photo with the pen next to several other fountains and even a cigar for reference.
4) It does post securely, but only a half inch or so, so not really deep enough to be usable that way. I don't really want to skinny the body down any more, as I think that might negatively affect the feel unposted. With a Bock #6, it's going to be a pretty big pen, so not sure it makes sense to try and make it usable posted anyway.
 
Top Bottom