360 herringbone using mesquite

Signed-In Members Don't See This Ad
See more from its_virgil

its_virgil

Member
Joined
Jan 1, 2004
Messages
8,118
Location
Wichita Falls, TX, USA.
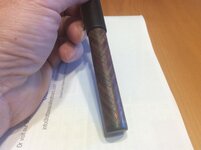
72 tiles to make 12 6-tile layers to get a blank to make this sierra. Of course, the number of tiles is a function of the tile thickness. Enjoy.
Do a good turn daily!
Don


360 herringbone.jpg
figure 31.jpg
 
Signed-In Members Don't See This Ad

mark james

IAP Collection, Curator
Joined
Sep 6, 2012
Messages
12,750
Location
Medina, Ohio
Beautiful finished pen Don. And I appreciate the photo of your "rubberband skills." Excellent way to pull the segments tighter.
 

skiprat

Passed Away Mar 22, 2022
In Memoriam
Joined
Oct 19, 2006
Messages
7,812
Location
In a Skip in Wales
Nice work Don. I've always admired those that get these correct. I didn't think anyone was brave enough to still be doing them these days...šŸ˜€
 

magpens

Member
Joined
Feb 2, 2011
Messages
15,912
Location
Canada
Great looking pen, Don !!! . And I appreciate the photo of the "pre-turned stage".

It would also be useful to me to see a photo of a single "tile" if you have one, please. . I have forgotten how these go together. . I suppose there might be one in the "resources" somewhere.
 

its_virgil

Member
Joined
Jan 1, 2004
Messages
8,118
Location
Wichita Falls, TX, USA.
Great looking pen, Don !!! . And I appreciate the photo of the "pre-turned stage".

It would also be useful to me to see a photo of a single "tile" if you have one, please. . I have forgotten how these go together. . I suppose there might be one in the "resources" somewhere.


Thank you!
I've written two articles: one on the herringbone blank and one on the herringbone 360. Both are here: https://drive.google.com/drive/folders/15IW-0xsjdualYFMUYVcF6r50aHUnmcwg
Read the herringbone article first just for some continuity.
Do a good turn daily!
Don
 

magpens

Member
Joined
Feb 2, 2011
Messages
15,912
Location
Canada
Thanks very much, Don !! . I have downloaded your pdf's and will study your processes.

I am now wondering about the optimal dimensions for the individual squares. . And also about alternating colors in some ways.
 
Last edited:

darrin1200

Member
Joined
Mar 17, 2010
Messages
1,850
Location
Lyn, Ontario, Canada
Excellent work, and a great article Don. You explained the assembly very well and there are a couple of good tips in there that I think i may employ in my next set of blanks.
I like your method of wrapping the strips together, but I prefer the orientation of the other pieces. I prefer not to have any endgrain visible. I think your method could also work if you cut the strip off the end of a board, then wrap them together and cut them. They are a lot more fragile this way, but I prefer the look.
 

its_virgil

Member
Joined
Jan 1, 2004
Messages
8,118
Location
Wichita Falls, TX, USA.
Excellent work, and a great article Don. You explained the assembly very well and there are a couple of good tips in there that I think i may employ in my next set of blanks.
I like your method of wrapping the strips together, but I prefer the orientation of the other pieces. I prefer not to have any endgrain visible. I think your method could also work if you cut the strip off the end of a board, then wrap them together and cut them. They are a lot more fragile this way, but I prefer the look.

Thanks. The first one I did I used Scrabble tiles purchased from Hobby Lobby but their thickness was inconsistent and they were not square. The next one I made from slices cut from pen blanks but that took lots of cuts to get the needed number of tiles. Cutting them the way I did but from pieces cut from a board the way you suggested would work fine and I will do that next time. I like the "no end grain" tiles. And, contrasting woods could be used.
Do a good turn daily!
Don
 

its_virgil

Member
Joined
Jan 1, 2004
Messages
8,118
Location
Wichita Falls, TX, USA.
Thanks very much, Don !! . I have downloaded your pdf's and will study your processes.

I am now wondering about the optimal dimensions for the individual squares. . And also about alternating colors in some ways.

You're welcome and I hope the articles work for you. Optimal dimenmsions: .75" square seems to work well and I made the last two thinner than the first. I will go a bit thinner next time. Thinner means more tiles.
Do a good turn daioy!
Don
 

magpens

Member
Joined
Feb 2, 2011
Messages
15,912
Location
Canada
Yes, thinner means more tiles. . It may also mean a slight change in the aesthetics ... don't know until after a trial.

I am thinking that a smaller tile, say 0.5", would reduce the amount of wood that gets turned off. . But I don't yet have a feel for any possible negative implications of making the tiles smaller by this much.
 

darrin1200

Member
Joined
Mar 17, 2010
Messages
1,850
Location
Lyn, Ontario, Canada
Yes, thinner means more tiles. . It may also mean a slight change in the aesthetics ... don't know until after a trial.

I am thinking that a smaller tile, say 0.5", would reduce the amount of wood that gets turned off. . But I don't yet have a feel for any possible negative implications of making the tiles smaller by this much.

Thinner tiles will add to the number of tiles. My first herringbone FP uses 3/32" tiles. The body here is made of 20 rows, or 120 tiles.
The way the blank goes together, there is inherently a lot of loss. If you use smaller tiles, when you cut away the protruding points, you will be left with a smaller core. Depending on the size you need, this could become a problem. The smaller the tiles, the harder they will be to work with as well. I can tell you from experience, that even the 3/4" tiles are fidely.
 

Attachments

  • image.jpg
    image.jpg
    145.6 KB · Views: 175

its_virgil

Member
Joined
Jan 1, 2004
Messages
8,118
Location
Wichita Falls, TX, USA.
Darrin,
Thanks for joining in the conversation. You certainly have more knowledge of these blanks than I. Thanks for your article in the library that was the inspiration and the instruction for me making my first three of these blanks. I think my next will be thinner to compare with what I have already made. Larger pens will require larger tiles and yes, cutting off the corners reduces the size of the core for making a pen.

The pen you showed looks really nice.

Thanks again,
Do a good turn daily!
Don

Thinner tiles will add to the number of tiles. My first herringbone FP uses 3/32" tiles. The body here is made of 20 rows, or 120 tiles.
The way the blank goes together, there is inherently a lot of loss. If you use smaller tiles, when you cut away the protruding points, you will be left with a smaller core. Depending on the size you need, this could become a problem. The smaller the tiles, the harder they will be to work with as well. I can tell you from experience, that even the 3/4" tiles are fidely.
 

darrin1200

Member
Joined
Mar 17, 2010
Messages
1,850
Location
Lyn, Ontario, Canada
Thanks guys. The pen i showed was my entrance into the Pen Artisan Guild. It is a natural finish, due for a polishing real soon, and has been my every day carry (EDC) for the past 3 years.
 
Top Bottom