bradleyheathhays
Member
I almost have my first CNC set up to run (Onefinity Woodworker), and the first project I'm shooting for is a wooden Cincinnati Bengals flag. The stripes will be made with traditional methods, but the union will be mostly CNC. I want to use the VCarve / Oramask process whereby the machine V cuts all the toolpaths for a certain color, followed by painting. Remask, cut the next color region, paint, and repeat until the entire image is created. It seems like this process would have a name, although I can't recall hearing it mentioned yet.
Even though I'll have the VCarve Pro software soon, I don't have any design experience, so I'll have to outsource creating the tool paths. I've found that Upwork has a ton of freelance people who do this kind of design work very affordably. I've seen what few CNC files there are on ETSY for a Bengals union, but they're just not close enough to the style I'm trying to create.

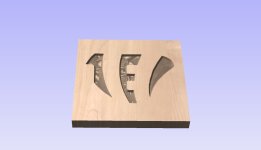
Does anyone have specific design advice on how to get this done? I'm imagining the oramask projects I've seen in the past, and I'm not sure how the interface where the colors meet should be addressed. Before any CNCing, the union will start off painted all black.
I've got a steep learning curve here, so all advice is appreciated.
Even though I'll have the VCarve Pro software soon, I don't have any design experience, so I'll have to outsource creating the tool paths. I've found that Upwork has a ton of freelance people who do this kind of design work very affordably. I've seen what few CNC files there are on ETSY for a Bengals union, but they're just not close enough to the style I'm trying to create.
Does anyone have specific design advice on how to get this done? I'm imagining the oramask projects I've seen in the past, and I'm not sure how the interface where the colors meet should be addressed. Before any CNCing, the union will start off painted all black.
I've got a steep learning curve here, so all advice is appreciated.