Oh, and, yes, be more patient!! That is a hard one, I am not the most patient person. That said, it is important to take off material at a rate the blank can handle. Every resin will chip, crack and shatter if you are too aggressive...even the softest (i.e. alumilite, actual acrylic). I don't know if you have done any normal wood turning with actual wood...but there is a saying: Let the wood come to the tool. It basically means let the wood bring the tool into the cut at whatever rate it wants to...and after you give this a try for a while, you will find that it actually does happen...you don't really need to shove a tool into a wood blank. Your hand on the tool is really there to guide the direction of the cut, not necessarily force the cut. The wood will naturally cut with a gouge, once the gouge is in proper contact with the wood...you then just need to control the angle of the tool to the wood, keeping the bevel in proper contact, and the tool will then just move through the wood. It is pretty amazing when it happens. Very low aggression, which in the end results in a clean, smooth cut without torn fibers.
While I can't say that I've seen resin actually pull a tool into itself, I have found that it does NOT take much aggression to start causing problems...either chipout, more the case with harder materials but enough aggression and you can chip out ANY resin in my experience, or what I call rippling, where you get rippled and coiled waves in the resin. IME this is the result of the heat of friction starting to melt the resin, but only so long as the tool is actually in contact, so as the tool moves along the blank you end up with a corkscrew divot or ridge...and worse, sometimes the tool itself will ripple while in contact with the blank, resulting in lots of fast horizontal ridges along the length of the corkscrew. Fixing this is easy enough when you still have material to remove, but if you do this close to your desired blank diameter, then you may well find that the effect is permanent (once the hot tip of the tool moves away from an area of the blank, it will quickly cool and solidify again.)
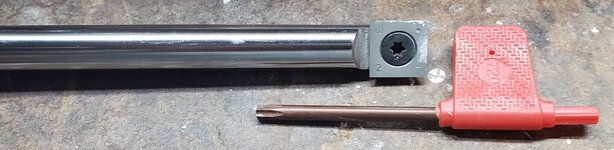
The solution to all of this, is to learn how quickly you can turn any given kind of material. Real acrylic turns pretty quick, as does alumilite. I turned some kind of resin (not sure what, exactly...just a solid black resin of some kind) last night, one which I'd segmented with some kirinite and alimunum metal layers. Took me near an hour to turn the upper segment (Cigar) which had the segmenting, and took me about a half hour to turn the solid lower segment. Hard material, it did not produce the nice streams of resin like I get with acrylic. I first started with my negative rake EWT tools, and eventually switched to a skew. Used the skew for most of my material removal, then switched back to very light negative rake cuts with the EWT tools for final shaping and turning just barely proud of the bushings. Took a good long while, and the right tool for each nuanced aspect of the job, but in the end I'm happy with out they turned out. A pure acrylic blank? Would have probably taken me 10-15 minutes to turn, as it just turns so much easier.
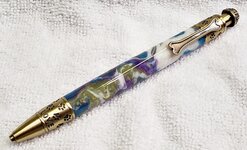
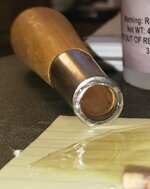
FWIW, I only actually finished the blanks earlier today. Took a while to sand them to the finish I expect. Even after sanding down to 1 micron (with white zona paper, wet), I could still see scratches in the right light. I then set the lathe to a slow spin, and used radial sanding to try and neutralize the visibility of those remnant (now just 1 micron!!) scratches. That was better, but in the right kind of lighting it still looked scratched. Did a few passes of polish with this micro fine polishing set of 3 progressively finer polishes. For some reason, that hardly seemed to do anything...maybe it just wasn't formulated for whatever resin this was? So I finally did some buffing...which in a sense is both aggressive but not all at the same time, first with Tripoli, then white diamond. Still didn't like the look after the WD, so finally put on my blue rogue wheel, and did a final third pass of buffing to really work out all the final scratches. The blanks ended up looking superb at that point (although, sadly, the buffing seemed to ruin the super shiny sheen I'd originally had on the aluminum accent bands in the segmented blank). Took several hours, lots of scrutiny, and a whole slough of different tools and techniques. But in the end, the blanks have no visible scratches, reflect light superbly well, and feel great between my fingers. I finally assembled the pen a little over an hour ago.
Let the material tell you how long its going to take, don't be aggressive, enjoy the craftmanship, and as you approach your finished diameter and shape, take lighter and lighter cuts to get the most optimal result. Take your time...its worth it.

 ) what Kevin said about the ending up with a angled hole is exactly what is happenig, I get drill bits when I purchase new kits.


")