What's in a ring?

Signed-In Members Don't See This Ad
See more from BSea

BSea

Member
Joined
Dec 28, 2009
Messages
4,628
Location
Little Rock, Arkansas
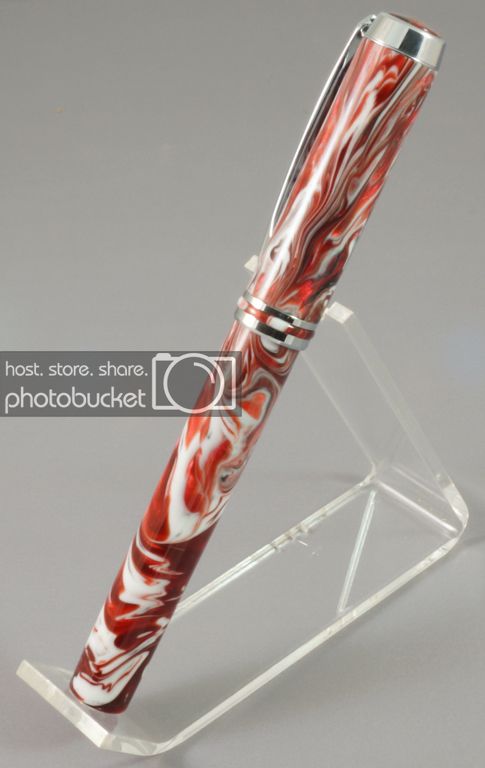
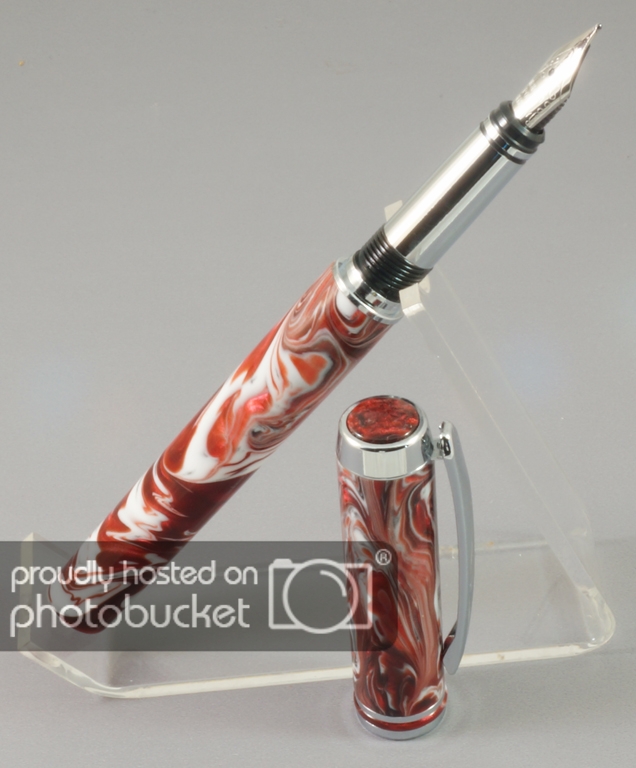
At our recent local IAP meeting, I did a demo on doing a custom finial & centerband for a Jr Gent I with a closed end barrel all from one 5 1/4" blank.

Here's the ring.


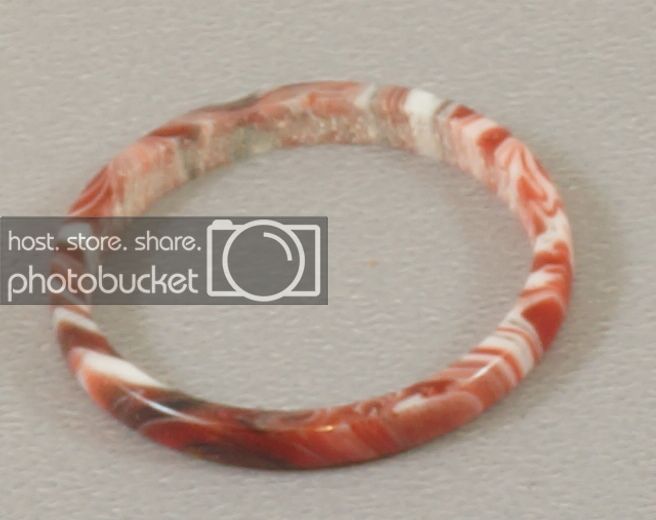
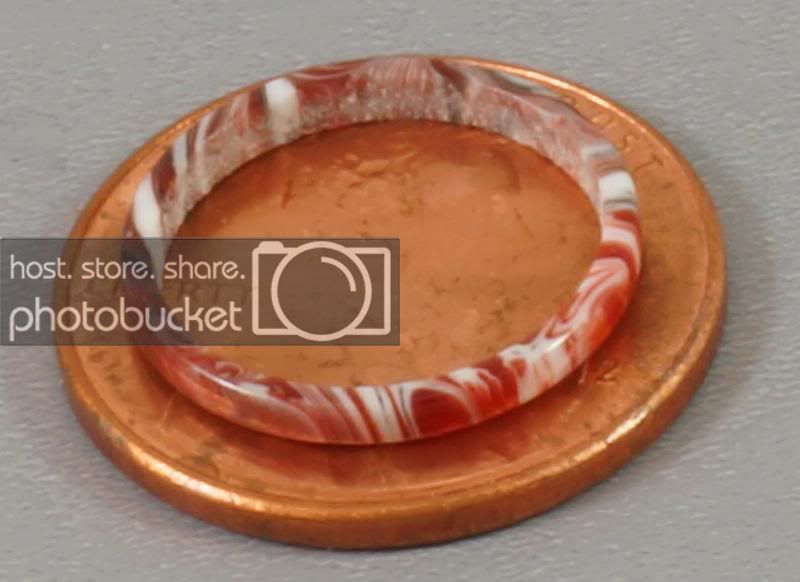
These are a bit smaller than they look. Here's the same ring on a penny.


And this ring was an oops ring because it's actually too big. That's the problem with doing demos on someone else's lathe. I didn't have the tailstock set right when I drilled, and the hole was too large.:redface: So I didn't get the entire pen from 1 blank. I had to use a scape for the centerband when I got home.:frown:

Here's the pen.


Signed-In Members Don't See This Ad

TDE

Member
Joined
Jan 31, 2012
Messages
258
Location
Tuckerman Ar.
Looks good Bob. Looks like that would take a very steady hand. Sure hope I can make the next meeting. Happy New Year to you and yours. Ted:)
 

plano_harry

Member
Joined
Jan 12, 2012
Messages
1,959
Location
Plano, TX 75093
Hey Bob, that is really cool! The perfect treatment for your beautiful blanks. Why don't you make a guest appearance in N Texas to demonstrate! Or just list out the order of the steps you take. The idea doesn't sound too mysterious, but it is nice to have a recipe.

Thanks,
Harry
 

BSea

Member
Joined
Dec 28, 2009
Messages
4,628
Location
Little Rock, Arkansas
Thanks for the compliments!! I really like doing these little touches. From a sales standpoint, it's may not be cost effective, but I do it for the fun of it.

Hey Bob, that is really cool! The perfect treatment for your beautiful blanks. Why don't you make a guest appearance in N Texas to demonstrate! Or just list out the order of the steps you take. The idea doesn't sound too mysterious, but it is nice to have a recipe.

Thanks,
Harry
Ok, I'll share my recipe':rolleyes:.


  1. Get a collet chuck & a set of collets. I'm really not sure if they are entirely necessary, but I've never tried this without using them. And get a drill chuck for your tail stock to drill on the lathe.
  2. if you want to use 1 blank for everything, you have to glue a scrap piece of blank on each end. Then round the blank to about 3/4", or enough to fit in a larger collet. I have a 20mm which is what I normally use. Measure the lower barrel, and leave about 1/8" extra so you'll have a little wiggle room on the end of the closed end. My finished barrels are right at 3", so 3 1/8" should work.
  3. Cut the blank & then inset the cap piece into your collet. with the end that meets the barrel pacing out. This will be the part where you cut the trim ring. I use Jr Gent I's from Timberbits because the trim ring is a separate piece.
  4. Take the ring over to your drill bits, and find the largest bit you have that will fit inside the stock trim ring. For this pen I used a 7/16th's. Drill the blank about 1/2" of so. It's not necessary to be precise because you're going to drill the blank out with a 15/32" bit later for the tube.
  5. Then turn about 1/8" of the end of the blank down to a diameter a little larger than the stock trim ring. Again, it's not too important to be super precise. As long as you're ok with how much it sticks out beyond the pen, you're good. Be sure and not to get the blank too hot. PR will deform if it gets too hot.
  6. Next take a parting tool, and cut the ring to the final width. DO NOT CUT ALL THE WAY THROUGH!!
  7. Then sand the ring. I normally start with 400, then MM. Be sure to soften the edges of the ring to give it the rounded look.
  8. I then part off the ring using an x-acto knife.
  9. You will probably have a burr edge from the parting tool. I just lay that side down on a piece of 320 sandpaper on a flat surface and just use my finger to sand it smooth. You just want to take off the edge, not sand the bevel out of the ring.
  10. If the ring is too tight, you might have to remove a small amount of material from the inside of the ring. I just put the 7/16" bit back into my drill chuck on the tail stock.
  11. (DO NOT TURN ON THE LATHE FOR THIS STEP) I then just slowly rotate the ring against the cutting edge of the bit. It will shave the inside of the ring. Usually this only takes a minute or two.
  12. Then just turn the cap piece around, and cut your finial cap. There is a tutorial in the library on doing this step.

Once you've done a few, you can probably do a trim ring in less than 1/2 hour.

I know this would make more sense with pictures, and I may do that soon if there is enough interest.
 
Last edited:

Brooks803

Member
Joined
Sep 13, 2009
Messages
5,632
Location
Aiken, South Carolina
Very nice Bob! Saw this first on my phone this morning. First saw the ring and thought, wow that's really nice...then scrolled down and saw the pen :eek: Wowza! You're gonna end up getting phone calls from me now!
 

SDB777

Member
Joined
Feb 6, 2010
Messages
6,620
Location
Cabot, Arkansas USA
You going to do one of each for the website? Because when you get ready to, I can make sure Lyn brings enough to work so you can pick them up.....:biggrin:


Great demo, I remember needing a new 'this' and a new 'that' and three of 'those thingies'.....


Scott (which blank do you want first) B
 
Joined
Apr 10, 2013
Messages
554
Location
Arkansas
Great recipe!

I would like to come to a demo that you would do on your own lathe!! That pen is really awe inspiring. I would love to be able to do that quality of work. Maybe if I was to slow down and have a mentor......
 
Joined
Apr 10, 2013
Messages
554
Location
Arkansas
Shops smith

I posted before Christmas that I had a new Shop Smith that I needed to sell. I have attached a few pictures if anyone knows of someone that might be interested. $2,500.00 Operated less than 30 minutes!
 

Attachments

  • DSC01291.JPG
    DSC01291.JPG
    147.2 KB · Views: 160
  • DSC01293.JPG
    DSC01293.JPG
    143.1 KB · Views: 163
  • DSC01294.JPG
    DSC01294.JPG
    139.5 KB · Views: 150
  • DSC01295.JPG
    DSC01295.JPG
    165.4 KB · Views: 169

dcannon

Member
Joined
Nov 20, 2010
Messages
66
Location
Toledo, Oh
Awesome pen!! One question: I get how the ring is made (thanks for the step-by-step), but is the ring put onto the stock hardware in place of the black ring? How does that happen? If I remember correctly, the stock centerband is one piece. Thanks in advance.

Great pen!

Dan
 

BSea

Member
Joined
Dec 28, 2009
Messages
4,628
Location
Little Rock, Arkansas
Very nice Bob! Saw this first on my phone this morning. First saw the ring and thought, wow that's really nice...then scrolled down and saw the pen :eek: Wowza! You're gonna end up getting phone calls from me now!
Well?!?!? It's been a whole 24 hours since your post, and not 1 call. What's up with that??:confused:

I would like to come to a demo that you would do on your own lathe!! That pen is really awe inspiring. I would love to be able to do that quality of work. Maybe if I was to slow down and have a mentor......
Didn't you take good notes at the meeting?:wink: To be honest, the ring in the 1str 2 pics was really close, but there was just a little bit too much play, so I made another. I'd be glad to do another demo of this sometime. It's been awhile since we had an unscheduled informal meeting. It just needs to warm up a bit 1st.

Awesome pen!! One question: I get how the ring is made (thanks for the step-by-step), but is the ring put onto the stock hardware in place of the black ring? How does that happen? If I remember correctly, the stock centerband is one piece. Thanks in advance.

Great pen!

Dan
It depends on the manufacturer of the kit. I get my Jr Gent I kits from Timberbits. The centerband is 3 pieces on this kit. Perfect for doing this mod. You can also do this when the centerband is in 1 piece. There is a tutorial in the library that explains it. I've never done one that's 1 piece. But I plan on trying it soon with a Jr Retro.


EDIT: Here's a picture of the centerband pieces from the Timberbits model of the Chrome Jr Gent I.
 
Last edited:

OZturner

Member
Joined
Aug 5, 2013
Messages
6,663
Location
Sydney. NSW. Australia
Bob, That is terrific, both your centreband and the finial, as well as your Tutorial Step Notes.
Thanks for your thoughtfulness in sharing your ideas, technique and skill,
Brian.
 

Dustygoose

Member
Joined
Jan 16, 2010
Messages
977
Location
Greenbrier, Arkansas
Scott, looks like I will have to paas by your house with some time.

Bob, I havent tried the tiny rings yet but I did the finials. You made it look easier. But I got it. Woo
 

SDB777

Member
Joined
Feb 6, 2010
Messages
6,620
Location
Cabot, Arkansas USA
Scott, looks like I will have to pass by your house with some time.

Bob, I havent tried the tiny rings yet but I did the finials. You made it look easier. But I got it. Woo


Come on by, been needing some help around here...my wood pile is too big!!!


I' still haven't bought the stuff to do this yet....errrr, feeling pretty stoopid now!


Scott (Jack'nCoke is yummy) B
 
Top Bottom