Working on my first Apex pen

Signed-In Members Don't See This Ad

qquake

Member
Joined
Feb 8, 2004
Messages
5,014
Location
Northern California
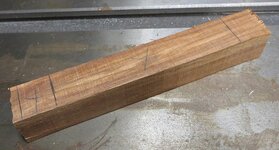
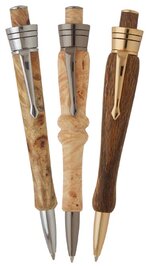
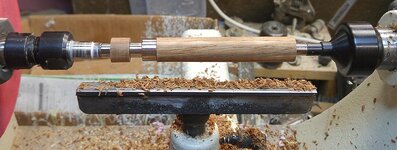
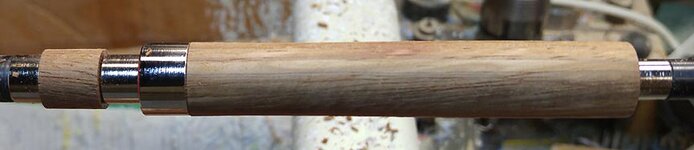
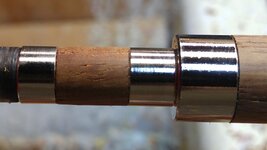
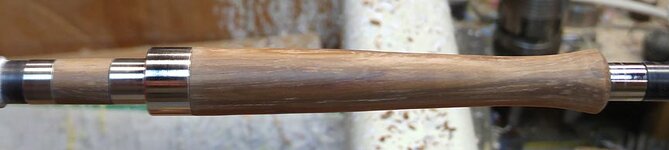
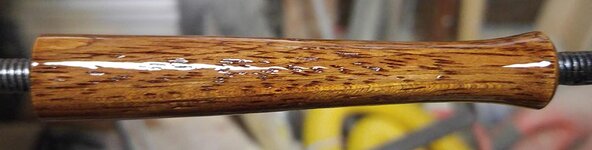
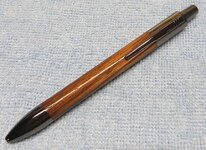
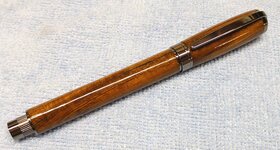
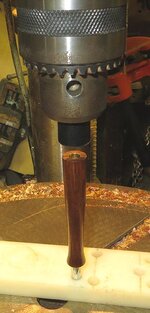
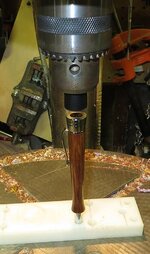
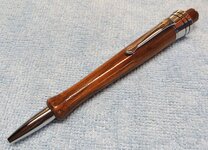
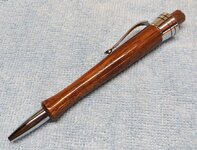
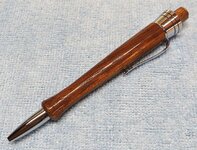
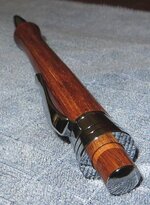
When I first saw the Apex pen on PSI's website, I was very intrigued. I love the style and complexity of the kit. I ordered three kits, and recently started on my first. I really like the profile on the left from PSI's website, and decided to give that one a go. My lathe skills aren't the greatest, so I decided to use wood for my first attempt, as wood is more forgiving and easier to shape (for me, at least) than acrylic. I have several of these blanks, I believe they're Thailand rosewood, but I could be wrong.

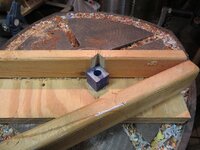
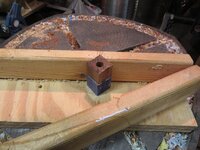
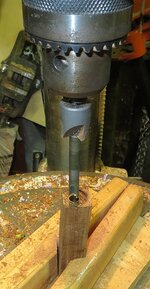
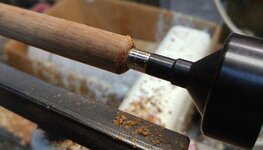
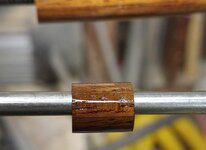
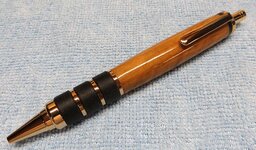
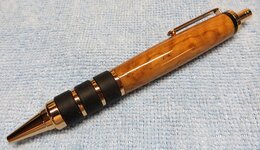
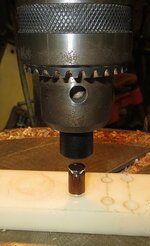
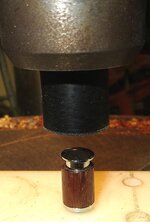
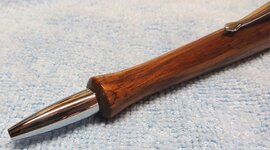
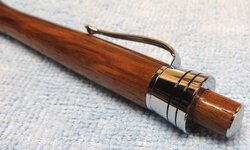
I was a little concerned about trimming the plunger blank, but I used a spacer in my gate jig, and it was easy peasy.
 

Attachments

  • 001.jpg
    001.jpg
    98.9 KB · Views: 180
  • 006.jpg
    006.jpg
    126.1 KB · Views: 184
  • 007.jpg
    007.jpg
    120 KB · Views: 180
  • 013.jpg
    013.jpg
    88.2 KB · Views: 189
  • PSI_image4.jpg
    PSI_image4.jpg
    35.5 KB · Views: 210
Signed-In Members Don't See This Ad

qquake

Member
Joined
Feb 8, 2004
Messages
5,014
Location
Northern California
After trimming both blanks, and figuring out the bushings, I started roughing them out.
 

Attachments

  • 015.jpg
    015.jpg
    69.5 KB · Views: 169
  • 018.jpg
    018.jpg
    135.5 KB · Views: 168
  • 020.jpg
    020.jpg
    108.8 KB · Views: 166
  • 021.jpg
    021.jpg
    89.9 KB · Views: 165
  • 025.jpg
    025.jpg
    43.1 KB · Views: 174

qquake

Member
Joined
Feb 8, 2004
Messages
5,014
Location
Northern California
I got the plunger blank turned to the bushings, and cut the shape in the main blank. Not the best, but it's pretty good for me. I'm happy with it. I usually finish my wood pens with Krylon Triple Thick Crystal Clear Glaze, which I did on the main body. But I decided to use regular Krylon Crystal Clear on the plunger, because it goes on thinner. I don't want it to hang up. I'll assemble it when I get home from work today.
 

Attachments

  • 026.jpg
    026.jpg
    59.8 KB · Views: 192
  • 027.jpg
    027.jpg
    70.6 KB · Views: 163
  • 030.jpg
    030.jpg
    41.3 KB · Views: 174
  • 034.jpg
    034.jpg
    49.9 KB · Views: 182
  • 035.jpg
    035.jpg
    74.2 KB · Views: 173
  • crystal.jpg
    crystal.jpg
    115.6 KB · Views: 159

qquake

Member
Joined
Feb 8, 2004
Messages
5,014
Location
Northern California
I sprayed it on outside. It's a spray on lacquer. I've used it for years, with good results. I don't sell my pens, though, so I don't know how well it would hold up to frequent use.
 

Attachments

  • 041.jpg
    041.jpg
    205 KB · Views: 218
  • 100.jpg
    100.jpg
    167 KB · Views: 181
  • 081.jpg
    081.jpg
    117.6 KB · Views: 191

qquake

Member
Joined
Feb 8, 2004
Messages
5,014
Location
Northern California
Do you resand it and respray it?

Those 3 pens look great!!

Thanks for the compliments! No, I usually just spray on one coat. The triple thick glaze is pretty thick. Although with this one, it wasn't very smooth after I sprayed it. So I put it back on the lathe after the lacquer had dried, and polished it.
 

Attachments

  • 163.jpg
    163.jpg
    137.3 KB · Views: 192
  • 164.jpg
    164.jpg
    125.4 KB · Views: 179

qquake

Member
Joined
Feb 8, 2004
Messages
5,014
Location
Northern California
I pressed everything together with my drill press as usual. One reviewer on PSI's website said that the wood on his plunger cracked when he pressed it together, so I scraped out the inside of the brass tube. It went together with no problems.
 

Attachments

  • 041.jpg
    041.jpg
    63.2 KB · Views: 190
  • 043.jpg
    043.jpg
    57.4 KB · Views: 139
  • 044.jpg
    044.jpg
    72.5 KB · Views: 169
  • 040.jpg
    040.jpg
    53.4 KB · Views: 157

qquake

Member
Joined
Feb 8, 2004
Messages
5,014
Location
Northern California
This might be my new favorite kit! It makes a unique and striking pen. It's more complex than the other kits I've made, but I enjoyed the challenge. I might not be so happy, though, if I'd had problems. LOL

I am very pleased with how this one turned out!
 

Attachments

  • 045.jpg
    045.jpg
    172.6 KB · Views: 183
  • 046.jpg
    046.jpg
    178.9 KB · Views: 181
  • 047.jpg
    047.jpg
    197.2 KB · Views: 164
  • 049.jpg
    049.jpg
    93.6 KB · Views: 164
  • 051.jpg
    051.jpg
    109.5 KB · Views: 179
  • 048.jpg
    048.jpg
    87.4 KB · Views: 190
Top Bottom