Wood Splitting in finished pen! Help!

Signed-In Members Don't See This Ad

wrjones224

Member
Joined
Mar 15, 2020
Messages
156
Location
Kentucky
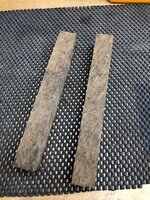
Hello everyone. So I have finished this brown mallee Burl magnet pen and a about a day after these cracks in the wood start showing up. My questions are this...
1. Do I need to disassemble and refinish? I actually don't mind them as is but would not want them to expand any further.

2. What can be done to avoid this in the future? I used a ca finish.
Thanks!
A5360DD4-BB01-4B62-8796-C0F7109F5A76.jpeg
 
Signed-In Members Don't See This Ad

turnit2020

Member
Joined
Jun 5, 2020
Messages
135
Location
Marietta, GA
I have never had that happen to my pens. Will be interested in hearing from others as to what they think the cause is and any solutions.
 

darrin1200

Member
Joined
Mar 17, 2010
Messages
1,850
Location
Lyn, Ontario, Canada
I have never seen cracks like that. It almost looks like the pen was bent, causing stress cracks.
You can disassemble, fill the cracks and then refinish. But you will see the cracks.
 

JUICEDSS

Member
Joined
Mar 5, 2018
Messages
227
Location
Grand Island, NY
The only time I had something similar is when I made a pen out of some wood that was not dried properly. It shrunk and cracked. I am not sure if that is your issue or not.
 

wrjones224

Member
Joined
Mar 15, 2020
Messages
156
Location
Kentucky
The Burl wood was brittle. I could have split a blank with my hands. Maybe this caused it. I figured the Ca finish would have held it together. I think I'm going to disassemble and refinish. What do you suggest I do to fill the cracks? Still somewhat new to turning!
I have never seen cracks like that. It almost looks like the pen was bent, causing stress cracks.
You can disassemble, fill the cracks and then refinish. But you will see the cracks.
 

Kenny Durrant

Member
Joined
Sep 11, 2012
Messages
2,496
Location
Sachse Tx. 75048
It could be because of moisture. Just a guess but maybe the hole for the tube wasn't straight and when you glued the tube in the stress made it crack. Not that you drilled a crooked hole but because of the blank flexing. As far as what to do I'd disassemble the pen and while sanding it down a bit save the dust. Use the dust to fill the crack and then refinish.
 

monophoto

Member
Joined
Mar 13, 2010
Messages
2,543
Location
Saratoga Springs, NY
These are drying cracks. As wood dries, it shrinks. If there is something that prevents the wood from moving as it shrinks, cracks will form. In this case, I suspect that the wood was not fully when the pen was made. The wood was glued to the tube, and brass is dimensionally stable.

I've had similar problems on jars that I've dressed with wooden sleeves - because the jar is made of glass, its dimensions can't change. In one instance, I tried filling the crack and refinishing the jar, but it really didn't look nice, and the crack reappeared a few months later. In another case, the noise that the wood made when it cracked was so loud that I heard it across the room.

It's disappointing, but wood is a natural substance and that's just the way it behaves.
 

jttheclockman

Member
Joined
Feb 22, 2005
Messages
19,132
Location
NJ, USA.
I too believe this is a moisture problem. Now you did not say what your glue of choice was to adhere the tube in?? If it were me and you want to save the kit I would discard the blank. Yes it is a nice burl but it may fall apart on you when you start hammering on it and to fill the cracks will make them stand out. But if you want to try I suggest a dark wood putty. Some people use coffee grinds or an inlace material. It needs to be liquid enough to get into cracks and not just lay on the surface. This wood could have had internal stress cracks in already before it was pressed. One thing and I read this all the time when people use Gorilla glue that needs moisture to activate, if you are adding water to the inside of a wood blank you are asking for troubles. But people keep doing it. Would never use that glue. If this is what you did then again moisture added to what could have been a weak blank already is not good. Many people stabilize those type blanks to prevent this too.

To prevent in the future, make sure the blank is dry before milling. After you drill the hole in questionable wood, let it set a day to now dry from the center out as well. Before gluing in the tube coat the inside of the hole with thin CA and make sure it soaks into the wood. Then use glue of choice.
 

hokie

Member
Joined
May 29, 2017
Messages
307
Location
Falls Church, Virginia
I think mallee burl is kinda notorious for things like this. Maybe not always outright splitting, but certainly shape-shifting in a way. pockets of moisture that dry out and shrink. I comment about my approach for dealing with it in this post: https://www.penturners.org/threads/red-mallee-burl-kitless-fountain-pen.158755/post-2015115

Essentially, I think mallee might need to be "twice-turned" to let the stresses out and maintain a smooth finish. I haven't turned a mallee pen since I made that kitless one, but if I were to use it again, I'd turn to *very* close to the final dimension and then just let it sit for a long while before taking down to the final dimension. Ideally, you'd only be removing the newly developed high points and cracks.
 

Dehn0045

Member
Joined
Mar 19, 2017
Messages
1,533
Location
US
You can disassemble and refinish, but I suspect that cracks will reappear. You may want to disassemble, turn off the finish, and let it sit for a couple of months before re-finishing.

As others have already addressed, it is pretty likely that the cause is drying of the wood that resulted in shrinking. Some changes you can control, some are more difficult. First the wood should be at equilibrium moisture content when turning and finishing. When wood dries the bulk water is released relatively quickly, but the water that is trapped inside the cells takes a lot longer to come out. A lot of times burls are cut, dipped and wax and shipped off to be sold, in part because they develop cracks when they dry and it makes them less valuable. If you turn waxed blanks without drying (remove the wax and let sit) then the wood will dry after being glued to the tube and you end up with cracks as it shrinks (I'm not sure if this blank you show was waxed or not, but it was probably pretty wet). Even if the wood is at equilibrium, you can run into issues when the humidity of the environment of the finished pen changes (summer vs winter, arizona vs florida, sweaty pocket versus hot car -- you get the point). In addition to just changes in moisture, the wood that we often use for pens has a lot of internal stress, even a dry piece can twist and bend when it is cut. When you glue a tube in the middle and turn away the outside the stresses can be released resulting in cracks. This tends to be more of an issue with harder woods (i.e. snakewood).

Here are some other ideas for preventing cracks in wood pens:
  • Use stabilized wood, this removes moisture from the wood and makes the material behave more like plastic and less like wood
  • Make fittings a slip fit such that they slide in easily and use loctite to secure them in place - cracks often develop at the ends where the fittings slightly expand the tube/blank.
  • coat the inside of the blank with CA prior to gluing. this will sort of stabilize the blank and also slow the impact of changing moisture
  • Get good glue distribution when gluing. Epoxy of foaming polyurethane glue (gorilla) are often recommended. CA is known to have poor distribution and is quite brittle, I'd suggest using one of the other two options.
  • Limit heat while drilling. Clear chips often, lubricate drill, sharp drill and go slow
  • Drill, wait overnight, re-drill. You can start one size small. This helps to allow stresses to relieve prior to gluing in a tube. If the blank bends or twists then by re-drilling you avoid a crack (method recommended by others for snakewood). Even if you don't re-drill, I think the overnight wait is worthwhile to allow the moisture to equalize before gluing.
  • Try a more flexible finish. CA is known to be brittle. Some people swear by polyurethane finish as it is more flexible. Or the CA glues with 'flex'. I am still a CA fundamentalist (pure thin only), but I try to do the other things on this list to avoid cracks.
Sorry, my reply got a little long, but I hope there is something in there that helps.
 

monophoto

Member
Joined
Mar 13, 2010
Messages
2,543
Location
Saratoga Springs, NY
  • Get good glue distribution when gluing. Epoxy of foaming polyurethane glue (gorilla) are often recommended. CA is known to have poor distribution and is quite brittle, I'd suggest using one of the other two options.
Just asking a question here - - -

Non-stabilized wood tends to adapt its internal moisture content to its surroundings. As a result, there is a natural cycle whereby it picks up moisture when the humidity in the environment increases, expanding in the process, and then gives up that moisture when the humidity falls while contracting at the same time. Flat work folks struggle with gluing end-grain to face grain because most of the expansion and contraction takes place across end-grain. A very common solution to preventing wood from splitting in those situations is to design the joint to accommodate expansion and contraction - apply glue only in the middle of the joint, so that the end-grain can expand or contract on either side of the glued spot. A good example is the way that bread-board ends are applied to a large flat surface such as a table top or cutting board.

In Ryan's case, the wood was a burl which means that there is the differentiation between end-grain and face-grain is indeterminate. But it appears that he glued it to a pen tube such that the wood contracted longitudinally as it dried resulting in cracks around the circumference. Could this problem have been avoided by using the cross-grain gluing technique described above - that is, not distributing the glue uniformly so that the wood was tightly glued to the tube, but rather applying glue only at one end so that the wood could expand and contract along the length of the tube? I've never seen anyone discuss this option, but it does seem like a logical way to avoid the problem of cracking due to dying and contraction. Obviously, that could introduce other concerns, but I wonder if that technique could address the problem Ryan described.

Of course, as others have mentioned, burls are often stabilized in order to make them mechanically stronger and to help prevent this problem. Ryan didn't mention if this burl was stabilized.

That said, I have a stabilized burl pen that my wife bought for me many years ago that has a hairline crack. So it may not be a perfect solution.
 

Dehn0045

Member
Joined
Mar 19, 2017
Messages
1,533
Location
US
@monophoto one issue is that using a CA finish on the outside guarantees glue distribution on the outside, so I think that this would essentially eliminate most (if not all) of the benefit of 'floating' the middle of the blank. Maybe if you use a more flexible finish on the outside. My thinking is that by distributing the glue evenly on the inside you add structural rigidity to the blank that is more evenly distributed compared to the strength of the blank itself that might be distributed very unevenly. Definitely good glue distribution helps prevent blowouts, but for cracking down the road? Maybe, maybe not. Its a hard thing to test.

Also - good point about the breadboard ends. Its important to note that most of the wood movement happens "across" the grain and much less "with" the grain. So engrain, angle cut, and burl are going to be a lot more susceptible to cracking. Also, segments that are used in an "engrain" fashion will be more likely to cause issues. Another place where wood movement is well understood is in making maloof style rocking chair joinery - selecting wood moisture contents such that when the wood dries it locks in the joint and closes the seam - fascinating.
 

jttheclockman

Member
Joined
Feb 22, 2005
Messages
19,132
Location
NJ, USA.
A couple things to Louies points. Impossible to get glue only in the center of a pen blank in my opinion. And if possible you now are relying on a small area to hold that blank from spinning on the tube especially if it is a twist pen. Second we are talking wood that is so thin movement should not play that large of a role as in furniture making. Now with that said you still need to work with dry woods because woods as they dry will move and with burl in every direction possible. Now another reason I like to use epoxy as my go to glue is that it remains flexible even as cured. Moreso than CA. Another point is with pen making you are sealing the wood for the most part in that CA is a top coat. Now you seal the inside of drilled hole and ends with CA you now have encapsulated that blank. But if that blank is wet it does not have a place to move to expand or contract. A double edged sword. It is also that some woods are just more prone to crack no matter what we do. The nature of the beast. Yes stabilizing can prevent this in a big way. I have to say I never seen a pen blank crack as much as this one in those directions. Usually slits and around the ends where parts are pressed in.
 

wrjones224

Member
Joined
Mar 15, 2020
Messages
156
Location
Kentucky
Thanks to all who have responded! I will take The advice for sure. Here is a picture of the blanks. As you can see they are not waxed and already have the cracks in it. I could rip them with my hands. What should I do with these? Unfortunately I don't have a stabilizer.

also, for those asking I had I glued up my blank using epoxy.
 

Attachments

  • image.jpg
    image.jpg
    692.3 KB · Views: 144

jttheclockman

Member
Joined
Feb 22, 2005
Messages
19,132
Location
NJ, USA.
That is a project that is crying out to be stabilized if you want to use as such. Maybe you could do some segmenting and use non cracked pieces. Have no other answers for you. Sorry.
 

darrin1200

Member
Joined
Mar 17, 2010
Messages
1,850
Location
Lyn, Ontario, Canada
I have never seen cracks like that. It almost looks like the pen was bent, causing stress cracks.
You can disassemble, fill the cracks and then refinish. But you will see the cracks.
I use either coffee or wood dust to fill up cracks. If there are enough cracks, it may even look like a cool feature. Another option may be Gluboost, they sell dyes for their CA.

As for the other blanks. If you don't have access to someone that can stabilize them, I would plan to use them as accent pieces in segmented work as John mentioned.
 

TonyL

Member
Joined
Mar 9, 2014
Messages
8,915
Location
Georgia
Ryan: you can try stuff like this, but I don't think the structure of the wood is going to be stable enough given how brittle it is.
Turq Powder

If you are set on using the wood, maybe you can use it as segments (1/4 " slices on a 60 degree angle or so), and incorporate/"sandwich" it between more stable wood. I don't know...just trying to come up with some ideas.

Good luck!
 

SteveG

Member
Joined
Dec 21, 2009
Messages
2,988
Location
Eugene, Oregon 97404
My sense of things, after seeing the unturned blanks, is that you will not overcome the tendency for this particular wood to crack. So if you accept the pen as is (cracks visible), you might fill with epoxy, which is more forgiving than brittle CA. You can add color to epoxy, to highlight the cracks. Then sand/refinish using friction finish, oil finish or just wax. Set the other blanks aside(or toss): they are proven not suitable for pen work, unless you really like the inevitable result. Next step: seek a different wood for your next efforts.:)
 

LK&T

Member
Joined
Dec 1, 2020
Messages
139
Location
Sedro Woolley, WA
Thanks to all who have responded! I will take The advice for sure. Here is a picture of the blanks. As you can see they are not waxed and already have the cracks in it. I could rip them with my hands. What should I do with these? Unfortunately I don't have a stabilizer.

also, for those asking I had I glued up my blank using epoxy.
I don't know what your experience is with woodworking, but those blanks look like trouble. Maybe, maybe you'd get lucky with a blank with such obvious defects but chances are it's gonna exhibit some weirdness. If your blanks were good and dry when you started, then the cracks are likely due to internal stresses in the wood. When wood has a lot of internal stress, working the wood allows stress to "let go". The result is usually not desirable. I can sometimes see a piece of wood change shape from sawing off a piece or planing with a hand plane. Such wood usually doesn't end up in my projects because there's nothing you can do to stop it from moving aside from stabilizing it somehow.
 

Slacker

Member
Joined
Dec 30, 2020
Messages
9
Location
Phoenix AZ
Thanks to all who have responded! I will take The advice for sure. Here is a picture of the blanks. As you can see they are not waxed and already have the cracks in it. I could rip them with my hands. What should I do with these? Unfortunately I don't have a stabilizer.

also, for those asking I had I glued up my blank using epoxy.
New here but what I would do fill cracks with brown star bond and saturate the wood with thin CA glue throughout stages of turning. Worked for me before I had a vacuum chamber for stabilizing. you could make a makeshift vacuum chamber out of a mason jar and a hand pump vacuum brake bleed pump from Harbor freight.
 

PreacherJon

Member
Joined
Aug 28, 2019
Messages
672
Location
Indiana
You got some great advice here. But I would cry a little. Gather myself up... take it apart and save the kit. Start over.
 

Kcimdrib

Member
Joined
Nov 1, 2020
Messages
1,375
Location
UK
Thank you all for your comments I have read with interest. I am considering changing to 5 min Eoxy away from CA. Having made 100s of pens I have mainly used CA. And only 6 have cracked. But even if you give them away I don't want cracks.
Again I I thank all of you.
 
Top Bottom