Wmcullen
Member
I'm not sure if this process is right or wrong; unique or common. But I want to share in case it's interesting. |
last post- 31: Pen Section Holder
(3d *.obj file attached)
Background
I like using scraps of wood as centerband material, but recently (and accidentally) drilled through the face grain instead of through the end grain of some zebra wood.
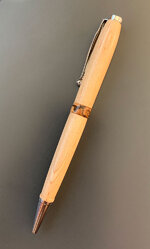
You all probably know this already but I was shocked at how awesome the wood pattern looks when turned on this axis.
As soon as I tried to replicate the mistake the centerbands began exploding one after another on the mandrel.
Well.... shoot!
Again, you all probably would have expected this, since it's a common thing to happen when cutting across the end grain.
Solution
To reduce the amount of material I need to remove on the lathe I wanted to cut the pieces into octagons before turning. But I'm fond of my fingers so designed and 3d printed this guide. It works really well.
1. I cut a 1/4" thick piece of wenge or zebra and drill a 1/4" hole through the Face Grain.
2. Snap onto the guide and run it straight across the bandsaw.
3. Turn the wood so the previous cut lines up roughly with the 45 degree guide. Cut across again.
4. Do this 8 times and you have a rough octagon... ready to turn on a mandrel.
Summary
Along with a sharp tool, getting the wood cut down to size has helped my success rate improve. The centerbands still explode... it seems just as I'm finished turning... but not every time.
3D Model
An obj file is attached. I typically need to scale up 10x and rotate before printing.
The print size should be: x=57.898mm; y=10.122mm; z=25.4mm
File provided as-is. Use at your own discretion and only if you feel it makes you safer.