Wmcullen
Member
I'm not sure if this process is right or wrong; unique or common. But it works for me and I want to share in case it's interesting. |
The Problem
I worried the only way I could make more interesting pens was to buy more expensive kits. Or I could use the standard bands while turning "non slimline" shapes that reminded me of trying on old pants "that had shrunk" and were now too tight around the waist.
1. I liked including center bands because they distract from the pen's crosscut.
2. Using contrasting or complimentary colored woods made for some nice combinations.
3. Turning my own bands provided a little more "workshop" fun during each pen project.
Here's my simple process
(Not rocket surgery, just how I do it.)
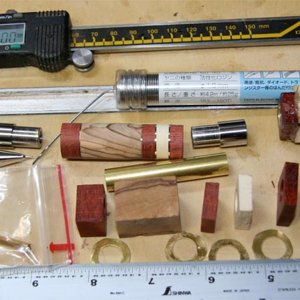
1. I cut thin strips of interesting boards on the miter saw. The width isn't so important, though I typically use between 5/32" and 5/16".
2. I mark lines along the strip, about 3 to an inch, using this handy measuring jig I made. It was 3D printed and I'm happy to share the file below.
My current favorite band is this one which "creases" in the center and changes the line direction between top and bottom.
Turning my own center bands is the easiest way I've found to keep using slimline kits while not restricting the shape of my pens. I get to make more decisions about the design, show off beautiful wood, and play with the contrasts.
The Jig
The jig file is a zipped "stl" file and measures about 6" long.