Walnut/Hickory segmented with Aluminum

Signed-In Members Don't See This Ad
See more from NittanyLion

NittanyLion

Member
Joined
Feb 3, 2013
Messages
804
Location
State College PA
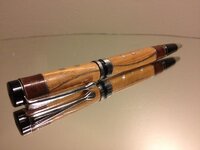
Still new at this....I had trouble once I started to sand with sanding dust from the aluminum flashing and/or solder staining the wood. I ended up taking it back down with a skew and CA from there. Any suggestions on how to avoid ruining blanks with metal dust?
 

Attachments

  • image.jpg
    image.jpg
    35.4 KB · Views: 363
Last edited:
Signed-In Members Don't See This Ad

plantman

Member
Joined
Jan 2, 2012
Messages
3,437
Location
Green Bay, Wi
Looks good for a new turning adventure. If you want to cut down on the metal dust, turn down to just over the size you want, wipe down your blank, apply a coat of thin CA, and turn down to size. Wipe with a tac cloth to remove dust. It looks like it came out undersized for your fittings when you returned your blanks. You can fix this by building up more coats of thick CA. Also looks like your dots are not centered and in line. Use a fence on your drill press when you want to drill holes in a straight line. Just some tips I learned the hard way also, not tring to be critical. Jim S
 

jttheclockman

Member
Joined
Feb 22, 2005
Messages
19,151
Location
NJ, USA.
First off to me this is a classic case of posting more than one photo of a pen. I just never understood why so many people post 4 or 5 or more photos of the same pen turned upside down, inside out, backward, forward and all they show is the other side of the grain. If that is the best side show it. In this case you have a few different things going on and it would be nice to see better photos. A pet peeve of mine. Add that to the list of petpeeves:)

As to answer your question about sanding dust. Don't sand. Plain and simple. You figured it out on your own when you went from skew to finish. If you are proficient with a skew there is no better finish than a skew cut. If you look at some of my segmented pens I never used a piece of sandpaper. I went right from skew to finish. Works well.

From the photo you do need to work on your fit to the kit. Now this is all a learning experience but you are on the right track when it comes to making an intersting blank. Keep at it and look forward to seeing more. Thanks for showing and if you could post more photos it would help.

Upon further looks of your pen it looks like you tried to follow the contour of the curve with your dots . This would make for a nice look but it gets tricky on the amount and distance to keep symetrical. I still like your attempt.
 
Last edited:

NittanyLion

Member
Joined
Feb 3, 2013
Messages
804
Location
State College PA
Thanks guys. I agree, there is a lot wrong here.....once the dust problem started, I was done trying to fit it. I was already down to bushing size, expecting to sand then build up with CA. Once "the dust settled in", it was deep and taking it down with a skew even more destroyed it. I slapped some CA on it and wrote it off as a lesson learned......I also learned from my 1st attempt at solder rods to not use cheap bits and punch a starter hole.....the bits wondered on me since I was drilling on a curve. Thanks again for the advice.
 

Paul in OKC

Member
Joined
Jul 26, 2004
Messages
3,091
Location
Oklahoma City, OK, USA.
You can use a center drill to start with, even if just to dimple the starting spot to keep the bit from wondering on a curved surface. Like the look, thanks for showing. The only failure would be to not have tried! Keep it up.
 

mredburn

IAP Activities Manager
Staff member
Joined
Jul 5, 2009
Messages
8,753
Location
Fort Myers FL
Its a great start. Now you know some ways not to do it. The concept and design are there now comes practice. Yes, we all have those pens, some are shown some are not.
 
Top Bottom