Wall Street II and III blanks too short?

Signed-In Members Don't See This Ad

Woodchipper

Member
Joined
Mar 15, 2017
Messages
5,138
Location
Cleveland, TN
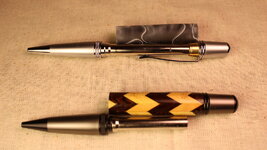
Here is the result of my pondering the problem of the refill not advancing in the WS III. I pondered the situation and noticed the twist part of the tranny was down inside the main part. That is a no-no. The segmented blank was measured and was in spec according to the library spreadsheet at 2.21. I put the Cap/Pocket Assembly into the end of the blank. Then I slid the open end of the blank/Cap onto the shoulder of the Nib Assembly an put it on the pen press. OK but the twist didn't work to extend the refill past the nib. In fact, it didn't do anything. I measured the tube in the WS II kit and extra tubes, #147120, and they matched the dimensions on the spreadsheet for twist WS III and WS II. I dry fitted the WS II; note the position of the segmented blank on the WS II. Now note the distance between the acrylic blank and the shoulder of the nib on the WS II. There's something wrong, IMHO. Instructions for the two kits are identical except for the diameter of the respective bushing. There were references to a Sierra pen but didn't find anything; obsolete?
 

Attachments

  • IMG_0121.JPG
    IMG_0121.JPG
    326.4 KB · Views: 102
Signed-In Members Don't See This Ad

its_virgil

Member
Joined
Jan 1, 2004
Messages
8,101
Location
Wichita Falls, TX, USA.
The Wall Street II and III are actually the Sierra and the Sierra Vista from Berea Hardwoods. Woodcraft sells Berea kits but renames them.

Assemble the parts without the wood blank. Does it work properly?

The clearance between the pen barrel and the "shoulder" of the nib end is very small. Any glue inside the brass tube or a burr on the end of the tube can cause binding and the barrel will not twist efficiently and sometimes not at all.

Do a good turn daily!
Don
 

thewishman

Member
Joined
Mar 9, 2006
Messages
8,181
Location
Reynoldsburg, Ohio, USA.
Don is right about the kits, but there is a significant difference in the transmissions between the Woodcraft and Berea versions. They do both the use the same size and length tubes.
 

Woodchipper

Member
Joined
Mar 15, 2017
Messages
5,138
Location
Cleveland, TN
"Assemble the parts without the wood blank. Does it work properly?"- Yes.
Tubes are clear of any glue, dog hair, dust bunnies, spider webs, etc. Have lots of the last three.:)
As you can see, there is a big difference in the OAL of the two pens. I followed the directions but when I put the WS III on the pen press, it pushed the twist part into the tranny. This is the problem...short tube/blank, IMHO. Again look at the segmented pen tranny.
Butting the acrylic blank up to the cap/clip on the WS II leaves a 1 cm gap between the end of the blank and the shoulder of the nib. I don't want to press the cap/clip into the blank and then press that onto the nib, ruining another tranny. As Willie Shakespeare says, "Aye, there's the rub."
Any other ideas? Thanks for replying.
 

jrista

Member
Joined
Aug 12, 2021
Messages
2,222
Location
Colorado
"Assemble the parts without the wood blank. Does it work properly?"- Yes.
Tubes are clear of any glue, dog hair, dust bunnies, spider webs, etc. Have lots of the last three.:)
As you can see, there is a big difference in the OAL of the two pens. I followed the directions but when I put the WS III on the pen press, it pushed the twist part into the tranny. This is the problem...short tube/blank, IMHO. Again look at the segmented pen tranny.
Butting the acrylic blank up to the cap/clip on the WS II leaves a 1 cm gap between the end of the blank and the shoulder of the nib. I don't want to press the cap/clip into the blank and then press that onto the nib, ruining another tranny. As Willie Shakespeare says, "Aye, there's the rub."
Any other ideas? Thanks for replying.
How far into the cap is the WSII transmission pushed? The cap is fairly deep, and it usually goes in a decent ways. The pen unscrews at the joint between the blank and the nib part of the pen for refill replacement. It may simply be that you haven't pushed the tranny in far enough. Once it is in, it really isn't supposed to be removed again, as the pen is supposed to be unscrewed for refill replacement. If you didn't push the tranny in all the way for fear of not being able to remove it again, that may be why you are seeing a length discrepancy (I know I did that the first few times I made a Sierra-style pen...I was a bit confused at first when I also had a gap...then I gave the bottom part of the pen a stronger push and things came together.)
 

Woodchipper

Member
Joined
Mar 15, 2017
Messages
5,138
Location
Cleveland, TN
I don't feel the tranny inserted into the cap is an issue. My problem, as stated, is the cap and blank pushing the twist part into the body of the tranny. You can see this on the photo. Compare the lengths of the two trannys. The WS III is the short one. This stems from the tube stated on the spreadsheet and the one in the kit.
 

Edgar

New Member Advocate
Staff member
Joined
Feb 6, 2013
Messages
6,890
Location
Alvin, TX 77511
I just checked a Woodcraft WSII, a Sierra Vista, and a Rockler Manhattan. All were in original packing and all have identical transmissions and 2.21" tubes & transmissions.

I screwed the trannys into their nibs & slid the tube over the tranny down to the nib. The tranny extends past the end of the tube about 0.45".

The depth of the caps are about 1.1" and the shoulder that presses into the tube is about 0.26" long. That leaves about 0.84" of room inside the cap for the end of the tranny.

By my calculations, a tube from about 1.9" to about 2.5" should work.

You might check your dimensions with what I got.

Did I understand correctly that you used a pen press to push the cap assembly onto the nib? I wouldn't do that - you only need to use a press to push the cap/clip into the top end of the tube. Then just push the complete cap/blank assembly onto the nib by hand. That's what a user has to do when they need to replace the refill anyway. If you used a press, I suspect that the top of the tranny might have caught on the rim of the cap that's pressed into the tube & that caused the top part of your tranny to be pushed into the bottom part. You probably wouldn't be able to do that by hand, but a press surely could.
 

jrista

Member
Joined
Aug 12, 2021
Messages
2,222
Location
Colorado
I don't feel the tranny inserted into the cap is an issue. My problem, as stated, is the cap and blank pushing the twist part into the body of the tranny. You can see this on the photo. Compare the lengths of the two trannys. The WS III is the short one. This stems from the tube stated on the spreadsheet and the one in the kit.
The fit of the tranny into the cap is just a press fit. You shouldn't need to use a press to get the nib assembly with refill in and tranny screwed in pushed into the cap. I've made quite a few Wall Street II pens and several Wall Street III. I tend to make those vs. the Berea Sierras because I have a Woodcraft just down the street, basically. I've never had any transmissions fail like you are describing...where the top twist part is pushed into the bottom tube part that screws into the nib...

You did mention that you pen pressed it all together... I am very curious now, is it possible that the twist part of the tranny actually caught the bottom edge of the cap? If it did (and it can, very easily) then compressing with the pen press could be why the twist part ended up compressed down into the tube. I've never used that much force, just a little bit of hand force to push the twist part of the tranny up into the cap. I'll often torque it just a tiny bit to make sure its seated well, then un-screw the nib and check that the tranny stays put.

There are plenty of times when I'm first inserting the transmission (which I always do with the nib screwed onto it) that I'll catch the bottom rim of the cap (which is compressed into the blank and brass tube at that point). I just fiddle around until the transmission finds the hole in the cap, then I press it in. I'm not sure I'd even be able to feel that little catch, if I was compressing the nib+transmission into the cap with a pen press....I suspect if it caught, then yeah...the twist is just going to get shoved down into the transmission's tube by the force of the press.
 
Last edited:

Woodchipper

Member
Joined
Mar 15, 2017
Messages
5,138
Location
Cleveland, TN
jrista, that makes sense. At 12:06 AM, I was pondering the depth of the transmission in the cap as related to the gap between the acrylic blank and the nib. I looked at the cap and noticed a "ring" that might indicate the depth of the transmission into the cap. I feel that your experience and observation is the problem of the tranny catching the edge of the cap. Is the blank on the cap as per instructions?
Know where I can get a replacement transmission for the pen? I'll put the pen aside for a while and work on some other pen kits I have on the shelf. Thanks two bunches.
To all who have replied, many thanks. I'm impressed by the willingness for the members to help another pen turner. Have a great day and a wild weekend!
 

Edgar

New Member Advocate
Staff member
Joined
Feb 6, 2013
Messages
6,890
Location
Alvin, TX 77511
Bear Tooth Woods sells spare transmissions for Sierra pens. Those should work on exact Sierra clones like the WSII & Rockler's Manhattan.

Exotic Blanks & Woodturningz sell one that appears to look the same for Mesa, Diplomat, & Lancer pens which are also Sierra clones. However, there must be a slight difference because the EB web site says that they will not work on Sierra pens. So don't buy those.
 

Woodchipper

Member
Joined
Mar 15, 2017
Messages
5,138
Location
Cleveland, TN
Edgar, thanks for the information. Will note in a file and check their websites.
jrista, I finished turning the blank and followed your "caution" about inserting the tranny into the cap. I did notice a "catch" but did a bit of wiggling to get it started. I did use the pen press to complete the sub-assembly. Next I verified the refill and spring were in the tranny and nib. I carefully slid the blank/cap over the tranny. Bingo! It worked! Many thanks for sharing the information. This pen is for my grandson. Will post a photo later today on Show Your Pens.
 

jrista

Member
Joined
Aug 12, 2021
Messages
2,222
Location
Colorado
jrista, that makes sense. At 12:06 AM, I was pondering the depth of the transmission in the cap as related to the gap between the acrylic blank and the nib. I looked at the cap and noticed a "ring" that might indicate the depth of the transmission into the cap. I feel that your experience and observation is the problem of the tranny catching the edge of the cap. Is the blank on the cap as per instructions?
Know where I can get a replacement transmission for the pen? I'll put the pen aside for a while and work on some other pen kits I have on the shelf. Thanks two bunches.
To all who have replied, many thanks. I'm impressed by the willingness for the members to help another pen turner. Have a great day and a wild weekend!

I'll have to pull out one of my WSII kits and take a closer look, but there may indeed be a marker for transmission depth in the cap. That would be handy, if there was!

Pushing the nib with the transmission screwed onto it, into the assembled cap and body, is really easy. It doesn't take much force to push them together. It actually takes more force to pull them apart again, which I'm pretty sure is by design. When I assemble these types of pens (any "Sierra-style" pen kit), I fit the finial into the body using my press (or a drill press), then the rest is actually all just hand assembly. Its actually one of the easier kits to assemble.

I tend to have more trouble with some of the rollerball/fountain pens, especially if I am using a more rigid material like TruStone (or, for that matter, buffalo horn...which seems to have a very weak longitudinal grain that the compression-fit of most rollerball/fountain pen kit parts will cause to split down the length of the blank...only way I seem to be able to use buffalo horn is if I thin the tube out a little bit then file down the part of the fitting that goes in the tube to the point where they just slip fit, then I use loctite to glue them in place.) With the plastic non-scratch sheathes that usually fit into the caps, and often overly-tight compression fit (I honestly would prefer a slip fit that I had to glue!!!), I have cracked too darn many blanks when assembling these higher end pens. So its now just become a bigger and more complex process to safely assemble these types of pens, as I usually have to file down fittings the vast majority of the time, and deal with gluing them in, etc.
 

jrista

Member
Joined
Aug 12, 2021
Messages
2,222
Location
Colorado
Edgar, thanks for the information. Will note in a file and check their websites.
jrista, I finished turning the blank and followed your "caution" about inserting the tranny into the cap. I did notice a "catch" but did a bit of wiggling to get it started. I did use the pen press to complete the sub-assembly. Next I verified the refill and spring were in the tranny and nib. I carefully slid the blank/cap over the tranny. Bingo! It worked! Many thanks for sharing the information. This pen is for my grandson. Will post a photo later today on Show Your Pens.
Awesome! Glad you got it sorted!!
 

jrista

Member
Joined
Aug 12, 2021
Messages
2,222
Location
Colorado
I was looking at the inventory of kits. Found a WS II kit plus a dozen others. Going to be busy.
Yeah, I have a customer order I'm working on this weekend. A total of 15 pens, sets of three in different kits with a particular kind of blank for each kit. Been trimming and gluing all morning. I finally get a break to let that stuff dry for a while!! It is surprising just how much work it can be to make a bunch of pens...for as small as they are, you would think it wouldn't be quite so much. ;P

I am now trying to figure out how to optimize the process. I'm looking at designing a set of pen crafting rigs, where I have a base piece of wood, some dowels stuck into that to hold blanks up for drying, a spot for holding all the pen parts, a place to hold the bushings, etc. etc.

I've come up with some little jigs to help me very quickly and consistently mark my blanks where I should cut them for each tube. I cut out a little depression in the base piece of wood, about twice as wide as a pen blank. In one half I put either a 1/8" thick or 3/16" thick cutoff from a used blank. I can fit in up to a 6" long blank, and then just place the brass tube alongside the blank, offset by the cutoffs. A couple of free blank cutoffs a bit thicker than the kerf thicknesses of my miter and bandsaw blades can be placed at the top of the first brass tube, for exact measurement of both segments in two-segment pens.
 
Top Bottom