Geophyrd
Member
All,
I recently bought (actually got for free) a router and routing table. Very cool item...but I have some questions. If you don't route for pen blanks or know about routing wood, you might want to skip...
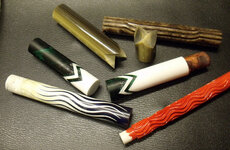
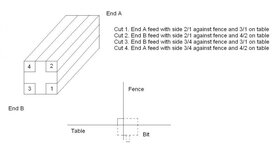
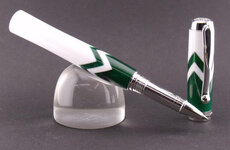
1). I used a rabbiting bit to try to take even rabbits out of my blank. Then, rotating them, I was going to make (basically) a blank reduced to just tenons, essentially an 'X' if turned on its side. From there I was going to add other material I'd have a straight up and down with alt material patterning the blank. When I rotated the blank, I got a different cut than the first one. The next rotation got the first patterning. And the fourth was same as second. The blank is square, so not sure why this is happening.
2). Does anyone use router bits to get angles into their blanks? Seems to me you can get a very fine cut that way...but haven't tried it myself yet.
3). Do anyone use a router for inlay work...laying in of veneers for example?
So that's it for now. Going with the if all you've got is a hammer, all your problems look like nails. Got a new tool, trying to figure out how to apply it to my penmaking.
Thanks in advance for the help
I recently bought (actually got for free) a router and routing table. Very cool item...but I have some questions. If you don't route for pen blanks or know about routing wood, you might want to skip...
1). I used a rabbiting bit to try to take even rabbits out of my blank. Then, rotating them, I was going to make (basically) a blank reduced to just tenons, essentially an 'X' if turned on its side. From there I was going to add other material I'd have a straight up and down with alt material patterning the blank. When I rotated the blank, I got a different cut than the first one. The next rotation got the first patterning. And the fourth was same as second. The blank is square, so not sure why this is happening.
2). Does anyone use router bits to get angles into their blanks? Seems to me you can get a very fine cut that way...but haven't tried it myself yet.
3). Do anyone use a router for inlay work...laying in of veneers for example?
So that's it for now. Going with the if all you've got is a hammer, all your problems look like nails. Got a new tool, trying to figure out how to apply it to my penmaking.
Thanks in advance for the help
 :biggrin: