I had posted in a prior thread where I had bought an Atlas 3950 6 inch lathe to replace the Sherline I started with. I have been very satisified with the Atlas except for one thing. The tail stock sucks. It has a whopping 1 1/4in. of travel.
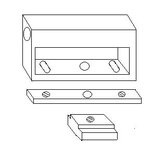
(40mm) I decided to do something about that. I bought a Logan tail stock for a 9 inch lathe off Ebay and took the bottom base off of it. I made plugs for both the quill hole and the handle hole and when I did a facing cut on them I left just the smallest of **** in the center. Measuring carefully I determined I needed to cut .685 off the tails stock to center it on my Head stock. I need to take this time to give a huge Thanks to Mike Roux (BluWolf) for allowing me to use his mill, make a mess of his garage for two days and dull one of his end mills. We started by clamping the Tail Stock in the vise and milling a flat on top and both sides of the quill area .


We then flipped it upside down in the vise and using the plugs and a Laser center found the center of the quill. We then milled the base away to fit down between the rails of the lathe.


When I got it home it snapped right onto the lathe. The fit was a hair snug, you could slide it with a little force. A light stroke or two of a flat file and it slides like its supposed two. Its perfect for height but needs to come towards me about .003 to be perfectly centered. Before I do any more adjusting I will have to double check the bed for twist. I did put the laser center finder in the chuck and a 60 degree tip in the quill and checked it both at the front by the chuck and at the back of the lathe to make sure the quill was parallel. It was perfect and didnt matter if the quill was extended or pulled back in, it stayed the same. I cut a notch out of the front corner it so that it will slide all the way up inside the saddle to get as close as possible to the work.

the last two pictures are of the two tailstocks for comparison. The original Atlas and the adapted Logan. The Atlas has an mt1 taper, 1 1/4 throw. the Logan 2mt taper and 2.5 inch throw. The next step will be to put the quill clamp back in and to make the adapter for the tail stock DRO.


comments and questions?
(40mm) I decided to do something about that. I bought a Logan tail stock for a 9 inch lathe off Ebay and took the bottom base off of it. I made plugs for both the quill hole and the handle hole and when I did a facing cut on them I left just the smallest of **** in the center. Measuring carefully I determined I needed to cut .685 off the tails stock to center it on my Head stock. I need to take this time to give a huge Thanks to Mike Roux (BluWolf) for allowing me to use his mill, make a mess of his garage for two days and dull one of his end mills. We started by clamping the Tail Stock in the vise and milling a flat on top and both sides of the quill area .
We then flipped it upside down in the vise and using the plugs and a Laser center found the center of the quill. We then milled the base away to fit down between the rails of the lathe.
When I got it home it snapped right onto the lathe. The fit was a hair snug, you could slide it with a little force. A light stroke or two of a flat file and it slides like its supposed two. Its perfect for height but needs to come towards me about .003 to be perfectly centered. Before I do any more adjusting I will have to double check the bed for twist. I did put the laser center finder in the chuck and a 60 degree tip in the quill and checked it both at the front by the chuck and at the back of the lathe to make sure the quill was parallel. It was perfect and didnt matter if the quill was extended or pulled back in, it stayed the same. I cut a notch out of the front corner it so that it will slide all the way up inside the saddle to get as close as possible to the work.
the last two pictures are of the two tailstocks for comparison. The original Atlas and the adapted Logan. The Atlas has an mt1 taper, 1 1/4 throw. the Logan 2mt taper and 2.5 inch throw. The next step will be to put the quill clamp back in and to make the adapter for the tail stock DRO.
comments and questions?