TRIPLE CROWN’S PITH PEN STORY – A Truly IAP Pen

Signed-In Members Don't See This Ad
See more from Triple Crown

Triple Crown

Member
Joined
Jan 18, 2012
Messages
122
Location
Alexandria, Virginia
Several Views.jpgOn Table.jpgOn Table2.jpg

First of all, I'd really like to thank Landon (hunter-27) for organizing such a great event and the great people of IAP that make it so fun to be a part of the PITH exchange. I've loved reading everyone's posts and looking at the pictures of the pens that people have challenged themselves to make for their fellow penturners! I am really happy that I was matched with my new really good friend Russ (Russknan). We have exchanged a lot of e-mail and spurred each other on with 'teaser pics' and stories of our works-in-progress. We also found out that we have a lot in common with each other in our lives in general.

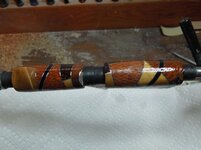
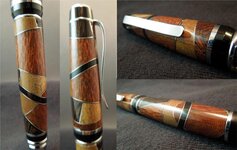
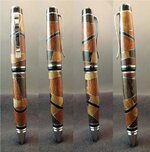
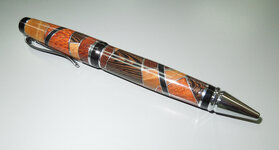
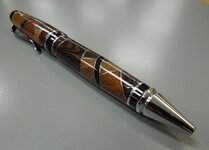
This pen took me a very very long time to make. I had an idea from the beginning of what I wanted it to look like, and I am pretty happy with the results. It is not 'perfect' and that is okay. It is my first wood segmented pen, and it is truly an IAP Pen! The different woods each came from my IAP member friends: Butternut from Rodney (Carpblaster), Lacewood and Wenge from Jeremy (Glycerine), and Rosewood from Eric (Buzz4). The aluminum sheets are also from my friend Rodney that he sent to me when we did the Transformation Swap. I provided the kit and the black pickguard that I ordered special to try out on this project.


I wanted to make a patchwork style pen with the wood grains running in multiple directions. I also wanted metal between every piece of wood. I drew a rough picture of my idea and started cutting and gluing the wood at varying angles one piece at a time. For my next one, I need to have a better way to make each adjoining surface come out perfectly flat, but all in all, it came out pretty good. I used medium CA for the glue. Here is how the blank ended up before I spliced in the pickguard.
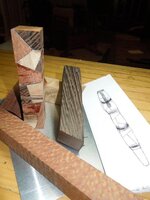
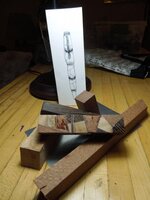
PITH Materials 1.jpgPITH Materials 2.jpg

My original design was to have the black pickguard running in the same direction/angle on both barrels. Here are the two barrels with the pickguard.
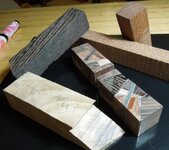
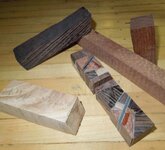
Blanks with Pickguard.jpgBlanks with Pickguard2.jpg

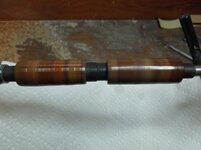
In my reading on the IAP forum, I have learned that there is a likelihood of blowouts occurring doing the drilling step on segmented pens. I've seen that a preventive technique for that is to glue on popsicle sticks or wrap the blanks in tape or string (and then soak the string with CA)... I thought that I would go further and I glued on paint sticks. Unfortunately, the paint sticks made the blanks too thick and they would not fit properly into my drill press centering jig. I had to mount them differently and use a square and my eyeballs to line it all up and hope for the best. One came out almost perfect and the other was close. Here's a pic of the glued-up-paint-sticked blanks. And here is my first 'teaser pic' that I sent to Russ! That was really fun because he then sent me a teaser pic of the wood that he was to use in his pen to me. He challenged me, but I could not guess what it was!
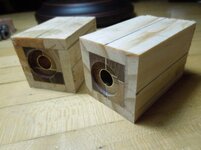
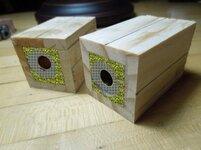
Paint Sticks.jpgTeaser Pic 1.jpg

Due to general life schedules…, a long time went by before I could turn the blanks. I was pretty nervous about blowing them up because I didn't think that I would have time to make another set. For the most part, they turned just fine. I kept my tool sharp and took my time. I also practiced with the CA finish along the way (something else that I learned from IAP). I haven't been very successful with CA finishes, but I was determined to make it work this time! Here are a couple of pics of turning off the paint sticks…
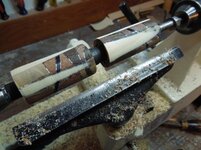
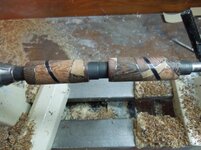
Removing Paint Sticks.jpgRemoving Paint Sticks2.jpgPractice CA Glue.jpg

and my second set of 'teaser pics' that I sent to Russ.
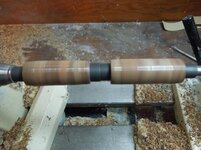
Teaser Pic 2.jpgTeaser Pic 3.jpg

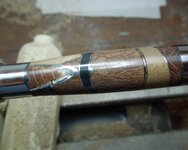
And then, of course when I'm close to done, I caught some metal glued onto a very tiny piece of wood right at the top end of the pen.I don't know where that piece flew off to, but I quickly started on the repair. I glued on a new piece of metal and a replacement piece of wood. At least this could be hidden under the clip!!
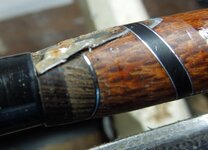
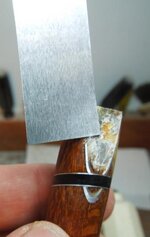
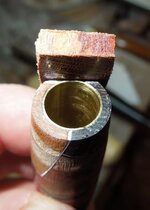
Obstacle1.jpgObstacle2.jpgObstacle3.jpgObstacle4.jpg

The finishing went very well! I took my time and applied it thin, but a lot of coats. I had been experimenting using the parts baggies over my fingers, and it was working better for me than using paper towels, but I still wasn't getting the finish that I see so many others getting. I constantly struggle with trying not to get ridges and dull spots. This time I used very small pieces of paper towel, just two layers thick, and the parts baggies over my finger. I think it helped me because I could feel it better like when it was just baggie, but I still had a little bit of towel to help control the amount being spread. I'm going to try this method again next time. I did have a tough time getting one of the bushings off and you can tell where that occurred if you study the pen. Next time I'm having trouble like that, I think that I will have to put it aside for awhile and make sure it is fully cured, take more time and go slow and easy (and hope).

One other imperfection about this one is that the Wenge has little pits in places. I think that the CA did fill the little holes, but since it is so clear, it did not make them disappear. They are quite little, but you can definitely still see them.

Assembling went easy. I've made lots of these cigar pens. My original design changed to make the pickguard angles in opposite directions instead of parallel. I needed to hide the repair job under the clip :redface: and the look flows just fine with the change :rolleyes:. All in all, the pen turned out to be quite beautiful in my opinion. I'm proud to give it to my new friend. (But it was hard to let it go though!! :))
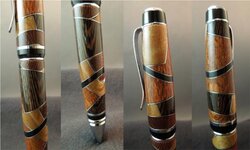
Close Ups1.jpgClose Ups2A.jpg

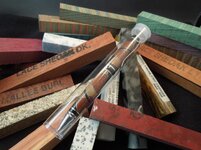
I included in my package to Russ as many blanks as I could fit in the box. I know he likes the Australian woods so I found a few of them, but I also wanted to put some stuff that he may not have done before. I have a pretty good supply of Dymondwood, so I added some different colors of it. He hasn't done any acrylics yet, so I put a couple of them in there with some other non-wood blanks - a good array of something different to complete the box stuffing. Merry Christmas Russ! :)
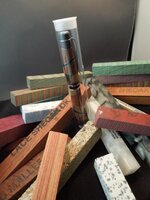
Pen with Blanks1.jpgPen with Blanks2.jpg

So, as with my other new-to-me techniques/kinds of pens that I spent a lot of time on and overcoming obstacles along the way, I wanted to share my story about this one. What made it even more fun was the PITH exchange part of it and getting to know my new friend Russ!

I hope that you like it and thanks for reading!
Greg
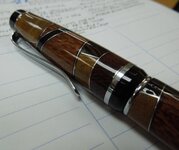

Calendar1.jpg
 
Signed-In Members Don't See This Ad

Russknan

Member
Joined
Mar 13, 2012
Messages
537
Location
Nanuet, NY
I can't begin to tell you what it was like to open that pen. Yeah, it's pretty darn nice. But, I haven't taken it to bed with me, yet. Can't bear to part with it, so tonight . . .

Thanks, Greg. Great pen!

Russ
 

Janster

Member
Joined
Nov 13, 2012
Messages
1,645
Location
Nevada
Outstanding,

I've not been a member here for very long but this is one of or maybe the best looking pen I have see. Suhweeeet!!!
 

ttpenman

Member
Joined
Jun 8, 2004
Messages
356
Location
Ashland, WI, USA.
WOW!! What a great pen. I wish I could wrap my feeble mind around how you do this. More patience than I'll ever have. Amazing piece.

Jeff in northern Wisconsin
 

carpblaster

Member
Joined
Dec 12, 2011
Messages
273
Location
Shelby,Alabama
((WOW))
Love the pen,I know a lot of time,glue and patience went into making it,love the info on how u made it with paint sticks thanks for telling us how u made it
Rodney
 

walshjp17

Member
Joined
Jul 29, 2012
Messages
3,418
Location
Weddington, NC
Fantastic pen, Greg. Appreciate the tale, the pics and the how-to. As soon as I clear up some to-dos, I'm going to try doing this myself. Thanks for posting.
 

Triple Crown

Member
Joined
Jan 18, 2012
Messages
122
Location
Alexandria, Virginia
I want to thank everyone for their very positive comments on the pen and this post! I apologize that I haven't been able to log back on since I wrote it. (I did actually attempt to write earlier this evening before we went out, but something went wrong, so I am trying it again now in a couple of posts.) I really enjoy the IAP and want to be more active on it. Thanks again all! Greg


Great story, even better pen!

Thanks Derek! :)


WOW! That one is one for the books. Nice story and nicer pen.

Thanks! :)


I can't begin to tell you what it was like to open that pen. Yeah, it's pretty darn nice. But, I haven't taken it to bed with me, yet. Can't bear to part with it, so tonight . . .

Thanks, Greg. Great pen!

Russ

ROFL! That's funny!
Everyone that I show the pen that you made for me wants one! I'm loving my pen too! Thanks! :)


Now that's a lot of segmenting! Looks like a great pen and it's detailed well

Thanks so much Tim! I have admired your pens from the time I discovered this site! Your creativity really inspires me! We are pretty close. It sure would be great if we could meet sometime when you are not traveling… :)
 

Triple Crown

Member
Joined
Jan 18, 2012
Messages
122
Location
Alexandria, Virginia
I've not been a member here for very long but this is one of or maybe the best looking pen I have see. Suhweeeet!!!

Wow! That is very nice compliment! Thanks!!! There are so many beautiful pens posted on this site all the time. I constantly marvel at the perfection in workmanship and just the amazing artistry of them. Before IAP, I hadn't thought of making my own blanks, either segmented or cast. Keep looking and you'll find lots of beautiful pens to inspire you! :)


That pen is awesome! I know that it took a lot of time to make it that detailed. It must have been really hard to give it away!

Thanks Spectrewiz! It was hard to let it go I admit, but I was really glad to have built such a good relationship with Russ along the way. That made it really fun to know that he was getting it! :)


WOW!! What a great pen. I wish I could wrap my feeble mind around how you do this. More patience than I'll ever have. Amazing piece.

Jeff in northern Wisconsin

Thanks Jeff! Knowing that I was participating in an IAP event gave me the perseverance to do something that I normally probably would not have invested so much time on. So many of my ideas actually worked out on this one! :)


((WOW))
Love the pen,I know a lot of time,glue and patience went into making it,love the info on how u made it with paint sticks thanks for telling us how u made it
Rodney

Hi Rodney! I'm so glad that you got to see how I used part of the Butternut that you gave me! Next time I'll either use the smaller/thinner paint sticks or find something else so that I can fit it in the centering vise. They did do the job though! Thanks so much! :)
 

Triple Crown

Member
Joined
Jan 18, 2012
Messages
122
Location
Alexandria, Virginia
Fantastic pen, Greg. Appreciate the tale, the pics and the how-to. As soon as I clear up some to-dos, I'm going to try doing this myself. Thanks for posting.

Thanks so much John! I do want to give back some of what I get out of IAP. I learn so much each time I log on. I'm glad you found it inspiring! :)


Sensational pen! Love the design. Congratulations on a real accomplishment in pen making!

Thank you Robert! I loved coming up with the design. It had been floating around in my head for a long time after seeing different pens on IAP. :)


Thanks for the really detailed post. Rarely we see such. Fantastic. :)

C

You are very welcome! One of my goals in making a detailed post like this is that I want to give back a little of what I so much enjoy about IAP. I hope too that I let people know that the stuff I pick up on while reading in the forum has really worked for me. Thank you all for posting your successes (and your failures) and posing questions and answers and suggestions! I think that it really does help us all! Charles, I truly love looking at your beautiful pens with those intricate wood grains and color! And your finishes are so so perfect and deep!!! They inspire me to keep trying on my CA finishes! Thanks! :)
 
Last edited:
Top Bottom