Tap and die for kit-less pen cap/body

Signed-In Members Don't See This Ad

TG Design

Member
Joined
Jan 22, 2018
Messages
267
Location
Dayton, Oh
Hi,

I am looking for a triple start tap and die set to start experimenting with kit-less pens.

After a little research, it seems the 12mm is commonly used. Any advice and sources for a tap and die set is much appreciated.

I am also looking for a good source for nib supplies.

Thanks!

Tim
 
Signed-In Members Don't See This Ad

magpens

Member
Joined
Feb 2, 2011
Messages
15,913
Location
Canada
For taps, dies try here: Silver Pen Parts

That is a members site, mredburn.

Not sure what he has available but he could direct you to other sources.

Watch on IAP for possible Group Buys of taps and dies in triple start, etc. . About once or twice a year someone organizes these for buying from Tapco or another company.
 

Curly

Member
Joined
Nov 20, 2010
Messages
4,828
Location
Saskatoon SK., Canada.
Beaufort Ink in the UK is about the only company that stock them. They are expensive because they are not a stock thread for manufacturers so have to be custom made.

Disclosure. Marla, my wife, supplies blanks to Beaufort Ink.

There was a recent group buy in one of the Facebook groups but it is closed now and their order is being made. The organizer may have ordered some extras.

If you just want to get your feet I would suggest you buy some single start sets first and if you like it, then get the triples. Victor have tap and dies at reasonable prices. You will want a 12x.75 for your cap to body threads. Pick up the body to section ones while you are at it. Victor also sell a simple die holder that you can use by choking a rod in the tailstock and hand turn the die onto the work held in the chuck. Easy for plastic materials but if you want to cut metal threads might be harder. I have a few of them.

Feed taps for the nib assemblies are proprietary to the nib brand you use, so you'll have to get them from the place you buy the nibs from.
 

bmachin

Member
Joined
Jul 28, 2013
Messages
613
Location
Owensboro, KY
Thumbs up on Curly's suggestion regarding single start threads. 12x.75mm is fine; 1/2-32 is a reasonable alternative.

A suggestion on nibs to get started. Forget Bock, Jowo, Schmidt, Edison (which is a Jowo in disguise) for the moment. They are all relatively expensive and/or require expensive proprietary taps. In addition, they require a lot of tedious, fiddly work to fit them into grip sections.

Instead, go here:

https://www.bereahardwoods.com/pen-kit/supplies/nibs.html

and order an El Grande Nib or three in whatever width floats your boat. You will have a section/feed/nib that is the perfect diameter to mate up with a barrel with a 12mm cap/barrel thread. The only additional tooling you will need is a 10x1.0mm plug tap for the hole that the section screws into. (By the way, if you have ever built a Churchill, this is the same grip section)

One other suggestion. Buy this book; you won't be sorry.

https://www.amazon.com/s/ref=nb_sb_...ichard+kleinhenz&rh=i:aps,k:richard+kleinhenz

Have fun,
Bill
 

mredburn

IAP Activities Manager
Staff member
Joined
Jul 5, 2009
Messages
8,752
Location
Fort Myers FL
I do carry taps for Jowo, #5, #6, #8 but no longer stock the triple taps. If you leave the want ad up someone may be ready to sell a set. I recomend single thread taps to start if your not sure you will continue making kitless pens. If you make a couple and decide its the way you want to go, then invest in the Triple lead sets. Beaufort Ink does carry them as noted and it looks like there is a possibility that another vendor will start stocking them in the US.
 

magpens

Member
Joined
Feb 2, 2011
Messages
15,913
Location
Canada
I forgot to mention that I started in kitless by using the Churchill nib and a 10mmx1mm tap that I got out of a multi-piece tap and die set (metric and SAE) that I bought many years ago at a store much like your Harbor Freight. . It worked out great and then I proceeded to buy a triple start set.
 

Phil Dart

Member
Joined
Jul 26, 2015
Messages
73
Location
Scotland
An alternative to the El Grande/Churchill section, which is along the same lines but will allow you to use Bock nibs, is Bock's own ready made sections. You'll need a plug tap if you don't have one, which is M8.5 x 1 - which I think Mike may have on his website, he certainly used to, but if not, we've got them in stock.

The sections are available from Beaufort Ink and cost about £10 depending on the finish.

Sections for custom fountain pens and kitlss pens

My advice to you too, even though it's our triple lead taps and dies everyone is mentioning, is in agreement with every one else, which is to prove your techniques and designs with single lead taps and dies. They are much cheaper to begin your journey with. Once you're happy that everything works out, and you know what you're doing, that's the time to invest in the triple lead ones.
 

thewishman

Member
Joined
Mar 9, 2006
Messages
8,181
Location
Reynoldsburg, Ohio, USA.
Plus, with the single tap, you can line up the cap and body to match perfectly. With a triple start, you only have a 33% chance of lining up the way you would like.:)
 

More4dan

Member
Joined
Mar 17, 2016
Messages
2,102
Location
Katy, TX
I've been following this tread.


Would this be what I want to start with?


tap

12mm x .75 High Speed Steel Bottoming Tap


die

12mm X .75 Round Adjustable Die 1" Outside Diameter - High Speed Steel


thanks


I would recommend a Plug Tap over the Bottoming Tap. The Bottoming Tap doesn't have a taper to start the thread, it's made for cutting a thread to the bottom of a blind hole after using a plug tap. Some will use it to "square the tread in a see through demonstrator pen cap. The Plug will be much easier to use.

Danny


Sent from my iPhone using Penturners.org mobile app
 

bmachin

Member
Joined
Jul 28, 2013
Messages
613
Location
Owensboro, KY
I agree with Danny.

Get the plug tap. Having said that, I would get the bottoming tap as well. It will come in handy should you design a pen where you stop screwing the cap on with a shoulder in the cap meeting the grip section rather than a shoulder on the barrel.

Bill
 

magpens

Member
Joined
Feb 2, 2011
Messages
15,913
Location
Canada
Yes, those will work.

But instead of a "bottoming" tap you should get the "plug" tap (which has a slight taper on it) for easier thread starting when you are cutting the thread.

http://www.victornet.com/detail/TAMP-12-.75.html

This is the tap you should start with. . Or get both, if you can afford that, for the reason that Bill said.

Also heed Curly's advice to make your work easier and more accurate. . Those extras are certainly worth having.
 
Last edited:

More4dan

Member
Joined
Mar 17, 2016
Messages
2,102
Location
Katy, TX
You will also need these:
9e624d0a49a28e8f879990d6aaf52829.jpg


https://littlemachineshop.com/products/product_view.php?ProductID=3104&category=

b311420a40e8bd30cf91b8e2fa4a2286.jpg


https://littlemachineshop.com/products/product_view.php?ProductID=2314&category=1110951029

They fit in the tail stock and make sure your threads are straight and parallel. I can add pictures on the lathe when I get home tonight to show how they work if needed. Even though I have a metal lathe that can cut threads, I use these with taps and dies instead.

Danny


Sent from my iPhone using Penturners.org mobile app
 
Last edited:

Brian G

Member
Joined
Jul 2, 2013
Messages
1,567
Location
Bloomington, MN
I agree this is a helpful thread. I want to venture into the kitless realm, but I get a little "overanalysis paralysis" trying to figure out what I need and then decide to decide later. :redface:

Time to get on with it!
 

More4dan

Member
Joined
Mar 17, 2016
Messages
2,102
Location
Katy, TX
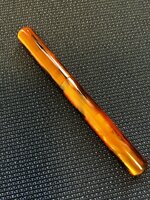
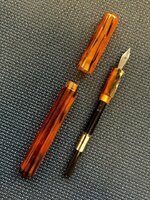
My early learnings from making my first kitless about thread sizes for a #5 nib. Minimum front section threads are 9 x 0.75 mm. for most materials, 8.5 x 0.6 can work for a metal section. Cap threads need to be at least 2 mm larger than your section threads. At 2 mm difference the front section will be a close fit for the cap ID. You can also make a cap that is the same OD as the body if you like that design. I started out trying to make the smallest FP possible around a #5 nib and k5 converter. After many tries i learned the tightest I could push it. Every other pen now starts there and the dimensions can be relaxed a bit for different shapes. It was my method to discovery and took a lot of trial and error looking at thread interferences and strengths. It would be good to practice on scrap materials before breaking out the ebonite or celluloid materials.

IMG_0365.jpgIMG_0368.jpg


Sent from my iPhone using Penturners.org mobile app
 
Last edited:

magpens

Member
Joined
Feb 2, 2011
Messages
15,913
Location
Canada
Good tips, Dan. . Thanks. . I like the pen in those two pics. Material looks great.

What is the material you used for the cap, body, and section ?
 

More4dan

Member
Joined
Mar 17, 2016
Messages
2,102
Location
Katy, TX
Good tips, Dan. . Thanks. . I like the pen in those two pics. Material looks great.

What is the material you used for the cap, body, and section ?


It was a AA blank from Woodcraft. It's opaque for one direction and see through at 90 degrees. It took 2 blanks to make the pen and surprisingly I was able to get cap, body, and section to align patterns. I used a carbide round over router bit set in a boring bar holder to round the ends. I did as another recent poster did and had it in my back pocket when I sat on a tile floor. I heard the body threads snapping before I could react. In my defense it didn't have a clip.

CUSA has what I think is the blank called antique gold.

https://www.woodturnerscatalog.com/p/154/544/Pen-Makers-Choice-Acrylic-Pen-Blanks


Danny


Sent from my iPad using Penturners.org mobile app
 
Last edited:

TG Design

Member
Joined
Jan 22, 2018
Messages
267
Location
Dayton, Oh
Thanks for all the great insight Dan. I'm working out all the details for my first kitless pen. I plan to post it here before I start.
I also want to make a clip. I planned on using some 0.050" stainless steel. Any words of wisdom? I assume I can put a 90deg bend, maybe a little more to create some holding pressure.


Sent from my iPhone using Penturners.org mobile app
 

More4dan

Member
Joined
Mar 17, 2016
Messages
2,102
Location
Katy, TX
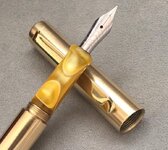
Here is a clip I did from brass, pretty basic. I did bend it a little pass 90 deg to give it some tension. I've also done stainless and titanium. In each case I did heat the metal prior to bending past 90 deg because I wanted a fairly sharp bend. Without heat I ended up with too large of radius. Heating and quenching 300 series SS, copper, and brass in water will soften it. 400 series SS and titanium will get harder after heating and cooling, even in air. Always drill in a soft annealed condition unless you have carbide bits. For SS, drill small and step up size several times with sharp bits and cutting fluid.

IMG_0039.JPG

Sent from my iPad using Penturners.org mobile app
 

TG Design

Member
Joined
Jan 22, 2018
Messages
267
Location
Dayton, Oh
I just ran into my first road bump on my kit less pen build. The nib housing! So I thought I would treat myself to a really nice Visconti nib (extra fine, looks like a #5). I did not realize the nib housing would have special thread. After a lot of research, I think the thread is M6.4 x 0.6. Does anyone have experience with this? If I need a 6.4mm x .6mm tap, where do I get one, or does someone have one they want to sell? Help! Thanks!


Sent from my iPad using Penturners.org mobile app
 

TG Design

Member
Joined
Jan 22, 2018
Messages
267
Location
Dayton, Oh
Does anyone have a 6.4mm x .6mm tap I can "rent". I'll pay postage both ways. I need to make sure this is what I need before I buy one. I've bought 4 wrong taps now I may never use. :(


Sent from my iPhone using Penturners.org mobile app
 
Top Bottom