Starter kit question

Signed-In Members Don't See This Ad

jrich7970

Member
Joined
Jun 13, 2020
Messages
124
Location
South Jersey, USA
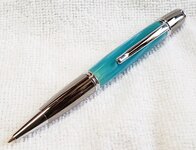
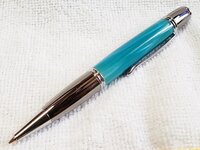
So, I've made a few slimlines, and I'm confident that I know what's going on with them. Not that my stuff is all that wonderful, but I know the basics. I originally got the starter kit for them that supplied things like the barrel trimmer, a properly sized drill bit, bushings, etc.

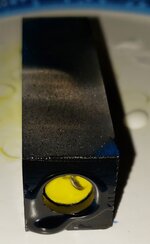
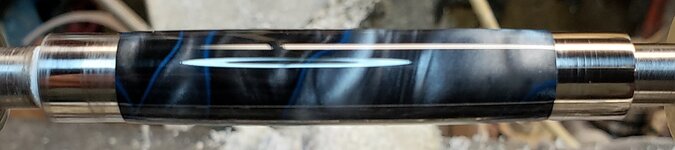
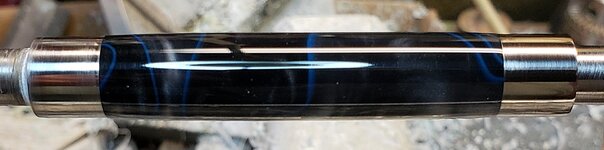
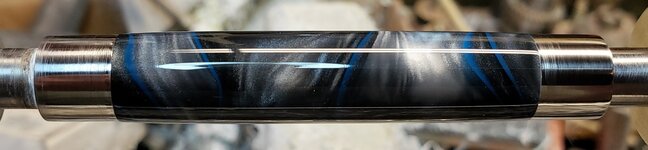
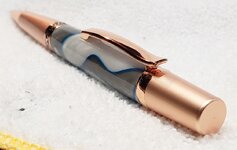
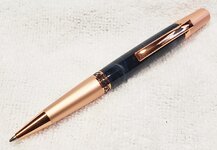
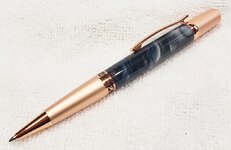
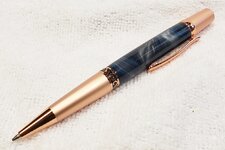
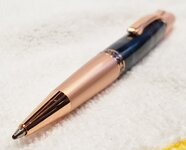
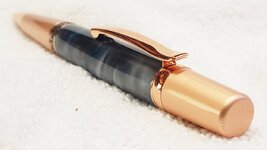
So I bought a starter kit from Woodcraft for their Wall Street II pen for the same reason, to make sure I had all the necessary equipment. The starter kit has two pen kits, bit, bushings. But it also has some extra tubes. OK, that's good. But here's my question. The tubes all have different finishes on them. And it is *advertised* that way.

As far as I can tell, it would be pretty difficult to tell the finish on the tubes as the material of the pen (wood, acrylic, whatever) is around the outside of the blank.

Why bother supplying me with extras of different metals/finishes? I just want to make sure I don't mess anything up, and/or not use these when I should be, or could be making a better pen.

Thanks,

Jeff

20200720_141052.jpg
 
Signed-In Members Don't See This Ad

leehljp

Member Liaison
Joined
Feb 6, 2005
Messages
9,314
Location
Tunica, Mississippi,
They just want to confuse you! :oops: Just kidding! 😀

I haven't bought starter kits in ages and had no idea that they would include different kinds of "finishes" on tubes. I do know that in some cases with castings, the color and finish of the tubes make a difference when the casting is done ON the tube.

IF one casts a blank that needs the hole to be drilled afterwords, it is not the tube that makes the difference, but the painting of the inside of the blank BEFORE the tube is inserted. That is the most effective way.

I am curious myself as to the reason for the above. I will be watching this thread; hopefully I will learn something new.
 

jrich7970

Member
Joined
Jun 13, 2020
Messages
124
Location
South Jersey, USA
They just want to confuse you! :oops: Just kidding! 😀

I haven't bought starter kits in ages and had no idea that they would include different kinds of "finishes" on tubes. I do know that in some cases with castings, the color and finish of the tubes make a difference when the casting is done ON the tube.

IF one casts a blank that needs the hole to be drilled afterwords, it is not the tube that makes the difference, but the painting of the inside of the blank BEFORE the tube is inserted. That is the most effective way.

I am curious myself as to the reason for the above. I will be watching this thread; hopefully I will learn something new.

Thanks.

Again, I just don't want to mess anything up, and just got the starter kit to essentially get all the required ancillary pieces. When I added up all the pieces, buying the starter kit cost me like an extra $2, so I figured that was reasonable in my mind to make sure that when I got home, I would have everything I needed. Plus I had a decent box for more pieces.

Jeff
 

magpens

Member
Joined
Feb 2, 2011
Messages
15,913
Location
Canada
@jrich7970
I believe their reason for supplying different tubes is what Kyle just said. . I'll elaborate a little bit, if you don't mind, Kyle ... 😀 !

Some blanks that you might want to use may be more transparent than other possible blanks.

For example, suppose you might want to use a somewhat transparent pink blank. . If the tube is brass, that is a yellowish color.
The resulting pen, with a yellowish tube showing through (even partially showing) the pink would not look very nice.
So you could choose to use a tube which is white (lighter pink after show through) or gun-metal (muddy pink ? after show-through).

When one uses a blank which is partially transparent, it is commonly recommended that you "paint the hole" in the blank.
Painting the hole is actually better than painting the brass tube (or using a tube that is white or gun-metal).
The reason for saying that is that if you use a colored tube, then the glue that is between the tube and the blank can show through.
The glue adds an irregularity that is difficult to counter, so painting the hole hides both the glue and the color of the internal tube.

Since you are starting out in pen-making you might not have encountered these concepts before.
Painting the hole is a bit of a bother but is sometimes necessary, and it's always better to paint the hole if you are uncertain of the result.
It gives you more control over the final resulting look of the finished pen.

With some dark or opaque materials like a black blank, or a wood blank, you don't ever need to worry about the show-through.

Hope this helps. . BTW, be sure to read the instructions online if they do not provide printed instructions in the kit package.

Oh, and another reason for including extra tubes .... the more stuff they put in, the more they can charge !!! . Not being cynical of course ! 😀
 
Last edited:

qquake

Member
Joined
Feb 8, 2004
Messages
5,007
Location
Northern California
Here is an example of the brass tubing showing through a blank that I thought was opaque. So the next time I used this blank, I painted it and the tube. And colored the epoxy for good measure.
 

Attachments

  • 006.jpg
    006.jpg
    385.8 KB · Views: 150
  • 007.jpg
    007.jpg
    364.6 KB · Views: 124
  • 013.jpg
    013.jpg
    424.4 KB · Views: 124
  • 014.jpg
    014.jpg
    268.2 KB · Views: 133
  • 015.jpg
    015.jpg
    235.9 KB · Views: 130
  • 018.jpg
    018.jpg
    115.6 KB · Views: 117
  • 081.JPG
    081.JPG
    368.4 KB · Views: 128
  • 082.JPG
    082.JPG
    389.7 KB · Views: 156
  • 083.JPG
    083.JPG
    305 KB · Views: 120

jrich7970

Member
Joined
Jun 13, 2020
Messages
124
Location
South Jersey, USA
Here is an example of the brass tubing showing through a blank that I thought was opaque. So the next time I used this blank, I painted it and the tube. And colored the epoxy for good measure.

Thanks! That's really interesting! How careful do you have to be to not lay the paint on too thick lest you not be able to get the tube in there?

Beautiful looking pen by the way!

Jeff
 

qquake

Member
Joined
Feb 8, 2004
Messages
5,007
Location
Northern California
Thanks! That's really interesting! How careful do you have to be to not lay the paint on too thick lest you not be able to get the tube in there?

Beautiful looking pen by the way!

Jeff
Thanks! I just use spray paint, and spray it in both ends. I stand the blank on end for the paint to dry, and I think gravity helps to smooth it out. Oh, and I stand the blank up on a piece of screen, so air can get into the bottom, and so the paint doesn't pool. I've rarely had a problem, but once or twice I have had to re-drill the blank with the next size bit. To color the epoxy, I use a drop of acrylic paint.
 

Attachments

  • 017.jpg
    017.jpg
    216.7 KB · Views: 103

magpens

Member
Joined
Feb 2, 2011
Messages
15,913
Location
Canada
@jrich7970

I am glad to see an answer to your question by Jim ( @qquake ) who posted those interesting pictures bearing on this subject.

I'll just say that it is possible to find paints that are opaque and that do the job without seriously decreasing the size of the hole.
In particular, I like to use the "paint" from the Rustoleum Glass Markers. . It works well for this purpose. . I do not know how readily available that Rustoleum product is. . I picked up some of it at a disposal store so it might have been a discontinued product. . I apply it inside the hole with a Q-tip and it goes on in quite a thin coat without preventing the insertion of the brass tube.

Also, with care you can enlarge the hole a tiny bit if you wish to ensure the brass tube will go in even with the slight decrease of hole size due to the painting. . I know that drill bits cost money, but I have never regretted buying full sets of SAE, Metric, and Letter-size drills. . It's true that I don't need all of them, but I have used enough to justify buying the full sets over buying individual drills. . The pen kit manufacturer always recommends a drill size for the hole in the blank. . That hole size is always just a shade bigger than the brass tube diameter. . When I have needed to enlarge the hole beyond that size, I have nearly always been able to find a drill bit (from my 3 sets) that is no more than 0.010" larger than that recommended and that works fine to allow for any paint I have applied to the hole. . The glue takes up most of any remaining slack. .

Some people use nail polish as the paint in the hole. . Others use acrylic paints (see Jim's photo just above) that are readily available in small bottles at craft stores. . Both of these paint types go on slightly thicker, but I have been able to use them for this purpose.

The answer to your question is that you do have to be careful with the paint thickness. . That involves some trial and error. . There are some paints that work better than others for this purpose. . It seems that Jim has found spray paints that work for him also.

One other issue is the color of the paint, but that is not as big an issue as you might think. . If you wish, do your best to get a color match to the blank, but if you can't pick a color that is close. . Or, often, black can be used. . Surprisingly, perhaps, white is also a good color to have on hand.
 

qquake

Member
Joined
Feb 8, 2004
Messages
5,007
Location
Northern California
Actually, paint color can make a HUGE difference. Both of these bodies were taken from the same blank, called Moon Storm. One was back painted white, and the other black. I was very surprised. They don't even look like the same blank.
 

Attachments

  • 003.jpg
    003.jpg
    159.5 KB · Views: 109
  • 018.jpg
    018.jpg
    259.3 KB · Views: 122
  • 019.jpg
    019.jpg
    384.3 KB · Views: 101
  • 021.jpg
    021.jpg
    199.6 KB · Views: 138
  • 022.jpg
    022.jpg
    197.5 KB · Views: 107
  • 024.jpg
    024.jpg
    200.5 KB · Views: 113
  • 052_205.jpg
    052_205.jpg
    105.1 KB · Views: 97
  • 050_205.jpg
    050_205.jpg
    118.7 KB · Views: 109
  • 051_205.jpg
    051_205.jpg
    100.1 KB · Views: 104
  • 001.jpg
    001.jpg
    194 KB · Views: 115
  • 013.jpg
    013.jpg
    342.2 KB · Views: 107
  • 014.jpg
    014.jpg
    412.3 KB · Views: 109
  • 018.jpg
    018.jpg
    217.6 KB · Views: 119
  • 019.jpg
    019.jpg
    137.3 KB · Views: 109
  • 020.jpg
    020.jpg
    196.8 KB · Views: 119
  • 047_205.jpg
    047_205.jpg
    123.7 KB · Views: 102
  • 049_205.jpg
    049_205.jpg
    150.8 KB · Views: 95
  • 048_205.jpg
    048_205.jpg
    128.2 KB · Views: 93

qquake

Member
Joined
Feb 8, 2004
Messages
5,007
Location
Northern California
Those pens are gorgeous!
Thank you! Both are Elegant Sierras. I thought the blank was more opaque, but was very wrong. When in doubt, I will always opt for painting.
 

Attachments

  • 057.jpg
    057.jpg
    212.2 KB · Views: 117
  • 058.jpg
    058.jpg
    207.3 KB · Views: 104
  • 059.jpg
    059.jpg
    200.6 KB · Views: 92
  • 060.jpg
    060.jpg
    150.4 KB · Views: 112
  • 061.jpg
    061.jpg
    215.6 KB · Views: 96
  • 054.jpg
    054.jpg
    276.5 KB · Views: 113
  • 055.jpg
    055.jpg
    250.8 KB · Views: 111
  • 056.jpg
    056.jpg
    250.2 KB · Views: 102
  • 057.jpg
    057.jpg
    228.2 KB · Views: 100
  • 058.jpg
    058.jpg
    161.5 KB · Views: 93

qquake

Member
Joined
Feb 8, 2004
Messages
5,007
Location
Northern California
CA or epoxy. I haven't found that the painted or reflective tubes completely hide the glue lines when I used them to make my pens.
I think if it's a particularly translucent (not see through) blank, then a combination of painting the blank hole and tube, and coloring the epoxy, gives the best results. There are times, though, that I've gotten away with just coloring the epoxy.
 

studioseven

Member
Joined
May 6, 2014
Messages
793
Location
Wisconsin
The pictures of the extra blanks brings up a question that occurred to me quite awhile ago. A few of the blanks have a white coating on them.... a smooth white coating. I always rough up my tubes to help adhere the tube to the blank in the gluing process. Are you going to negate the white smooth finish roughing up the tube?

Seven
 
Top Bottom