
guitarchitect
Member
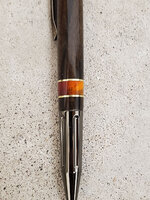
Well, I had a great time attending a number of virtual talks at the MPG and sunday night thought I should end the weekend with a pen! I wanted some really dark wood with some really bright segments - that evolved a bit as I evaluated my stash but this is what I came up with!
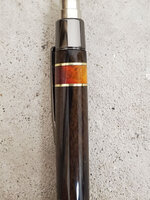
The accent rings are double-dyed buckeye burl, the main body is ziricote, and the accent bands are brass. Finish is GluBoost, and I had to wet-sand with thin CA early on to fill up all the open pores in the ziricote. I got the cleanest cuts I could with my carbide insert tool, and then did the wet sand (and started sanding) with 400. I used micomesh semi-dry on the whole pen up to 4000 grit to take any scratches out of the brass, then scuffed it with synthetic steel wool and went through the usual CA process.
The accent rings are double-dyed buckeye burl, the main body is ziricote, and the accent bands are brass. Finish is GluBoost, and I had to wet-sand with thin CA early on to fill up all the open pores in the ziricote. I got the cleanest cuts I could with my carbide insert tool, and then did the wet sand (and started sanding) with 400. I used micomesh semi-dry on the whole pen up to 4000 grit to take any scratches out of the brass, then scuffed it with synthetic steel wool and went through the usual CA process.

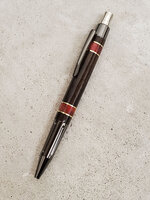

 I switch to non-sticks before I sand. I've found that if I leave it the tiniest bit proud of the bushing, my first go with 240 grit sandpaper will take it the rest of the way and give me a perfect match with the kit. I think I'm a bit fat here because i only did a very light sand at 400 and didn't compensate for that!