
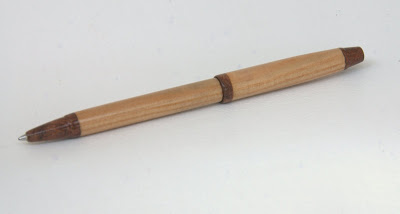
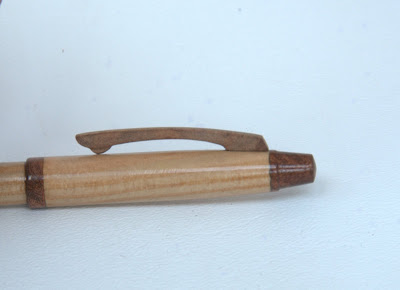
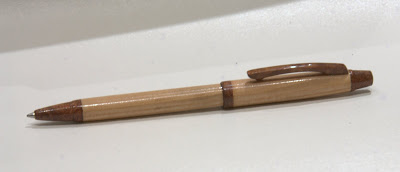
This was the pen I made for Mrpukashell for the spring PITH. Like all of us I am always challenged in the pith's to take the basic requirements and push it as much as I can. This was my first ever attempt at an all wood bodied pen. The pen is made from Western Mesquite burl and Pine.
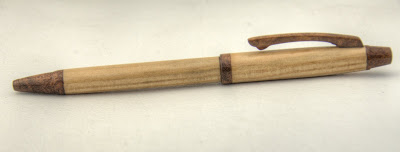
I used a pkmont kit for the non wood parts except for the refill, for that I used a parker style from Private reserve.
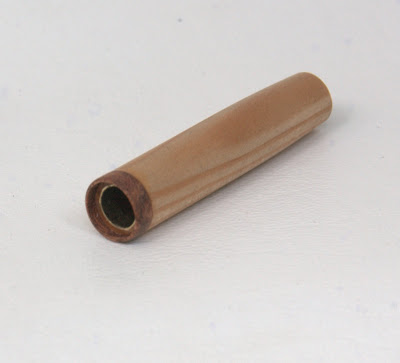
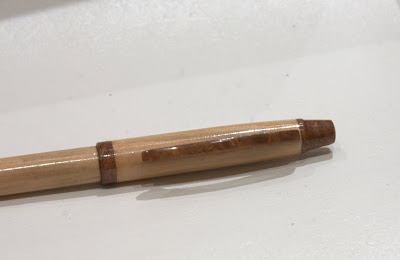
I turned the lower barrel to .394(10mm) and the upper tube to .456(11.6mm). The mesquite finial is solid and I did it that way for a reason. I turned a small tenon on the upper tube for the mesquite band. I turned it down to 10.2mm to almost match the lower body. I then turned the mesquite center band to 10.2 on the inside and 12mm on the outside. I then glued the center band on the upper tube and turned it down to match together.
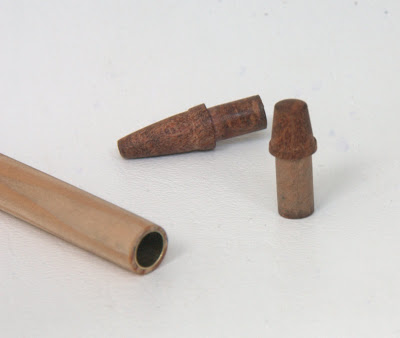
I then drilled the nose cone for the refill profiles and turned the wall thickness down to fit in the tubes. Both the nose cone shoulder wall and the center band are .028 thick.
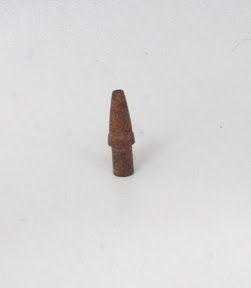
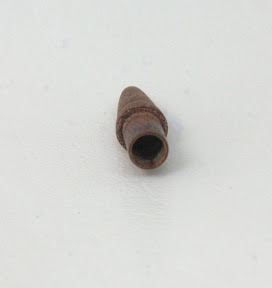
I immediately used thin super glue on the wall of the nose cone to reinforce it. I made a brass mandrel that just barely slid into the nose cone to support it while I turned the taper on the front of the nose cone.

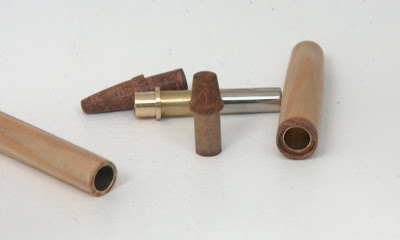
I turned the brass coupler down to fit the pen. Just barely larger than the brass tube and I turned it down where it press in to the tube. This allows me to make the check all the lengths before assemblage. The Small mesquite band does 2 things. It finishes off the top of the blank and it allows me to trim it down until I get the length right.
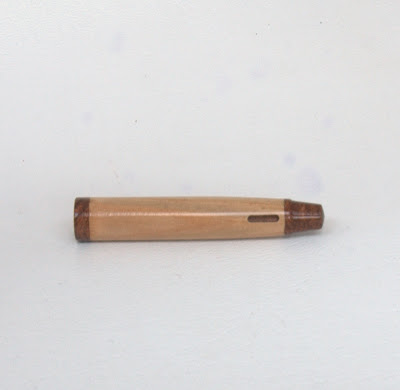
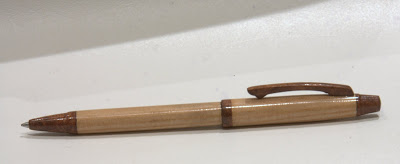
The pen assembled without a clip
I was really going back an forth about the clip. Black ebony or matching mesquite. I finally decided on the mesquite.
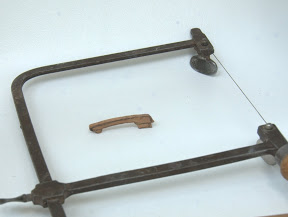
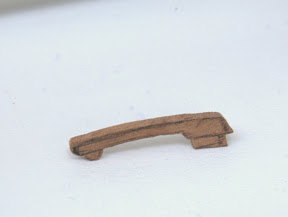
I made the finial solid and long to fit deep into the tube. I used the mill to drill a 2mm hole 3/8 (10mm) long, all the way into the center of the finial. I hand formed the clip with files, sanding sticks, and hand sanding.
I had already put 4 coats of medium ca on the pen and polished it. I haven't done but about 10 pens with ca and this one went on like a dream. After the test fit of the final shape I removed the clip form the pen and held it in tweezers while I put 4 thick coats of medium ca on it. I just poured it on carefully and spread it out with a tooth pick. Taking care not to get the tooth pick stuck. Then I hand sanded it starting at about 400 grit working down to 800 grit and then transferring over to Micro mesh pads. I started at 6000 and went down to 12000, the last step was to epoxie the polished clip onto the pen. IT took about 8 hours over 2 days to make the pen. I have a little over an hour in making the clip.
Anyway thats my pen for the Pith. Hope you enjoyed it, any comments welcome.
I used a pkmont kit for the non wood parts except for the refill, for that I used a parker style from Private reserve.
I turned the lower barrel to .394(10mm) and the upper tube to .456(11.6mm). The mesquite finial is solid and I did it that way for a reason. I turned a small tenon on the upper tube for the mesquite band. I turned it down to 10.2mm to almost match the lower body. I then turned the mesquite center band to 10.2 on the inside and 12mm on the outside. I then glued the center band on the upper tube and turned it down to match together.
I then drilled the nose cone for the refill profiles and turned the wall thickness down to fit in the tubes. Both the nose cone shoulder wall and the center band are .028 thick.
I immediately used thin super glue on the wall of the nose cone to reinforce it. I made a brass mandrel that just barely slid into the nose cone to support it while I turned the taper on the front of the nose cone.
I turned the brass coupler down to fit the pen. Just barely larger than the brass tube and I turned it down where it press in to the tube. This allows me to make the check all the lengths before assemblage. The Small mesquite band does 2 things. It finishes off the top of the blank and it allows me to trim it down until I get the length right.
The pen assembled without a clip
I was really going back an forth about the clip. Black ebony or matching mesquite. I finally decided on the mesquite.
I made the finial solid and long to fit deep into the tube. I used the mill to drill a 2mm hole 3/8 (10mm) long, all the way into the center of the finial. I hand formed the clip with files, sanding sticks, and hand sanding.
I had already put 4 coats of medium ca on the pen and polished it. I haven't done but about 10 pens with ca and this one went on like a dream. After the test fit of the final shape I removed the clip form the pen and held it in tweezers while I put 4 thick coats of medium ca on it. I just poured it on carefully and spread it out with a tooth pick. Taking care not to get the tooth pick stuck. Then I hand sanded it starting at about 400 grit working down to 800 grit and then transferring over to Micro mesh pads. I started at 6000 and went down to 12000, the last step was to epoxie the polished clip onto the pen. IT took about 8 hours over 2 days to make the pen. I have a little over an hour in making the clip.
Anyway thats my pen for the Pith. Hope you enjoyed it, any comments welcome.
 I just had the way the pen would look in my mind when I started. Form followed function. I kept making it smaller in diameter as I went. I made a brass rod to jam the blanks on so that I could turn the mesquite parts flush with the pine after I glued them on. THe final dimensions were turned with everything glued in place but the clip. there is no lip whatso ever between the mesquite and Pine.


")